Here’s everything you need to know about suspension training
Suspension training: how to master the ultimate in bodyweight training and build strong, functional muscle
Get all the latest news, reviews, deals and buying guides on gorgeous tech, home and active products from the T3 experts
You are now subscribed
Your newsletter sign-up was successful
You may have spied a set of yellow and black straps dangling from a pull-up bar at your local gym or leisure centre, or perhaps witnessed an athletic type performing seemingly impossible ab crunches on TRX training videos on YouTube.
But the thing is, suspension training is nothing new. Military types – specifically those living in cramped conditions aboard naval vessels – have been keeping fit using just a couple of hefty ropes and some home-made handles for many moons now. That's now developed into such a thriving, worldwide industry that we have a guide to the best suspension trainers and this indispensable article on how to get the most out of them.
“Suspension training is a style of bodyweight workout that uses straps to suspend the body. The hands hold (or the feet are placed in) said straps, and the user’s bodyweight is the only resistance,” explains master trainer Harry Aitken from suspension training specialists Auster Fitness.
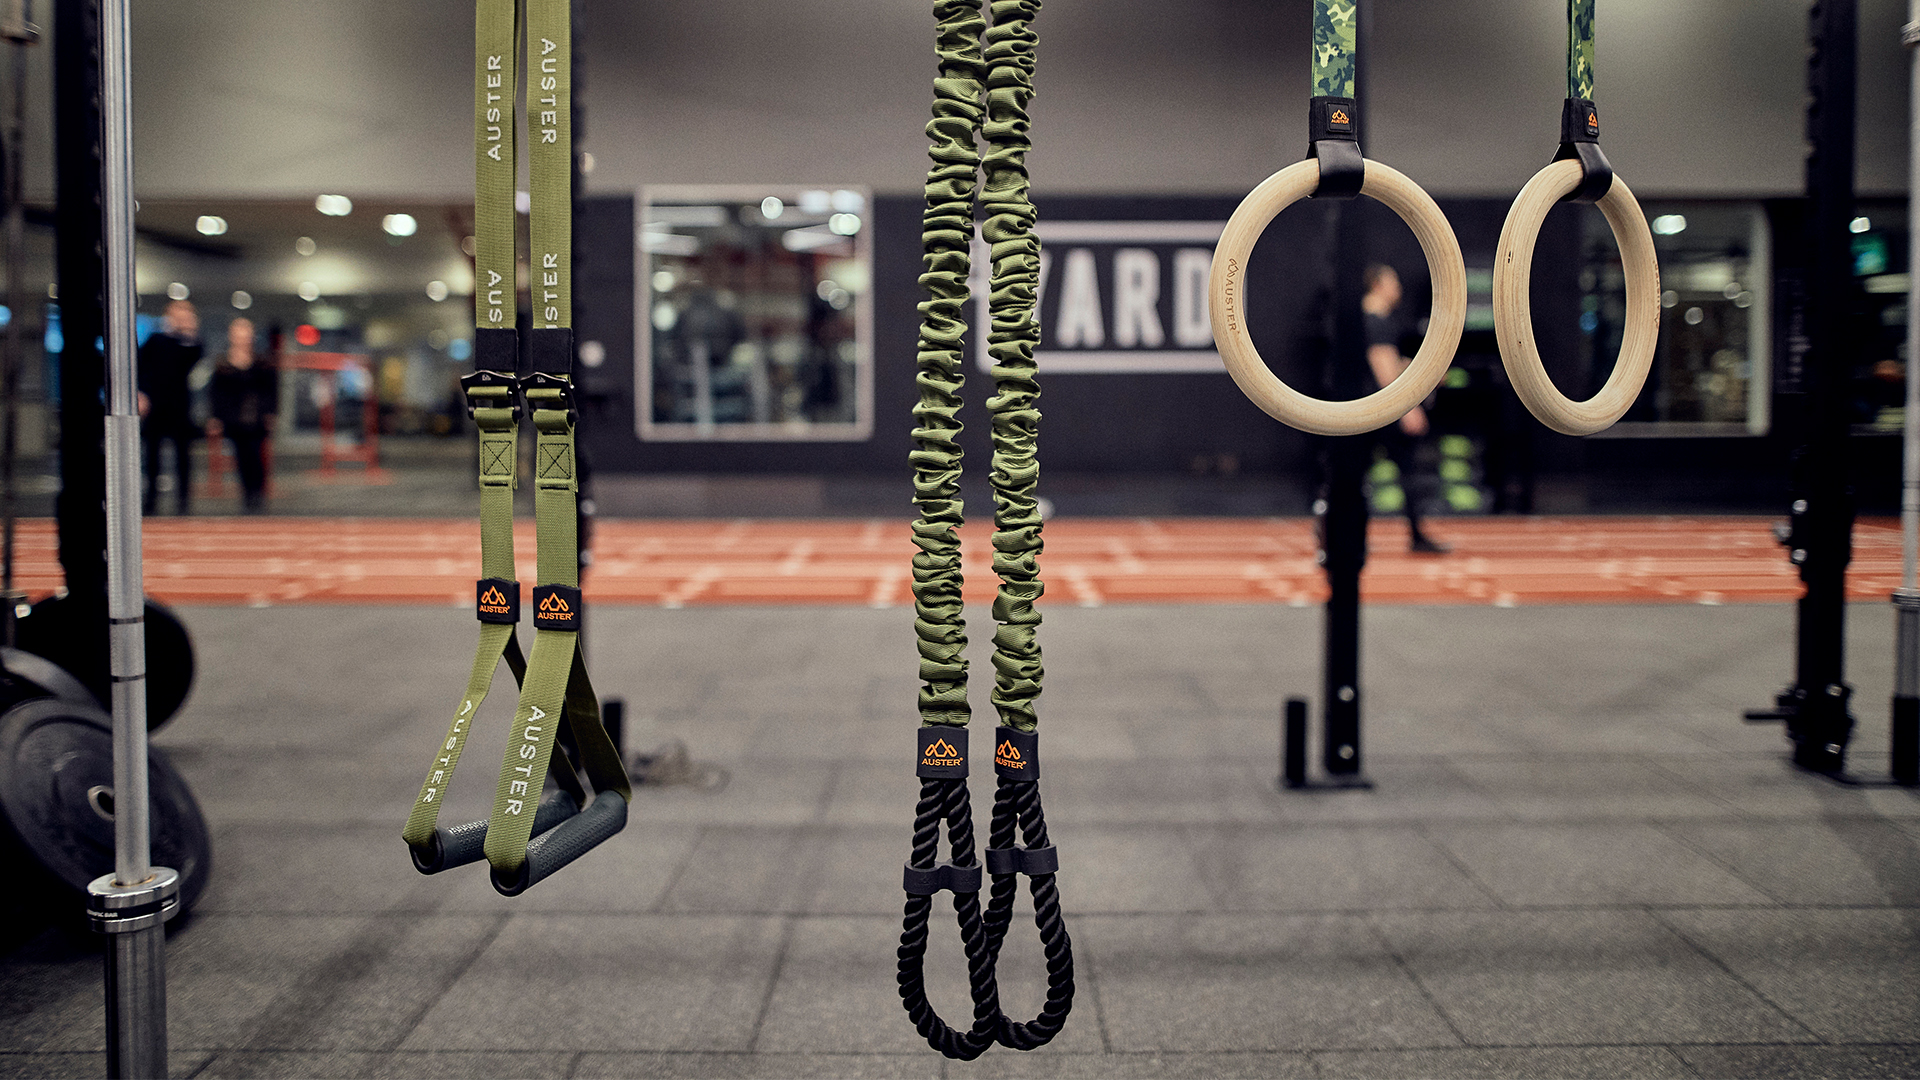
Don't ignore this kit in the gym
“Suspension training is a style of bodyweight workout that uses straps to suspend the body. The hands hold (or the feet are placed in) said straps, and the user’s bodyweight is the only resistance,” explains master trainer Harry Aitken from suspension training specialists Auster Fitness.
“One of the biggest benefits of suspension training is that it is extremely easy to increase or decrease the difficulty of the exercises. By simply increasing or decreasing the length of the straps and moving closer or further away from the anchor point you can have a massive effect on the difficulty levels,” he adds.
On top of this, Harry claims that bodyweight training is extremely functional and because most exercises train multiple muscle groups at once, it is a very effective way to build strong, functional muscle and and overall toned body.
“Unlike some traditional weights training, bodyweight exercises also build strong tendons and ligaments, burn fat, and help to stabilise joints. Whether you are a total beginner, or a calisthenics and gymnastics pro, there are suspension training exercises that will push you to the limit,” Harry adds.
Get all the latest news, reviews, deals and buying guides on gorgeous tech, home and active products from the T3 experts
- Get a full body workout with the BOSS of all exercises for abs, arms, legs and more
- Get ripped fast with this ace gym workout tip for muscle growth
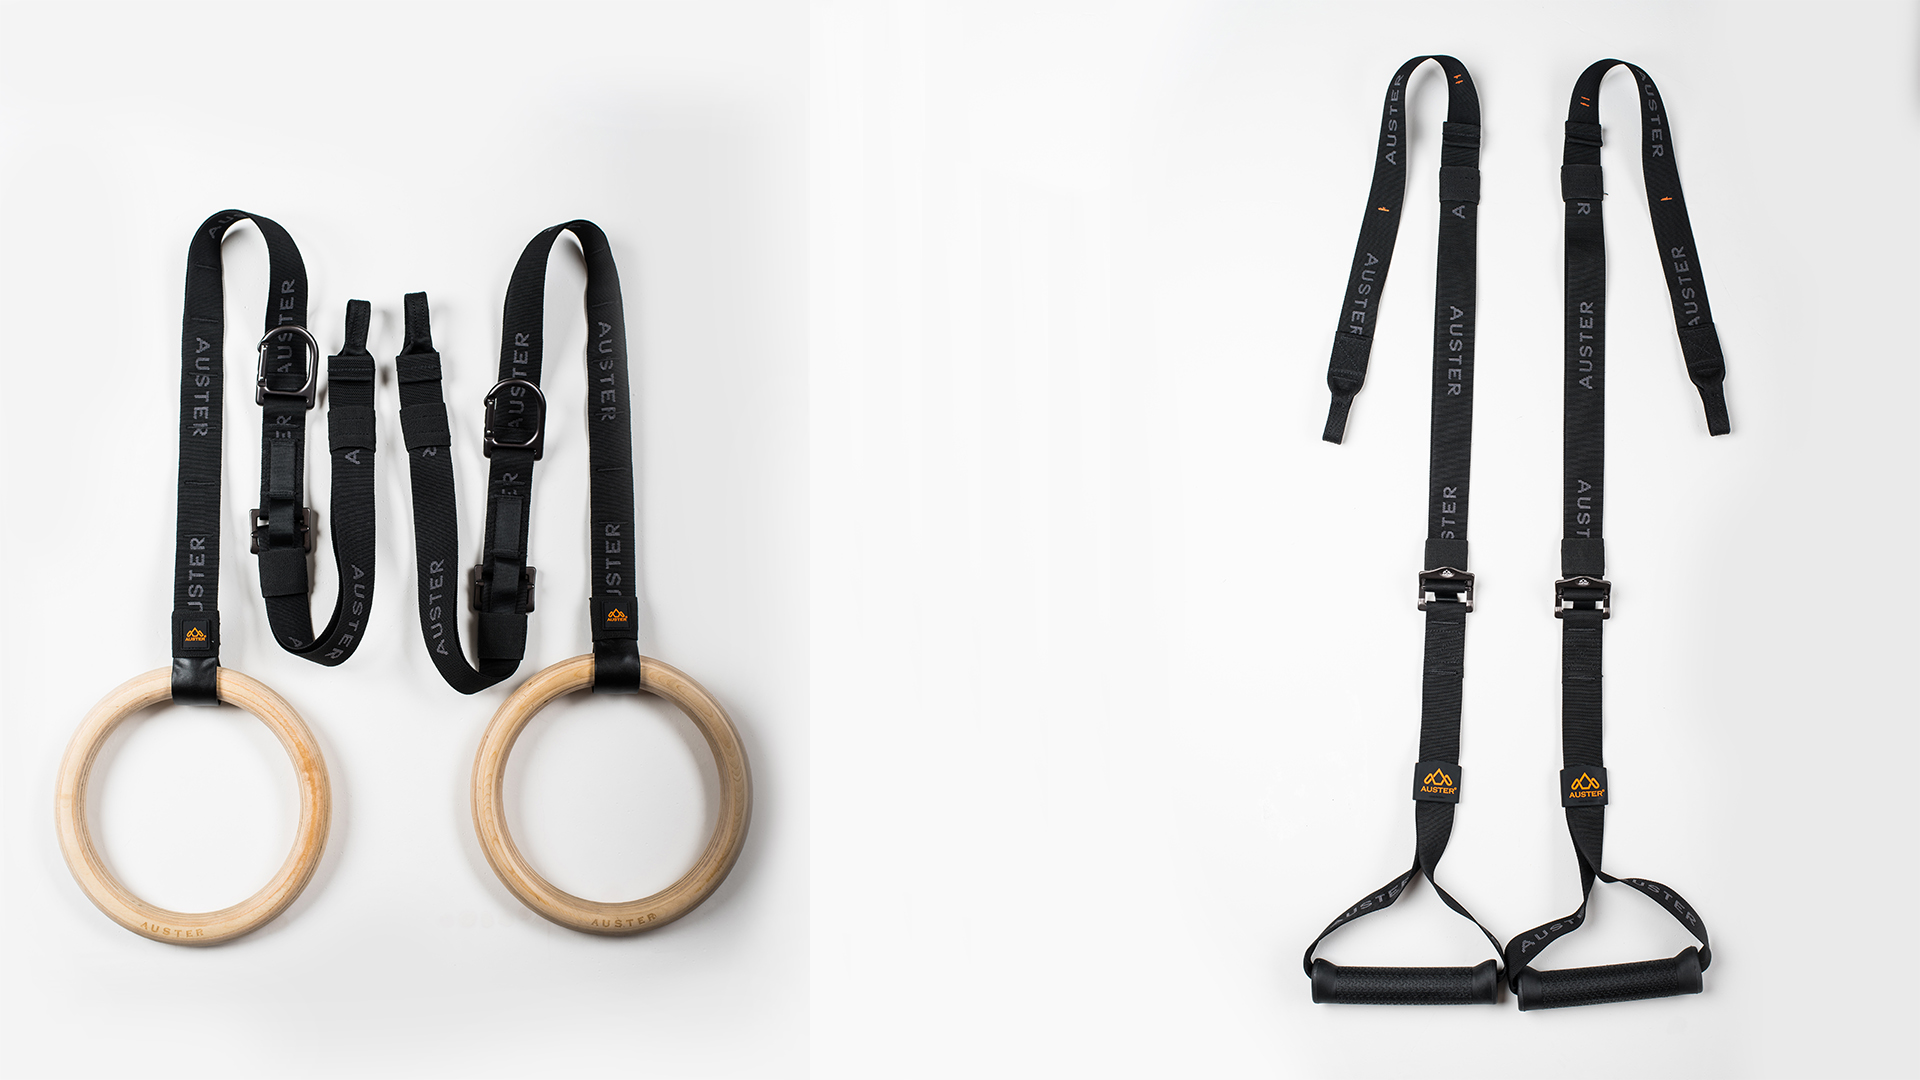
Suspension training tools from Auster Fitness
Why choose suspension training?
We will let our resident expert Harry answer that one...
Bodyweight exercises train the whole body in various planes of motion. Compared to a weighted machine, which uses a fixed plane of motion, suspension training allows you to use your body through changing planes of motion and a variety of angles. This means increased muscle, ligament and tendon activation across various angles, ultimately leading to increased strength and stability.
A reduced risk of injury when exercising. Most injuries in the gym happen when people use poor form, too much weight and machines that over-stress joints from unnatural movement patterns. Machines are ultimately designed for the average shaped person, with average length limbs, which means a huge swathes of the public won’t be suited to the equipment. In contrast, bodyweight exercises are typically natural movements, rarely loading the body up in a way which it wasn’t designed for. Not only are you at less risk of injury from doing bodyweight exercises, but when properly performed and progressed, you can also strengthen the joints to a point that means they are less to prone to injury in the future.
Workout anywhere, anytime. A suspension trainer is a really effective piece of kit that can be used anywhere. For example, our Auster Main Anchor wraps around trees, lampposts, benches, while the Bone Anchor is designed to be placed over a door, so you can workout at home or even in your hotel room. With access to hundreds of exercises you really can carry a gym in your bag.
- Invest in this simple kettlebell and complete the home workout set-up
- Now, here is the best kettlebell workout to get you started

Dangle your way to a fitter body
The ultimate suspension training full body workout
The below workout is designed to work on any suspension training system, be it the one in your local gym or something you may have purchased for use at home. As Harry previously mentioned, the difficulty of each exercise is easily increased by changing body position, which will be suggested as we move through the workout.
Complete beginners are advised to stick to the easiest method to begin with, simply to perfect form and ensure all of the correct muscle groups are activated before making life more difficult. Remember, a proper warm-up and cool down technique is also advised pre and post-workout to avoid injury.
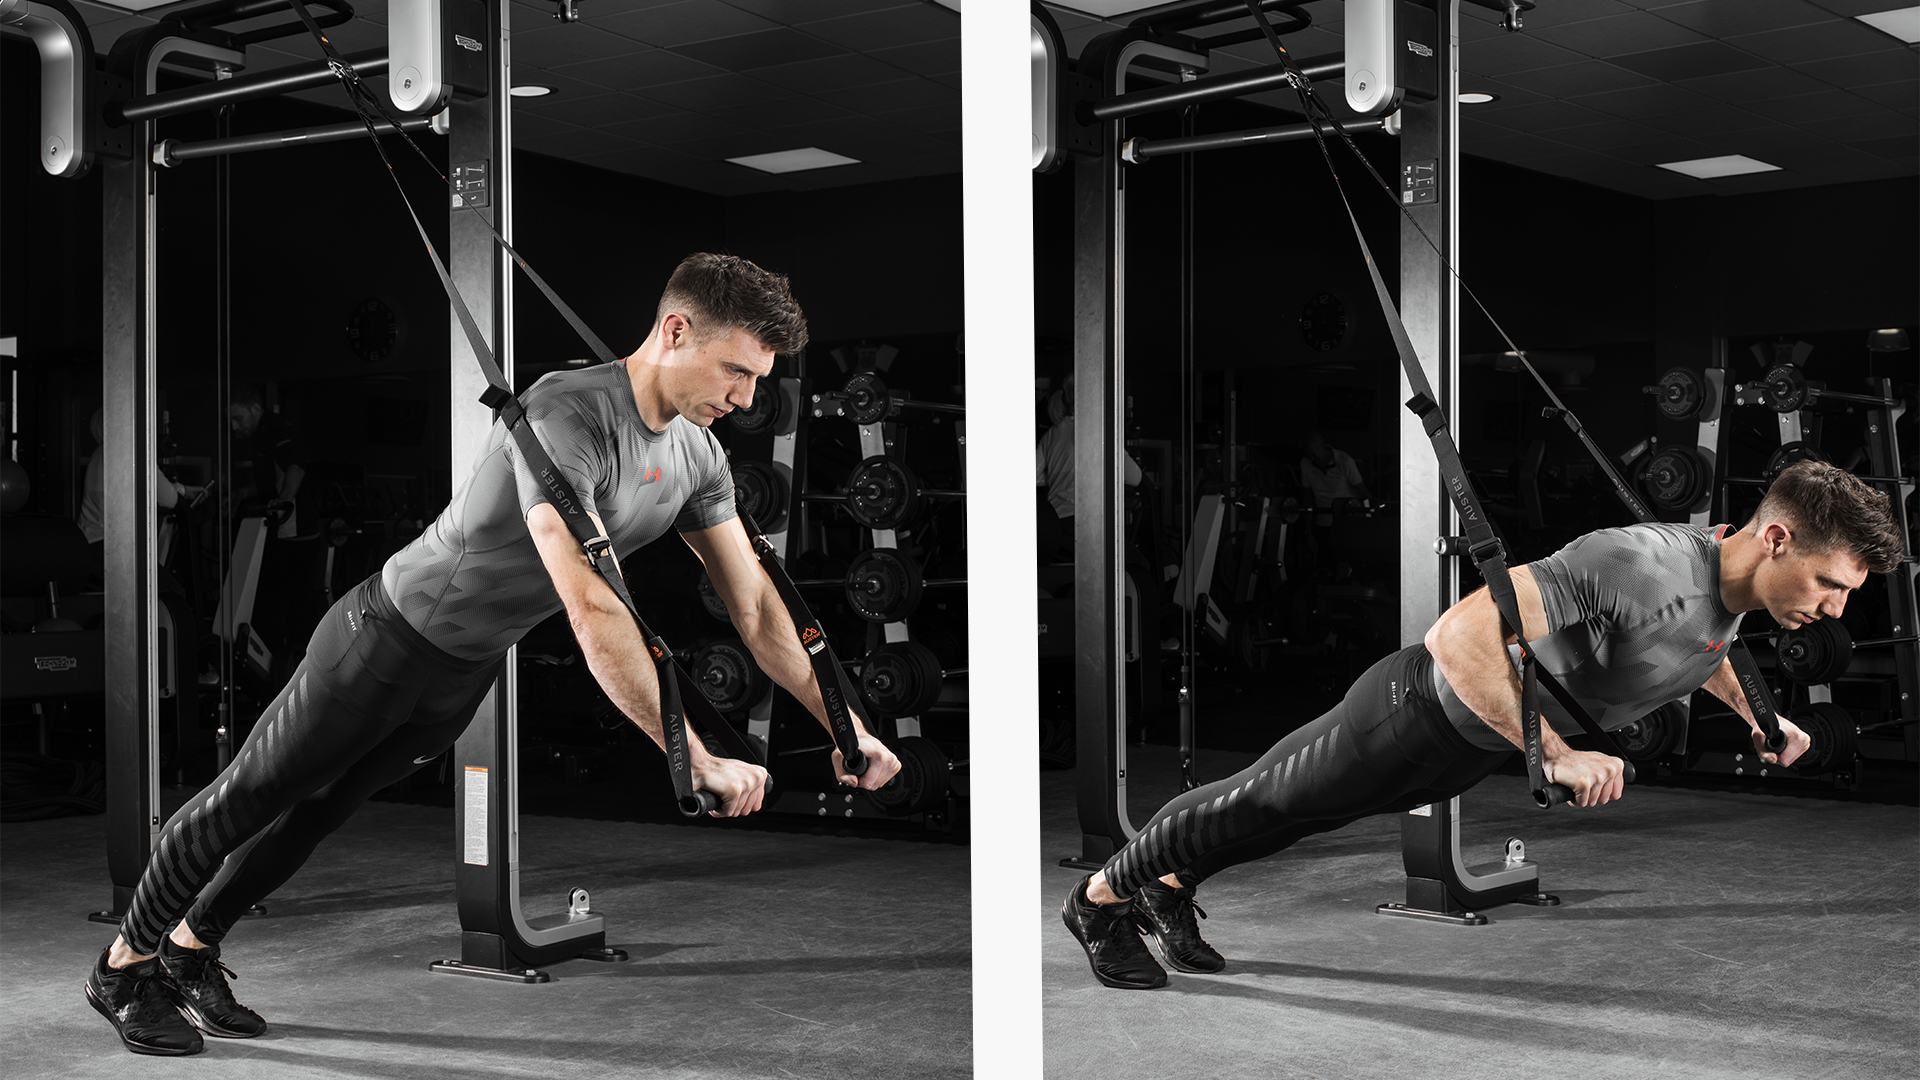
Chest press for sweet pecs
Chest Press
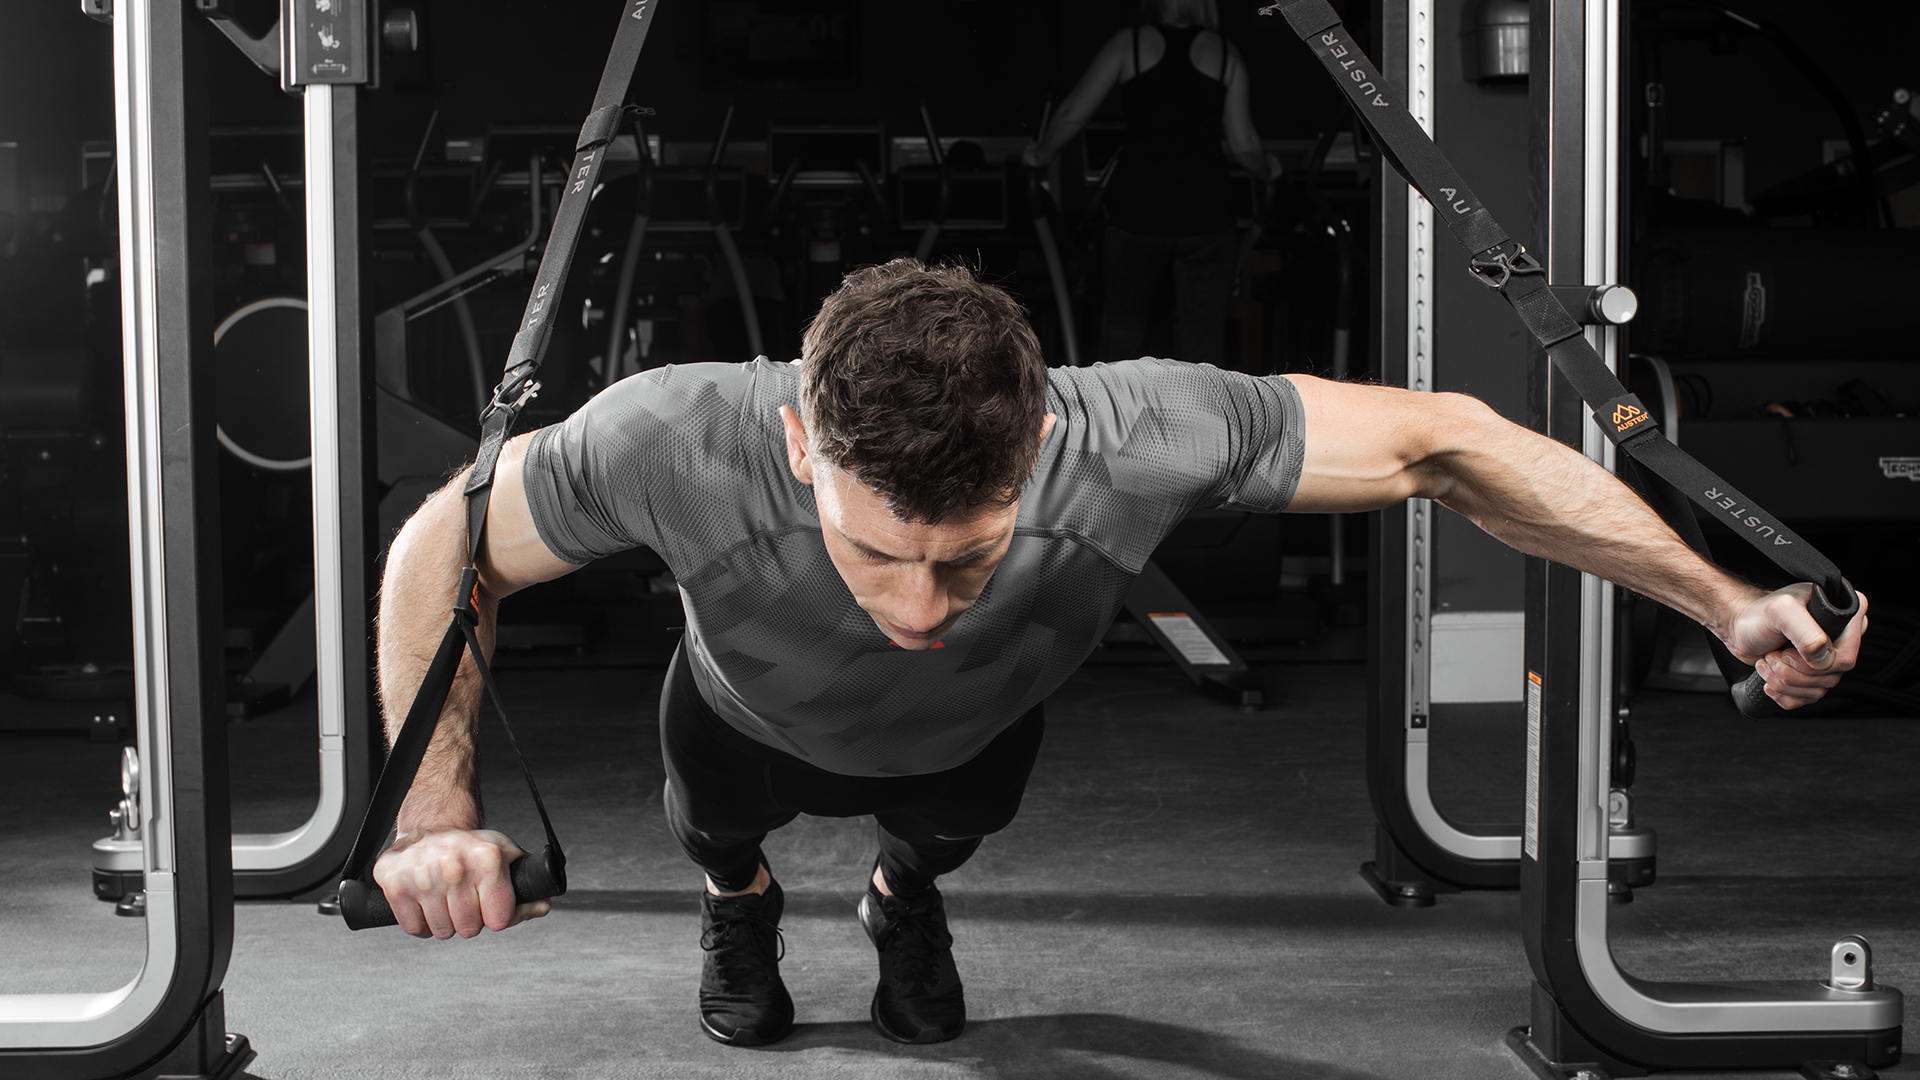
“A fundamental exercise to work the chest, shoulders, triceps and core. As the arms are having to balance and stabilise the upper body, it helps to effectively train the shoulder stabiliser muscles. The aim is to be able to do three to four sets of 8-12 slow and controlled reps, before moving onto a harder variation of the exercise,” Harry says.
Begin by grabbing the handles, one in each arm, and lean into the straps so they begin to take your weight. Start position is with your arms straight out in front of you and almost (but not quite) locked at a 90° angle to your body, but ensure a slight bend in the elbow to avoid injury. Keeping your shoulder blades squeezed together throughout the movement, bend your elbows and lower your body until your hands are level with your chest, ensuring your elbows remain tucked at your side and not flared out sideways. Press back to the start position and repeat.
Make things harder… The more vertical you are, the easier this exercise is. However, get in the prone/press up position (body horizontal and parallel to the floor) with the straps hanging vertically down very low to floor to reall

Elevated press up works plenty of muscle groups
Elevated Press Up
“The Feet Elevated Press Up is a harder version of the regular press up, as more of your bodyweight is carried by the arms. This works the chest, shoulders, triceps and core. The aim is to be able to do three to four sets of 12-15 slow and controlled reps before moving onto the harder variation,” Harry explains.
Begin by sliding the handles around to reveal the hidden footstrap, and loop your feet into the footstraps. Start in a regular press up position, with your arms straight, palms flat on the floor and in line with your chest. Keeping your shoulder blades squeezed together throughout the movement, bend your elbows and lower your body until your chest is close to the floor, ensuring your elbows remain tucked at your side and not flared out sideways. Press back to the start position and repeat.
Make things harder… Using high hanging straps, with very elevated feet, places the majority of the bodyweight on the arms. For the Calisthenic/Gymnastic version – Raise the straps as high as possible, which turns this exercise into more of a shoulder/handstand press up.
Calisthenics athletes also look for scapular protraction (shoulder blades pushed forward, not pulled back) which helps train strength for more difficult exercises, so Calisthenic athletes will want to keep shoulders protracted and not retracted.
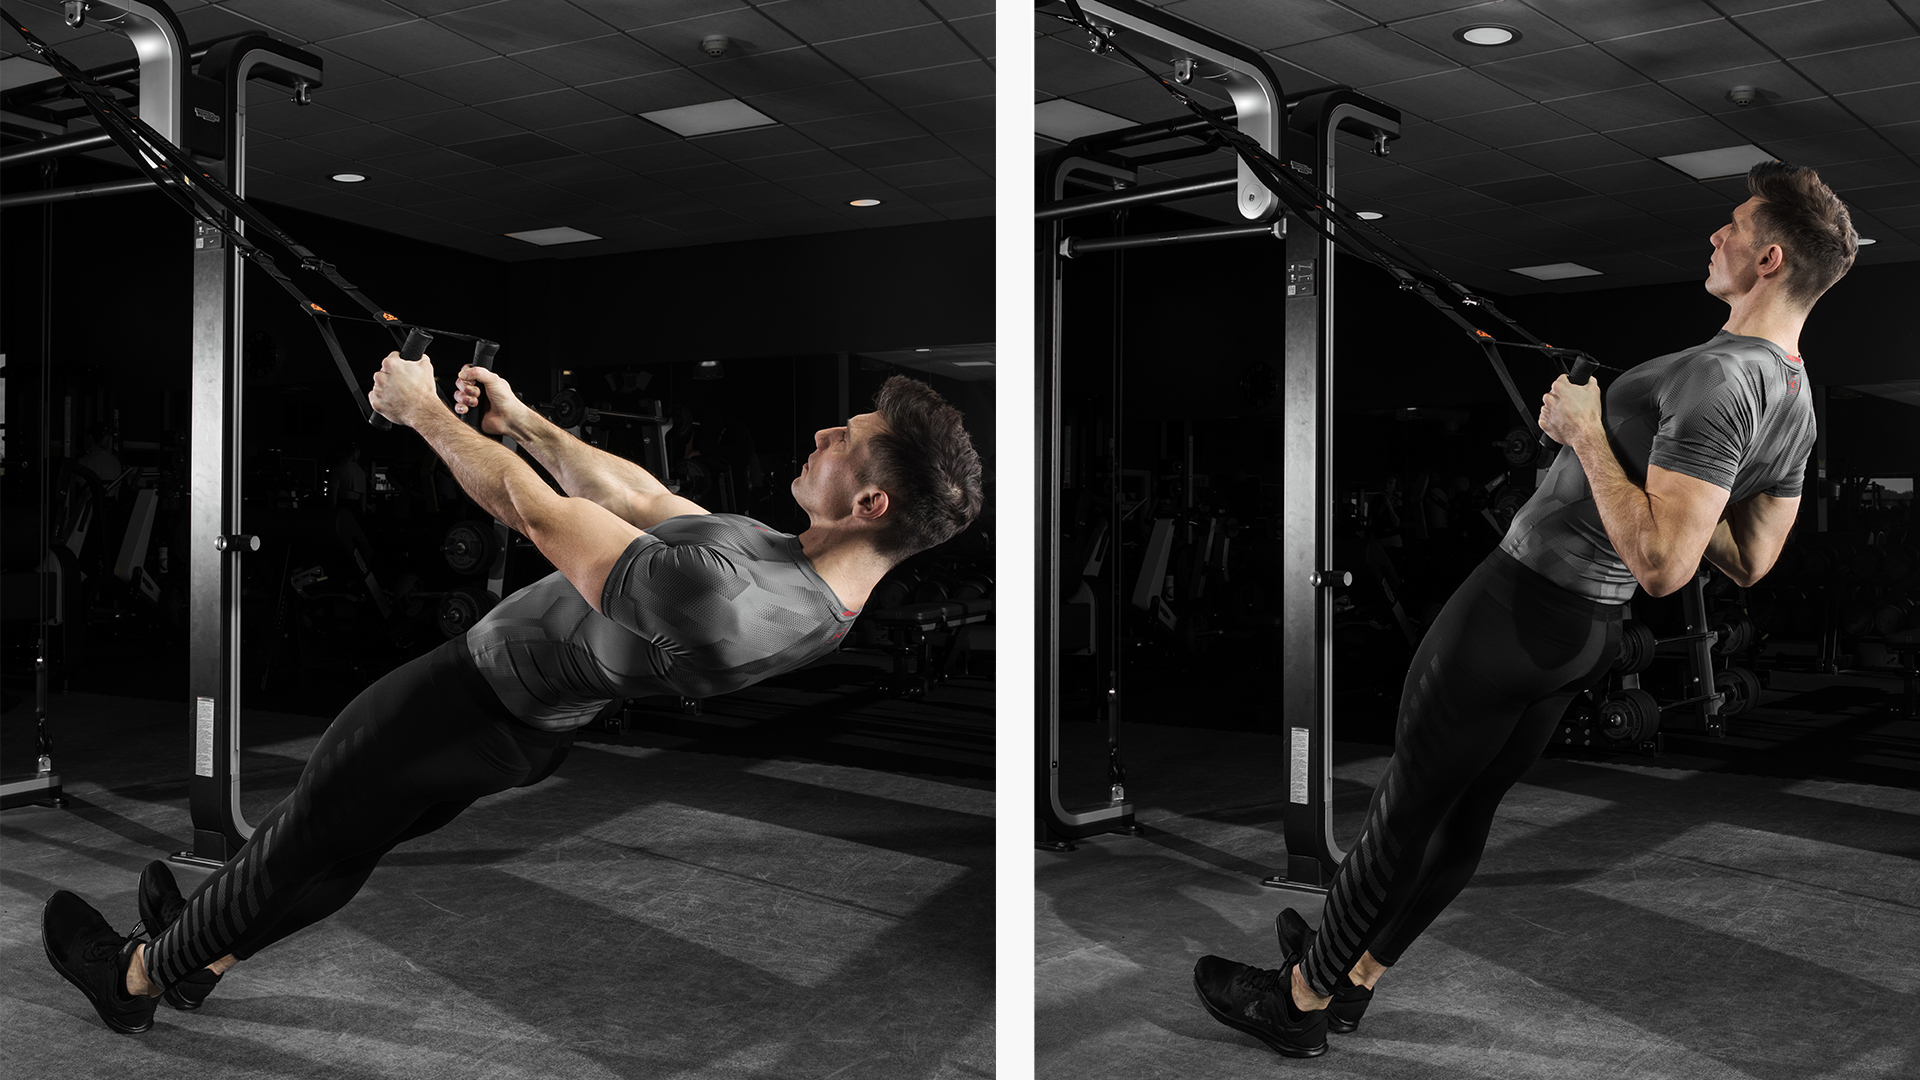
Inverted row builds a solid back and core
Inverted Row
“The Inverted Row is a staple back exercise that works the lats, rhomboids, traps, rear delts, spinal erectors, biceps and core muscles. It helps beginners progress to doing pull-ups, and advanced athletes to emphasise the mid back development and general rowing strength. The aim is to be able to do three to four sets of 8-12 slow and controlled reps,” says our resident master trainer.
Take hold of the handles and lean back with your arms straight and locked to tension the straps. Keep your shoulder blades pinned back, then row your body up till your hands are in line with your chest. Pause at this position then lower back to the start position and repeat.
Make things harder… Try low hanging straps with the upper body placed directly underneath the anchor point, which places the majority of the bodyweight on the arms. Advanced athletes could even elevate their feet to make this exercise even trickier, or by performing the row with only one arm.
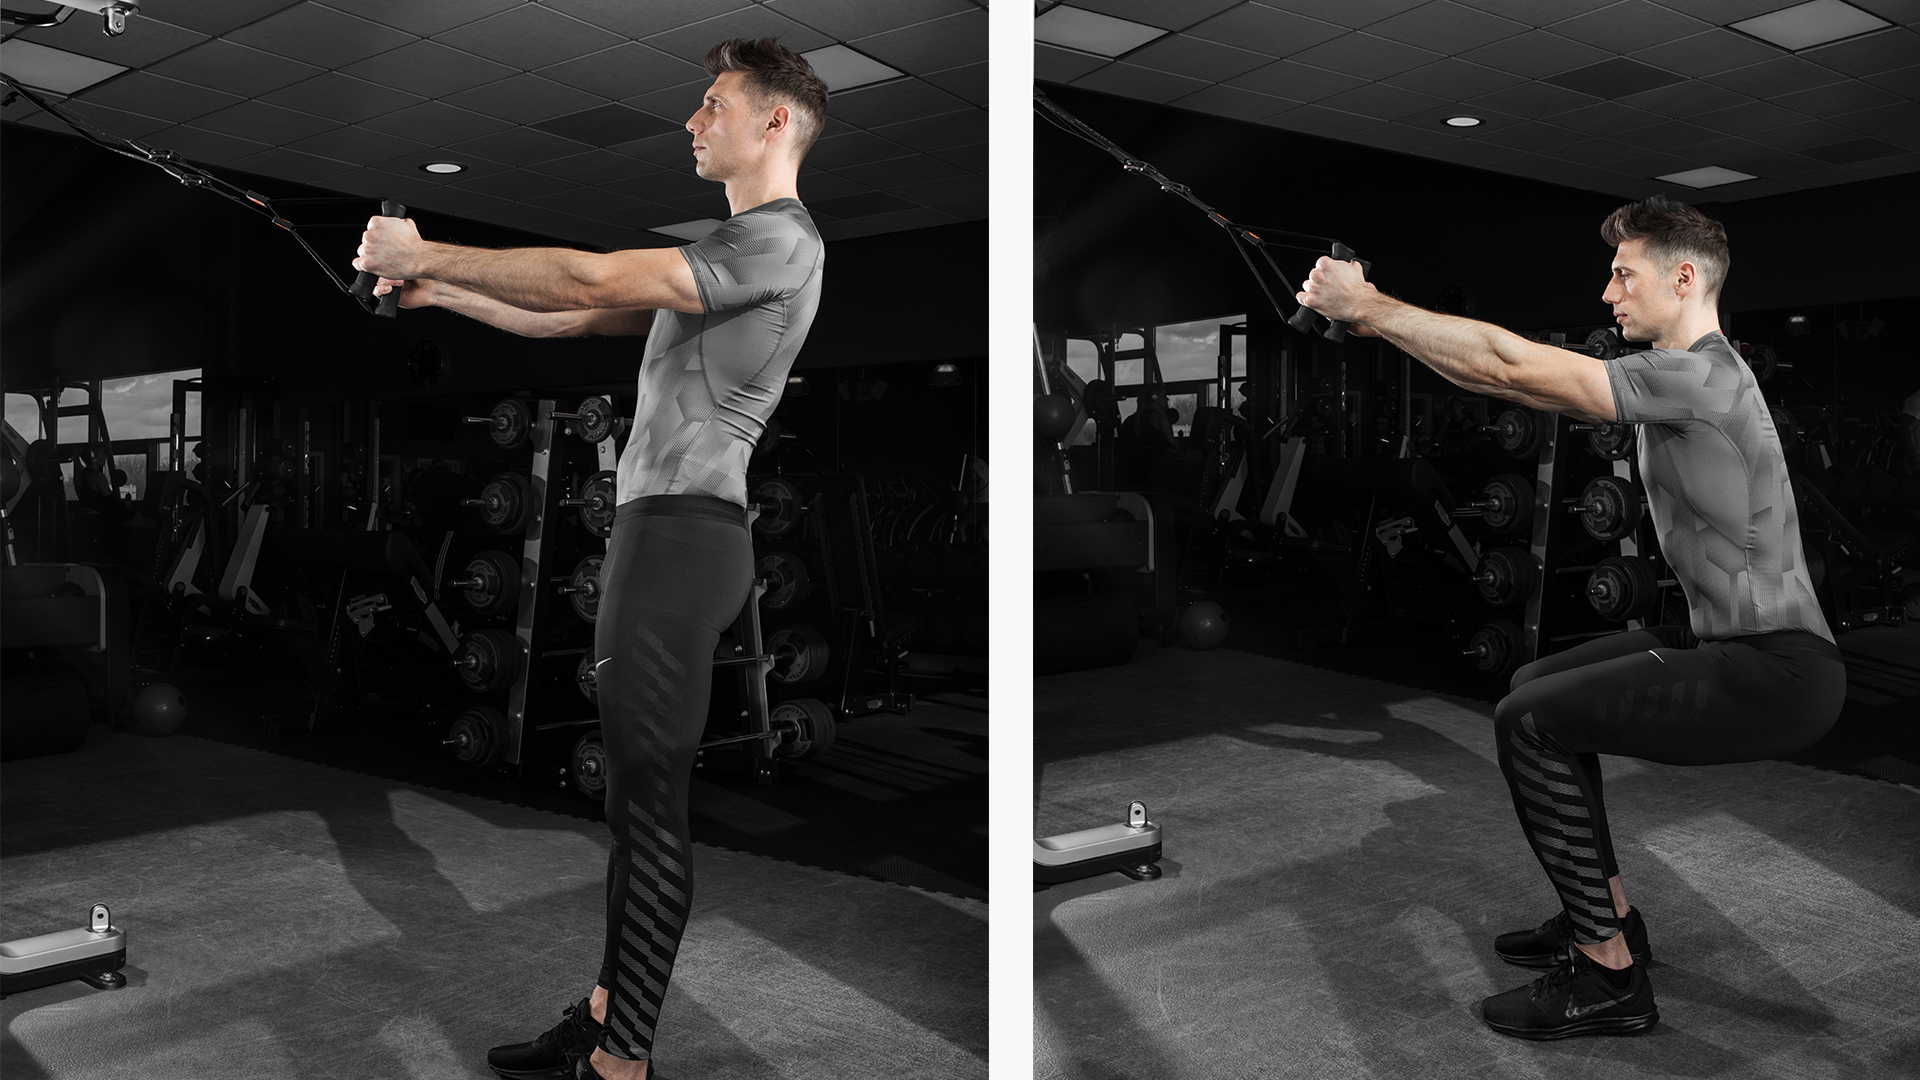
Assisted squats work the legs and aid mobility
Assisted Squat with Plyo Jump
“The Assisted Squat targets the quads, hamstrings, glutes and core and is a great way of progressing to be able to squat without assistance. The aim is to do three to four sets of 15-20 slow and controlled reps,” Harry says.
Take hold of the handles and lean back with your arms straight and locked to tension the straps. Keep your heels on the ground and squat down to as low as comfortable, ensuring not to round the back. Pause at the bottom then stand up and repeat. Make sure the shoulders and back don’t round and the body isn’t excessively leaning forward. Also, ensure you keep the heels on the ground and core tight.
Make things harder… Go for low hanging straps, standing straighter so the arms are only assisting and guiding the exercise rather than bearing weight. More advanced athletes can also do a plyometric, explosive jump at the top of the movement.
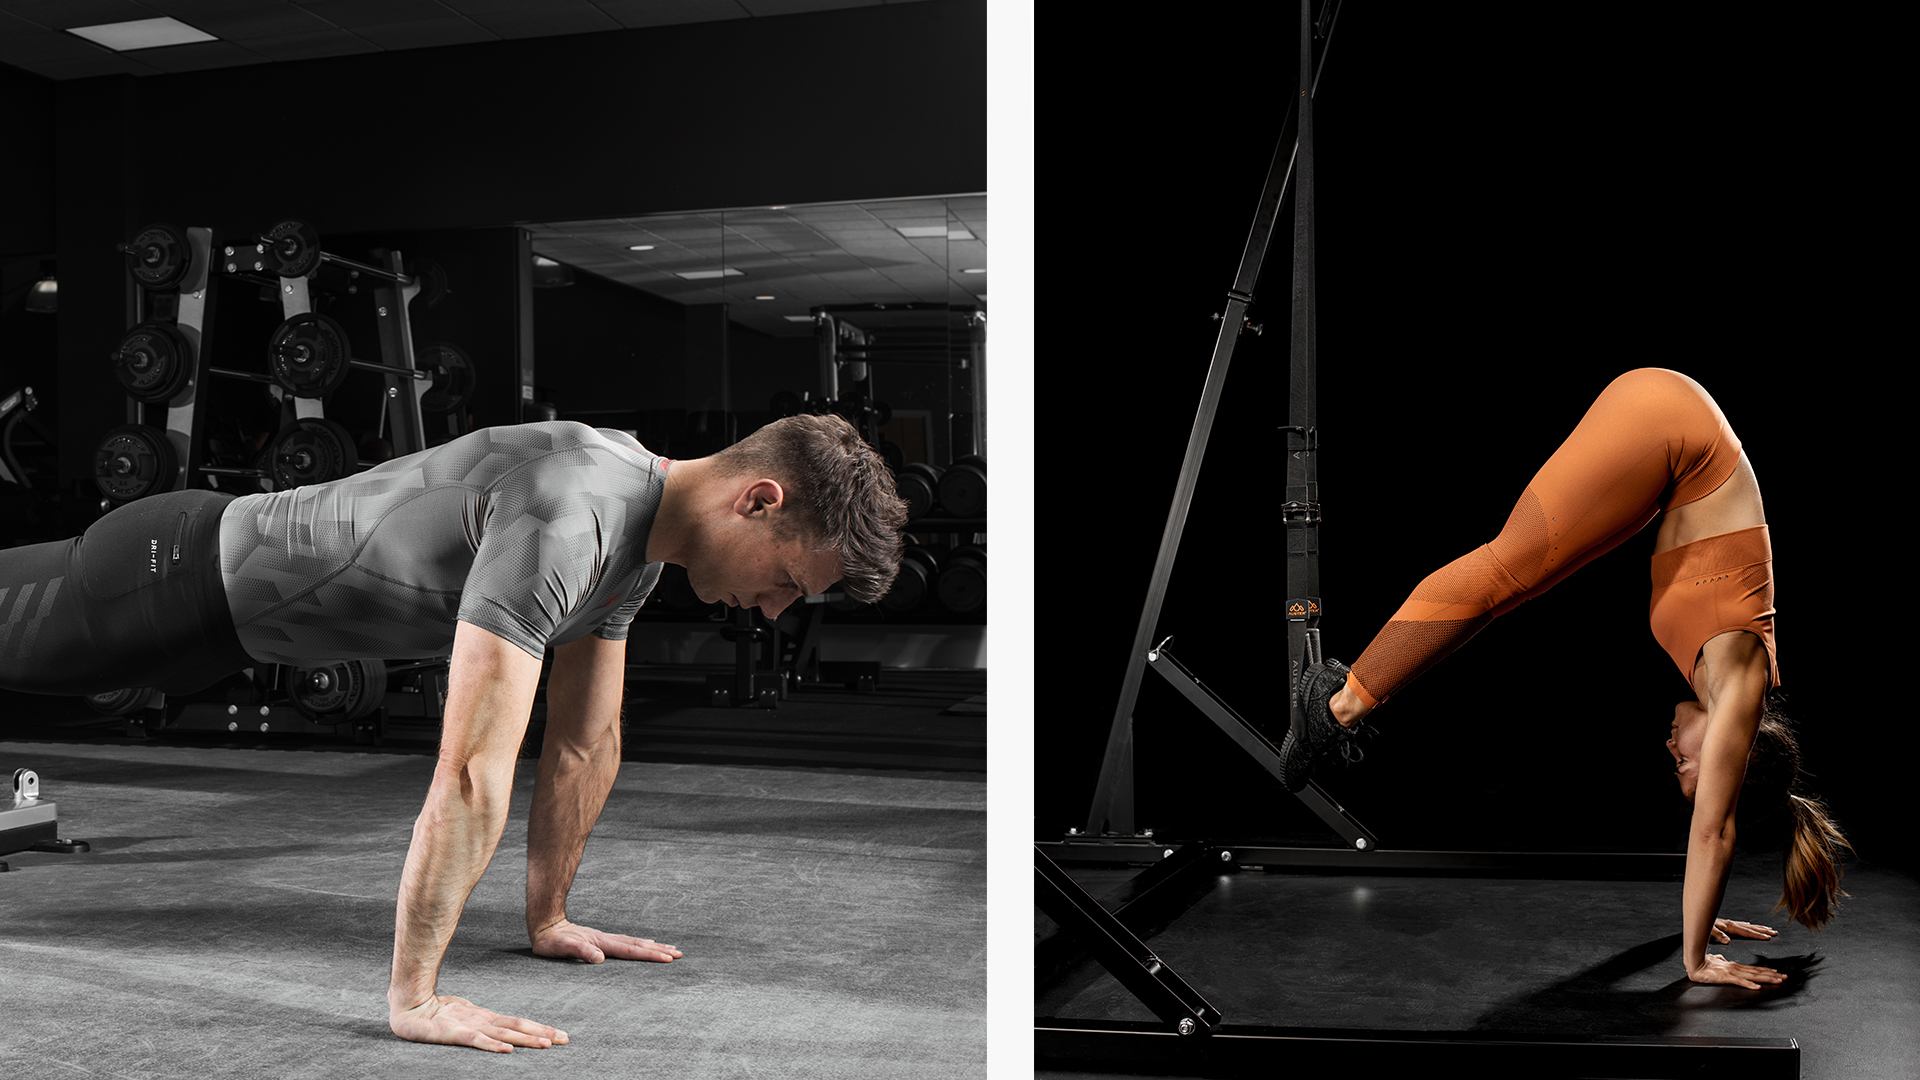
Feel the burn with an ab-crushing pike
Pike
“Pikes are a tough but effective advanced ab crunch exercise that work the abs, obliques, core, shoulders and major muscles in the back. The aim is to do three to four sets of 10-15 reps to really burn the abs at the end of this workout,” says Harry.
Begin by sliding the handles around to reveal the hidden foot-strap. Loop both feet into the foot-straps. Begin in the press up position, shoulders protracted (pushed forwards), arms straight and almost locked. Keeping your legs straight, Pike up by thrusting your glutes in the air and contracting the abs, hold at the end position, then reverse and repeat. Make sure the hips don’t excessively sag in the extended position, make sure shoulders don’t collapse.
Make things harder… As always, you can try this with much lowers straps. Also, lead with the feet already away from the anchor point, as this adds additional gravitational pull towards the centre.
Eat up your protein, now
Leon has been writing about automotive and consumer tech for longer than he cares to divulge. When he’s not testing the latest fitness wearable and action camera, he’s out in a shed fawning over his motorcycles or trying not to kill himself on a mountain bike/surfboard/other extreme thing. He's also a man who knows his tools, and he's provided much of T3's drills coverage over the years, all without injuring himself.