How do I use AirDrop? How to transfer files between Apple devices
AirDrop is a way to transfer pictures, videos and more between an iPhone, Mac and iPad. Here's how it works.

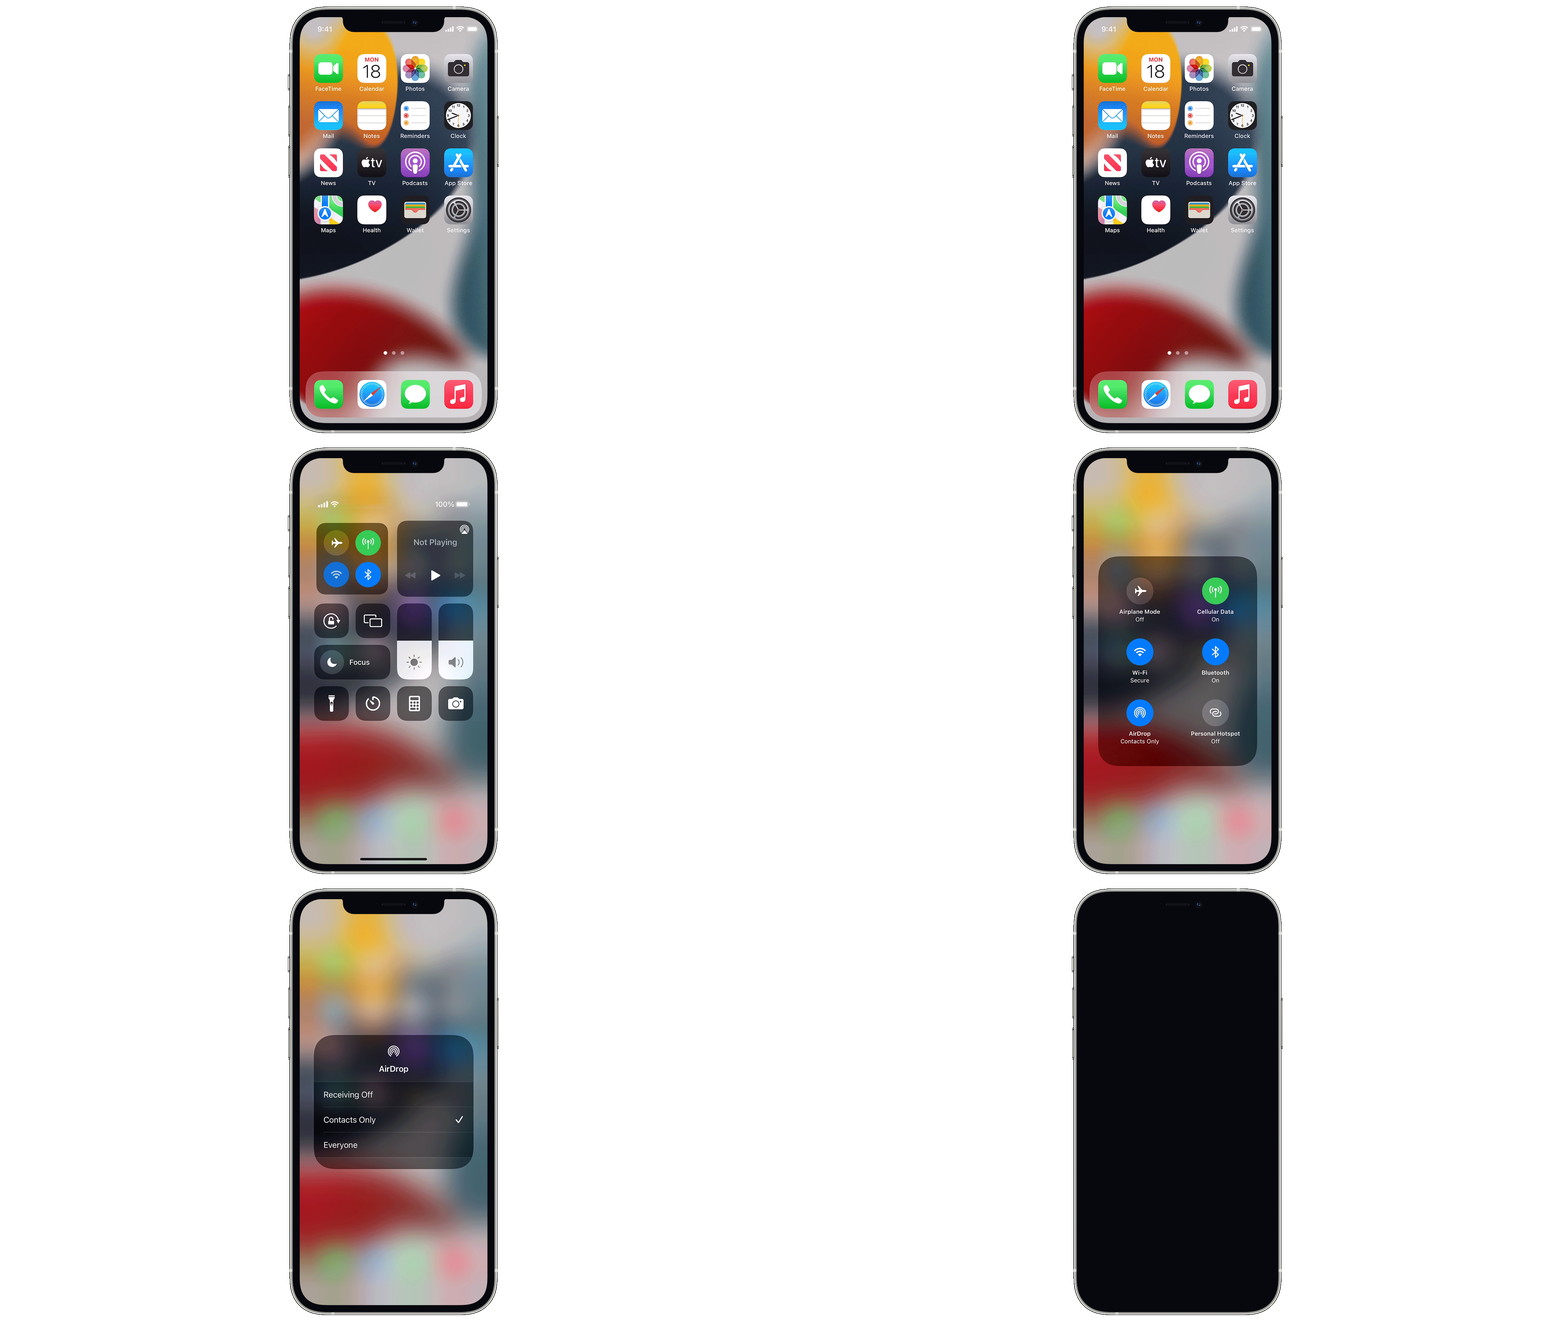
Are you the kind of person who emails things to themselves, just as a way of getting pictures, videos and other files from one device to another? Perhaps you use something like Dropbox or Google Drive to share photos between your phone and computer. These solutions work, but aren’t the most seamless – especially when compared to Apple’s clever AirDrop system.
AirDrop is free and works across iPhones, Macs and iPads as a way to transfer files between your devices, without compression, in a matter of seconds. As well as sending files between your own Apple products, AirDrop also acts as an easy way to share photos and videos with friends.
How to set up your iPhone to use AirDrop
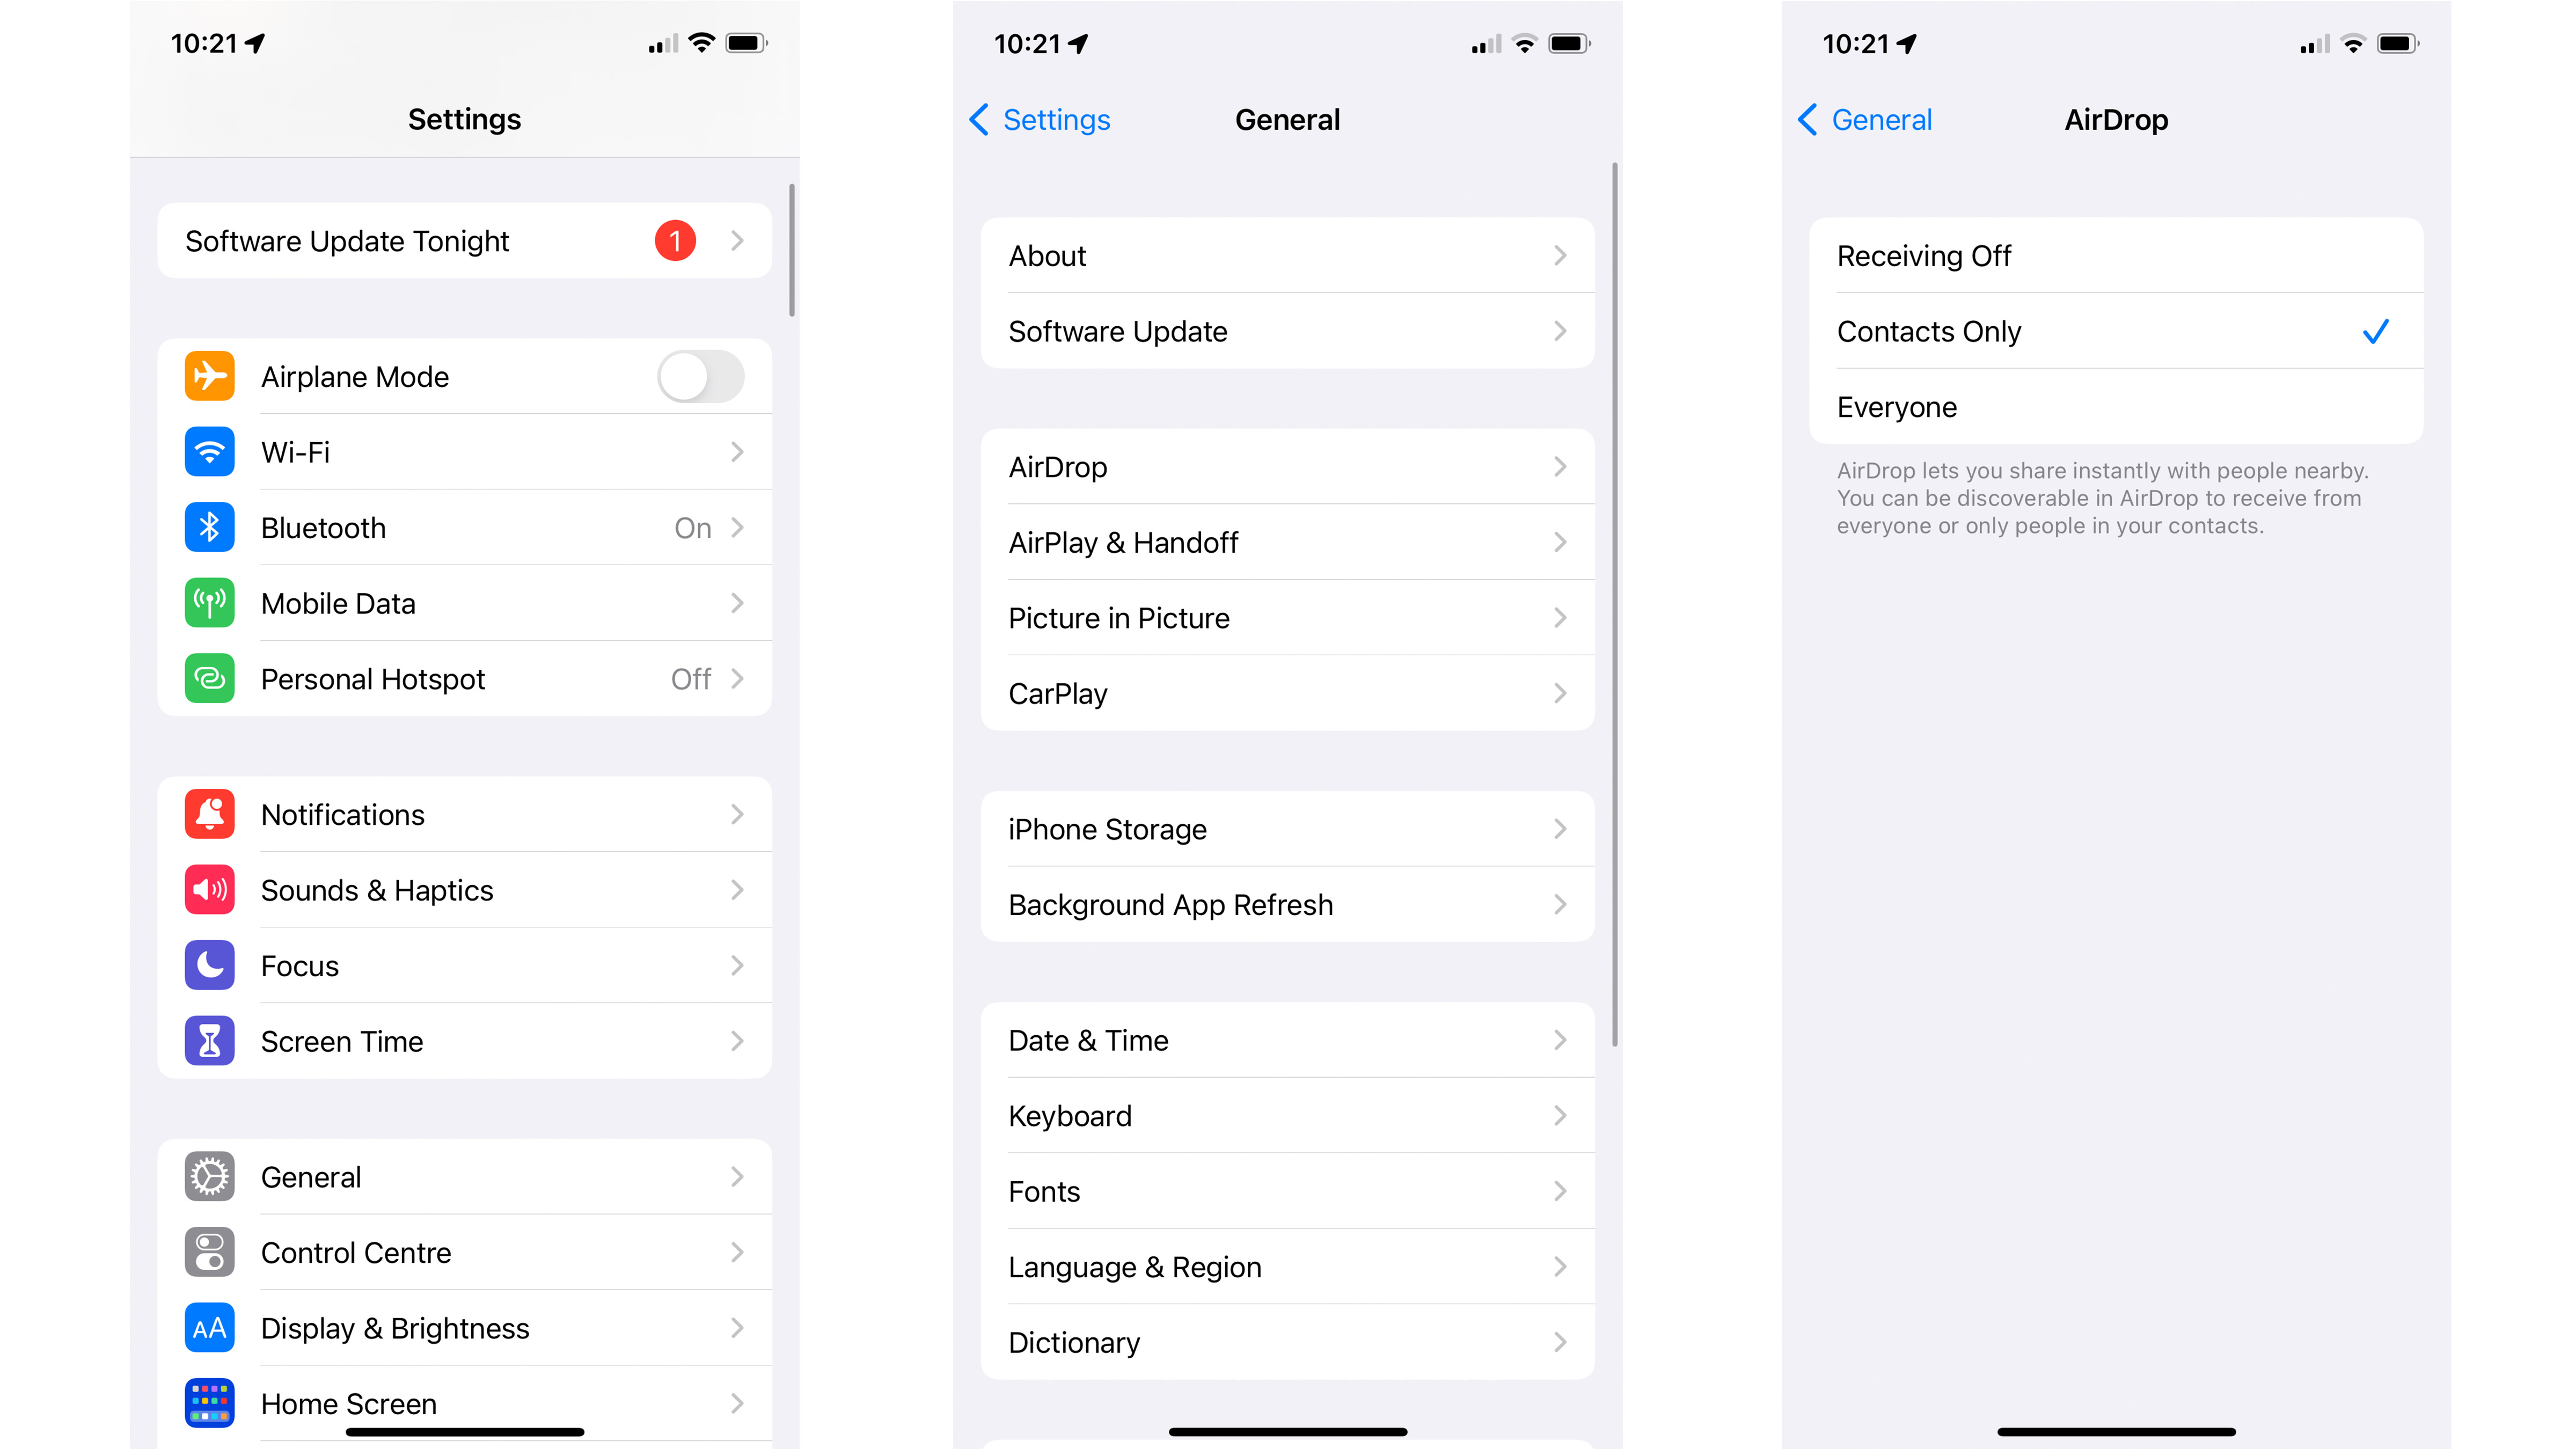
Before getting started, you need to check your devices are set up correctly. And, while AirDrop isn’t available on every single device Apple has ever made, it works on Macs from 2012 onwards (running macOS 10.10 Yosemite or later), as well as iOS 7 or later on the iPhone and iPod Touch, and iPads running iPadOS 13 or later.
Airdrop uses a combination of Bluetooth and Wi-Fi, so both need to be enabled on both devices, and Personal Hotspot must be switched off, before files can be transferred. The two devices also need to be within about 10 metres of each other to establish a connection.
By default, AirDrop can only receive files from devices belonging to people in your contacts book, and the sender should also have your Apple ID’s email address or phone number added to your contact card in their phone.
If you are sending files to someone not in your contacts book, or you aren’t in theirs, then the receiver needs to either add the sender’s contact details, or change their AirDrop settings so files can be received from everyone. To do this, open the Settings app and tap General, then AirDrop and pick the Everyone option.
However, do be aware this means anyone can send you anything, whenever they are within AirDrop range of your device. We'd encouraged you to have their AirDrop set to only receive from contacts, or have receiving switched off most of the time.
Get all the latest news, reviews, deals and buying guides on gorgeous tech, home and active products from the T3 experts
How to set up your Mac to use AirDrop
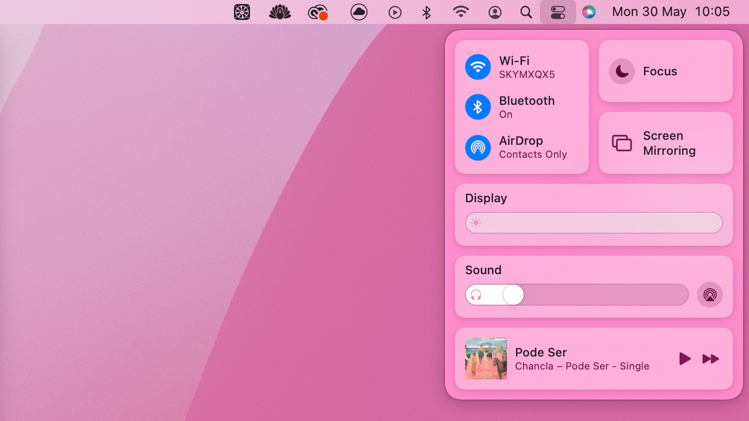
AirDrop works in a similar way on Macs. To adjust your settings, open Finder and click on AirDrop in the Favourites section. Here you can see nearby devices that are ready to use AirDrop, and by clicking on ‘Allow me to be discovered by’ you can switch between no one, contacts only, and everyone. These settings are also accessible from the Mac menu bar, as pictured above.
How to send a file from an iPhone using AirDrop
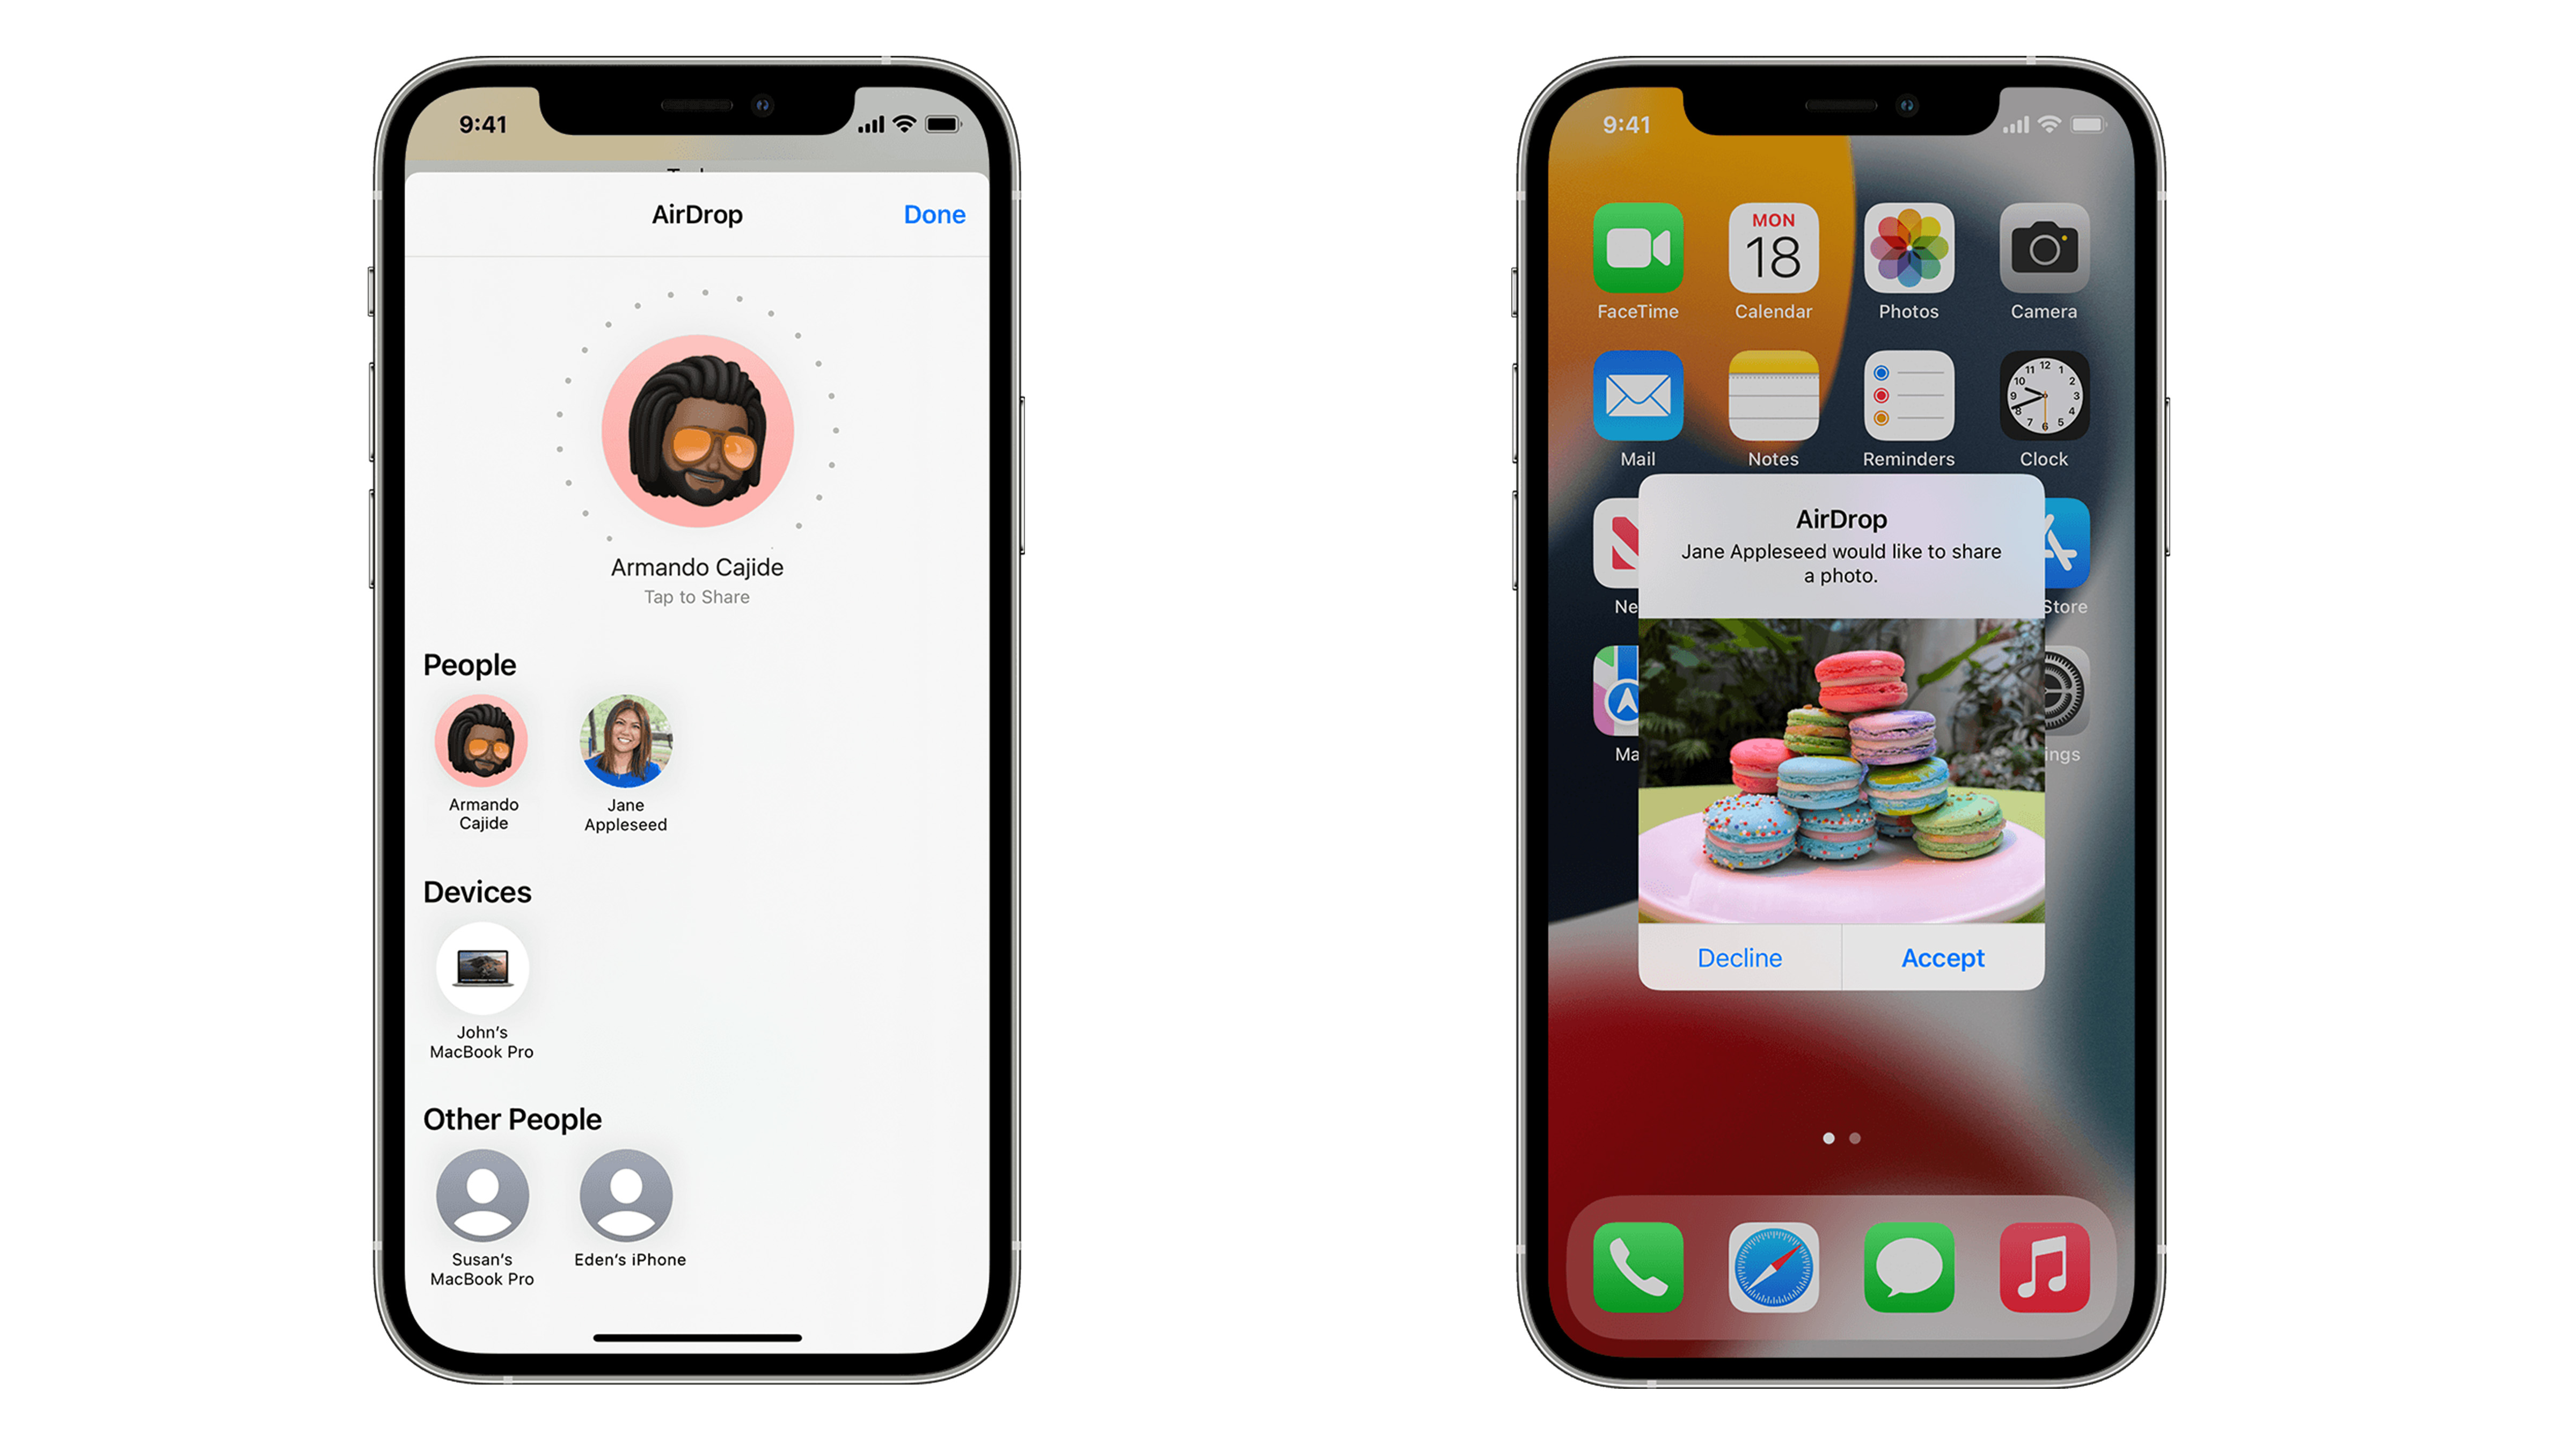
AirDrop works slightly differently on iPhones with ultra-wideband (UWB) technology, which includes the iPhone 11 and later. To share something, open an app that contains the file you want to share (like Photos), then tap the word Share or the share icon (an arrow pointing upwards from a square), then tap on AirDrop.
Now point your iPhone in the direction of the person you want to share with, and their name and Apple ID profile picture will appear. If the person isn’t in your contacts then you won’t see their picture. Tap on the person you want to send the file to, and AirDrop will do the rest.
iPhone without UWB technology (those before the iPhone 11) miss out on the screen that shows where contacts’ devices are in relation to you, but AirDrop otherwise works in just the same way.
Files that can be sent using AirDrop include photos, videos, websites, map locations, documents and audio files. There is no file size limit, and large files can take several minutes to transfer from one device to another. They are not compressed and their quality is not reduced during the transfer.
How to send a file from a Mac using AirDrop
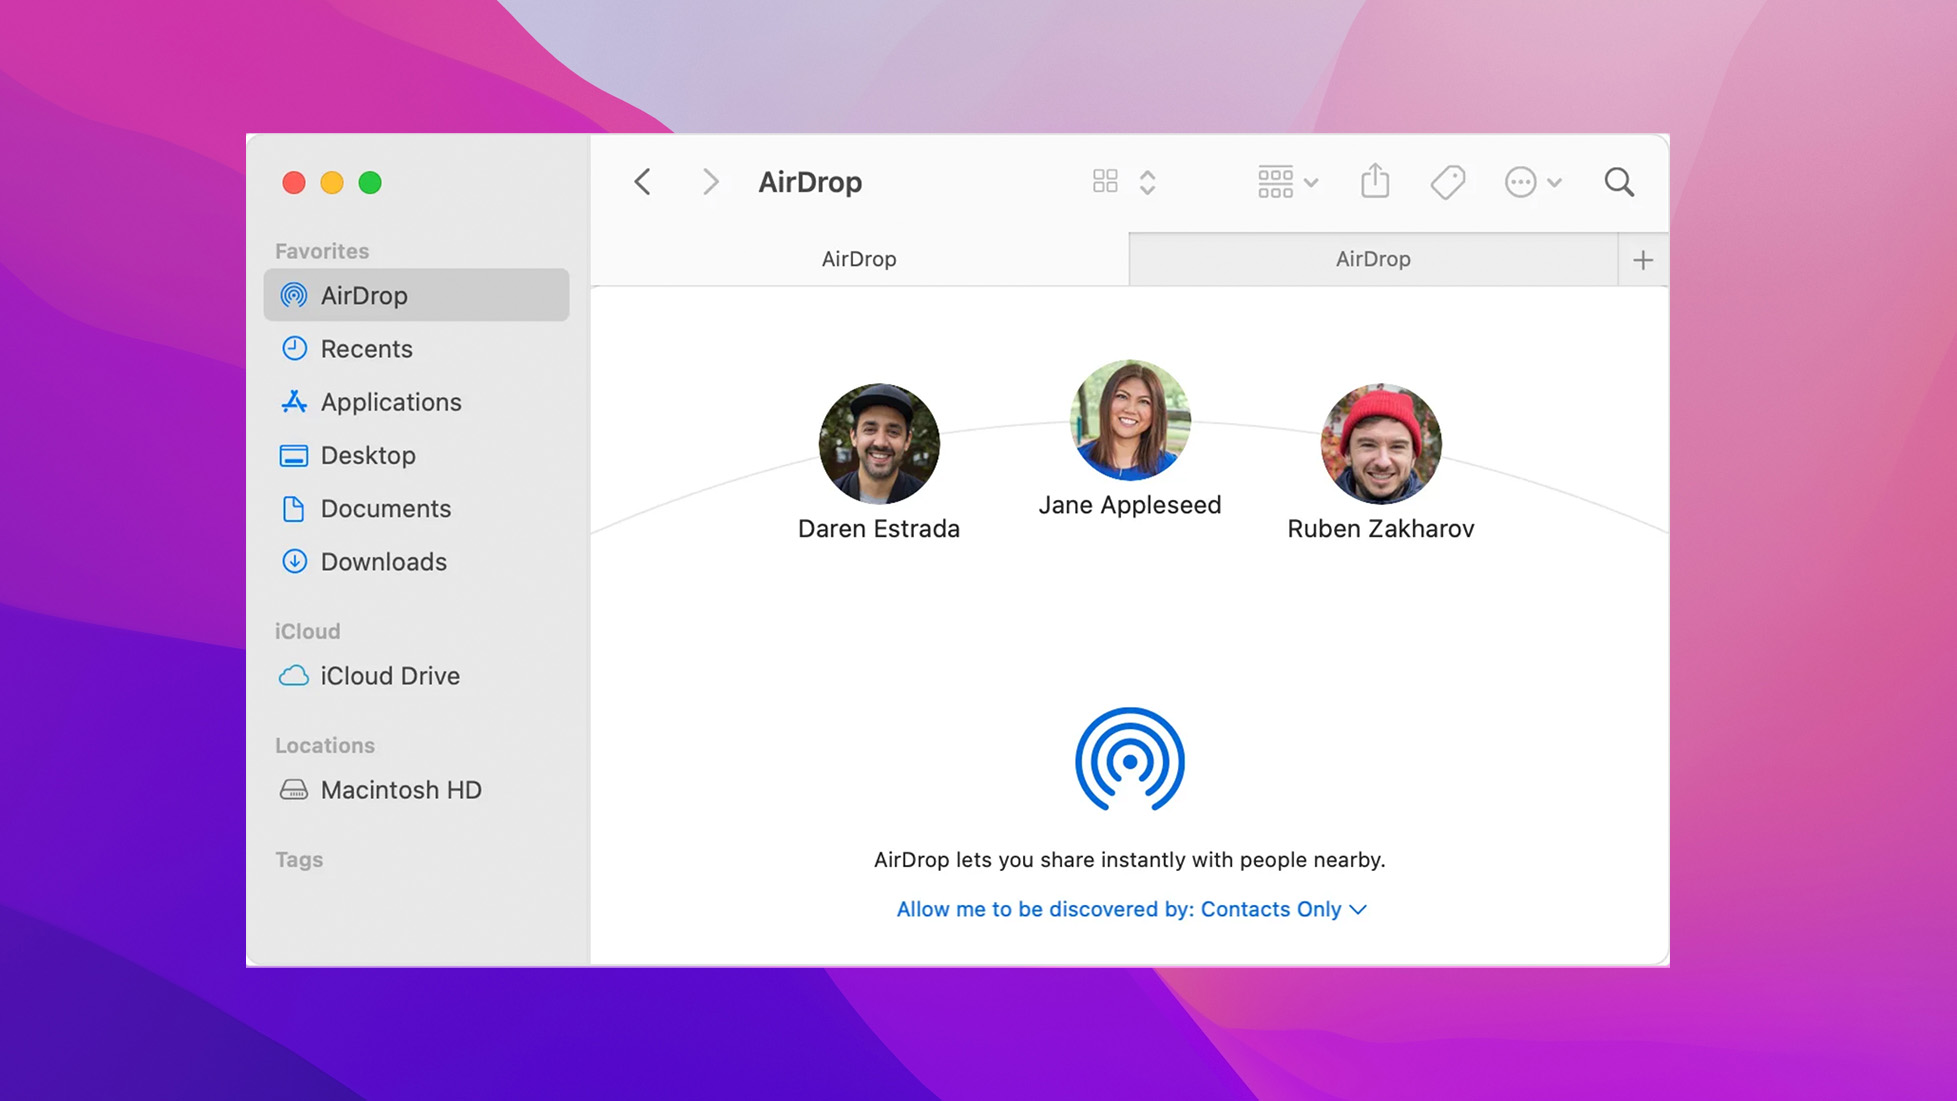
There are two ways to do this. First, you can right-click on the file you want to share, then click Share then AirDrop. Now pick the recipient’s device from the list displayed, and the file will be sent.
Alternatively, open the Finder and click on AirDrop, then drag and drop the file you want to send onto the icon on the recipient’s device.
Once a file has been sent to you, you’ll receive an alert with a preview of what the file is. You can then tap on Accept or Decline. Accepting the file will transfer it to your device and put it into the same app it was sent from, so images will appear in Photos and website addresses will open in Safari. A link to an app will open its page in the AppStore.
When AirDropping something to yourself – from your iPhone to your Mac, for example – the preview alert does not appear, and instead the file comes straight through.
Alistair is a freelance automotive and technology journalist. He has bylines on esteemed sites such as the BBC, Forbes, TechRadar, and of best of all, T3, where he covers topics ranging from classic cars and men's lifestyle, to smart home technology, phones, electric cars, autonomy, Swiss watches, and much more besides. He is an experienced journalist, writing news, features, interviews and product reviews. If that didn't make him busy enough, he is also the co-host of the AutoChat podcast.
