PS4 SSD upgrade guide: not getting PS4 Pro but still want a performance boost?
Then follow our step-by-step pictorial guide to replacing your old drive with a faster and larger model

So, PS4 Pro is out this week and, as you can see in our official review, we really liked it.
However, if you want a better PS4 experience, then upgrading to PS4 Pro isn't the only option. Sure, you can't make the PS4 more powerful, but what you can do is make it faster and, in terms of storage space, more spacious by upgrading it with a state-of-the-art SSD hard drive.
Article continues below 
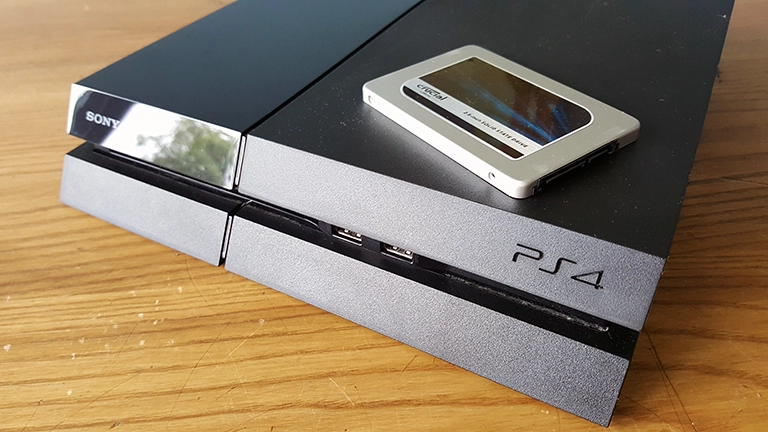
For our upgrade we chose a Crucial MX300 2.5-inch 1TB SSD. This PS4-compatible SATA drive delivers a blistering 530 MB/s maximum read speed and 510 MB/s maximum write speed which, when combined with 1050GB of storage space, offers to significantly improve performance when compared to the stock PS4 drive. For the record, the stock PS4 hard drive is a HGST model with an RPM of 5400 and a 500GB capacity.

For the upgrade we needed very little in terms of harware and tools. Asides from the SSD, the only other things we needed was a screwdriver set (you only need a small crosshead), as well as a USB drive (we ended up using two, but you only really need one if you are strapped).

So, onto the actual upgrade. Before we touched any of the hardware we took the first USB, stuck it in our system and backed up our system's data onto it. Detailed instructions on how to do this can be found on PlayStation's official website, however it simply entails going to Settings > System > Back Up and Restore. Once we had initialised the backup, which can include games or just core user data and saves, we once more visited PlayStation's official website and downloaded the latest update iteration of the PS4's OS and transferred it onto our second USB.

With our data backed up on one USB and a fresh system install waiting on the other, we then proceeded to open up the PS4, all the while consulting Sony's official material. The first stage in this is simple, just sliding the HDD bay cover off by pushing it outwards from the centre line. WIth the plastic cover off, we now had access to the hard drive bay.

Taking our screwdriver in hand we then proceeded to remove the single screw holding the hard drive bay in place. You really can't miss this screw as it has the PlayStation circle, square, cross and triangle symbols on it.

Once the screw is removed the drive bay simply slides out, revealing the stock PS4 hard drive.

Next we proceeded to remove the old drive from the drive bay, which is simply achieved by removing the four mounting screws in the four corners of the bay. While doing this, however, we made sure not to remove the rubber inserts from the holes.

Once the screws were removed, the old drive came loose and we removed it from the bay. And... that was that. That was all the disassembly required.

Now we could start the rebuild. We grabbed the Crucial MX300 and reversed the process we had just completed. First we put the Crucial drive in the drive bay, next we re-inserted the four mounting screws and thirdly we slotted the drive bay back into the system.

We then re-inserted the PlayStation screw to secure the drive bay in the system and slotted the hard drive cover back onto the system, clicking it back in place.

With the new MX300 SSD in place we then plugged the PS4 back in and powered it on.

After the system boots, we were then presented with the system OS install screen, which asked for our prepared USB with the latest PS4 update files on to be inserted into the system. USB attached we then clicked OK and waited for the latest version of the PS4 OS to be installed.

Once the installation process had completed, the system rebooted and we were presented with the standard setup wizard that all PS4s ask you to run through to set up your system.

After setting up Wi-Fi, date and time, power settings and accessories the system then kicked into the cross media bar. To check that everything had gone to plan we then navigated to System Storage Managment in Options.

And everything had indeed gone to plan. The new Crucial MX300 SSD was in place and we now not only had a system that booted faster and loaded games faster, but one that had a whopping 906.6 GB of storage space.

To finish the upgrade, we grabbed our USB with our backed up system data, plugged it in and then reinstalled all our data by going to System > Back Up and Restore. We then re-installed the raw games' data by re-downloading titles bought in the PlayStation Store and installing others off disc - in fact, we installed every game we owned as we had the space to do so! - and then sat back, put our feet up and ejoyed some great gaming.

So, there you go - it is really that simple. Get a compatible SSD such as the MX300, follow this guide, and then enjoy faster loading games and more of them too.
