iCloud secrets revealed: tips and tricks that will make you a master of Apple's online service
Flexible, friendly and free… here’s how to get the most out of Apple's online service on iOS and OS X
Apple's iCloud is one of the simplest, best value and most flexible online services going. It's more than just a space to store your files, but a series of apps, a robust communication system and an ever-expanding set of features that enhance our daily lives as Mac and iOS users, wherever we are in the world. Getting here has seemed a long, hard slog, though – with several false starts.
Apple's innovative eWorld service lasted less than two years, MobileMe was poorly received, and iCloud, MobileMe's eventual replacement, didn't seem to offer that much at launch. But now it's the thing that binds the iPhone, iPad and Mac together, and with the advent of Apple Watch it underpins a vast range of under-the-hood services that we barely even think about.
Set a reminder through Siri and it's sent over iCloud. Plan a route in Maps on your Mac and iCloud sends directions to your iPhone – and ultimately to your Watch. Use Handoff to move work between devices and your iCloud account is instrumental in authenticating which of those nearby are owned by you. iCloud also silently makes your iTunes and App Store downloads available on all your devices, syncs your iBooks page turns, and manages website accounts in a keychain.
Here, we'll be looking at every iCloud feature in detail to help you get the most out of them.
Seting up and restoring
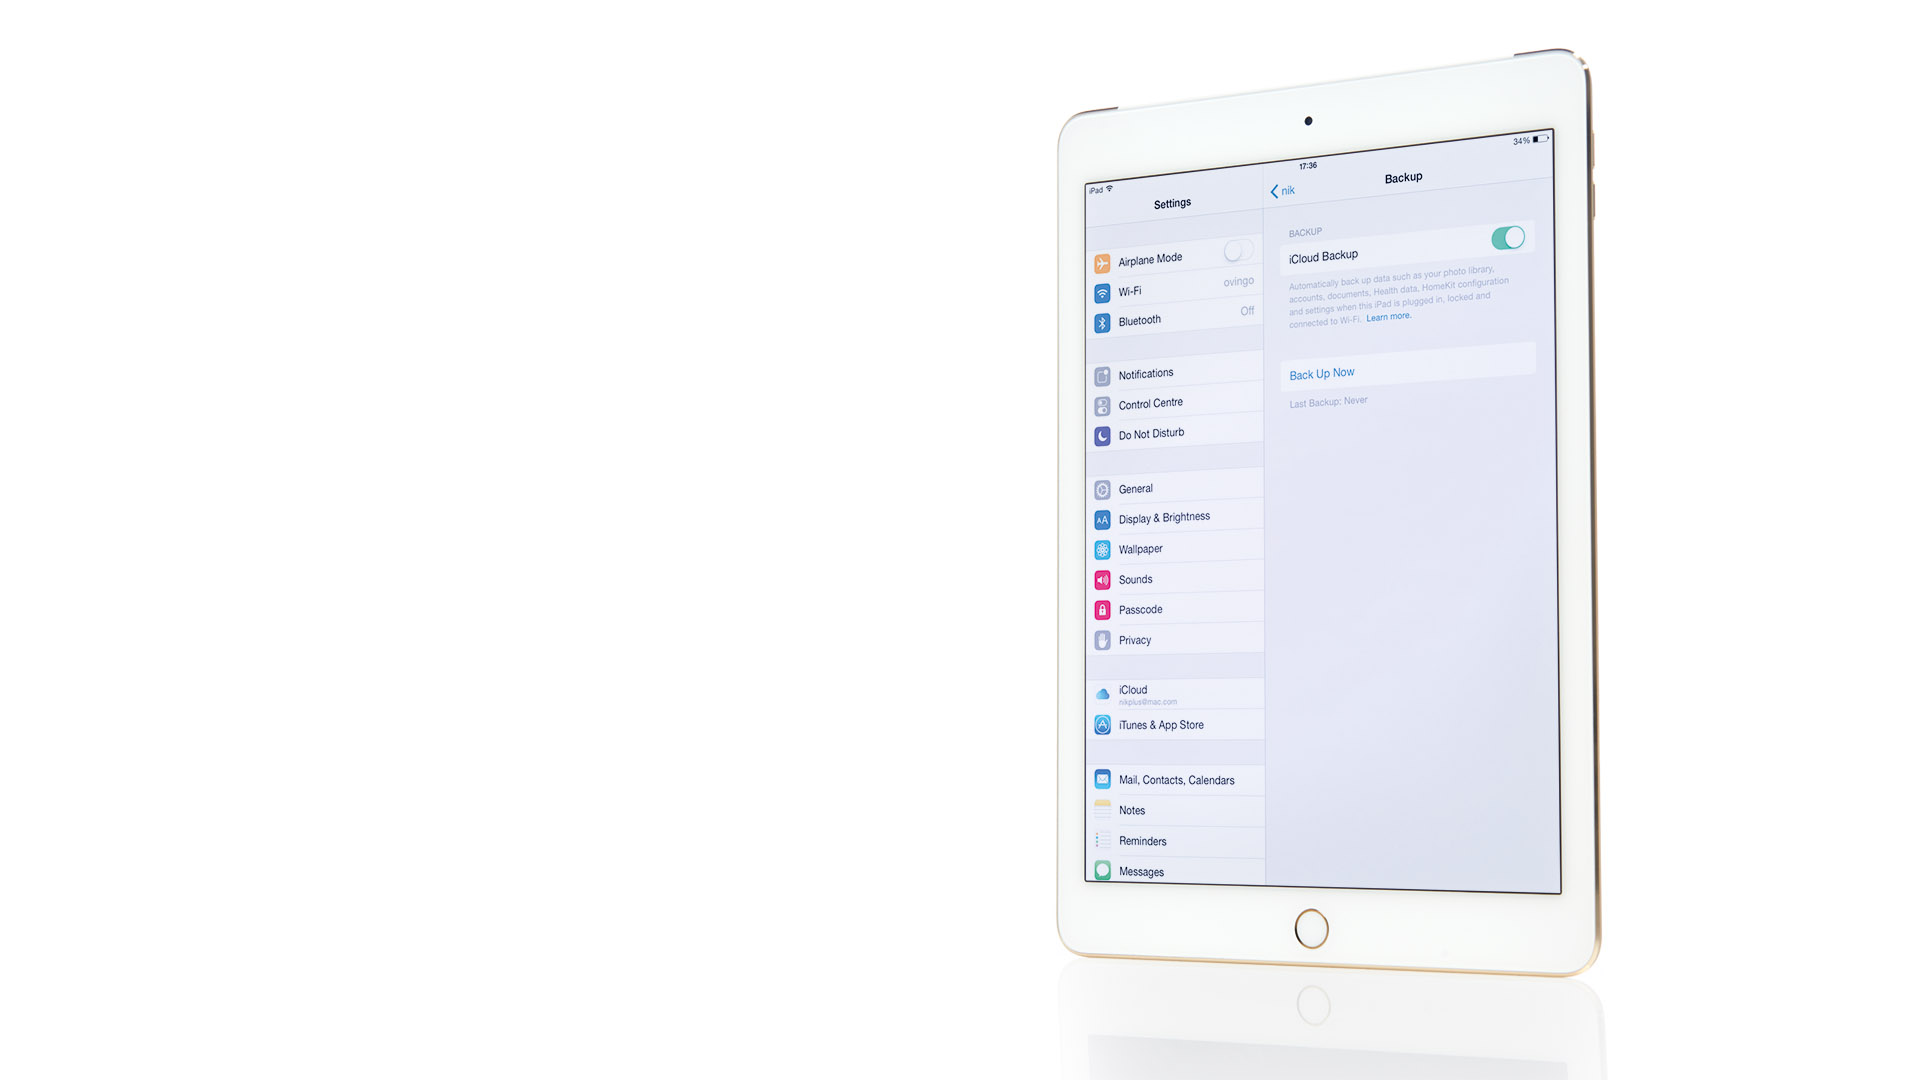
Backing up your iOS device to iCloud not only keeps your data safe, but also lets you transfer it quickly and easily to a new device. iOS backs up your data whenever your device is plugged in, locked and connected to Wi-Fi, so you can literally set it up and forget about it until you need to restore your files.
Turn on iCloud Backup in Settings > iCloud > Backup. When your device is next connected to a power supply it will back up, but you can tap Back Up Now to force it to do so right away.
iCloud backs up your purchase history from all of Apple's download stores (you can redownload the purchases on demand), device settings, app data, the layout of your Home screens, messages (iMessage, SMS and MMS), ringtones, health data, HomeKit configuration and, if your mobile network supports it, your Visual Voicemail.
Get all the latest news, reviews, deals and buying guides on gorgeous tech, home and active products from the T3 experts
Things like email, contacts and calendars, which are already stored online by iCloud features, are omitted. They are restored simply by turning on the relevant switches in Settings > iCloud. Data from third-party cloud services is also excluded. Your photos and videos are backed up only if you haven't turned on iCloud Photo Library; otherwise, they are treated like the other things just mentioned.
The things included in backups eat into your available storage. That's just 5GB on iCloud's free plan, so you may need to upgrade to a paid plan in Settings > iCloud > Storage, or exclude apps by tapping Manage Storage, the device you're using, and turn off the switches for apps whose data you don't want to back up from that device.
Restore from iCloud
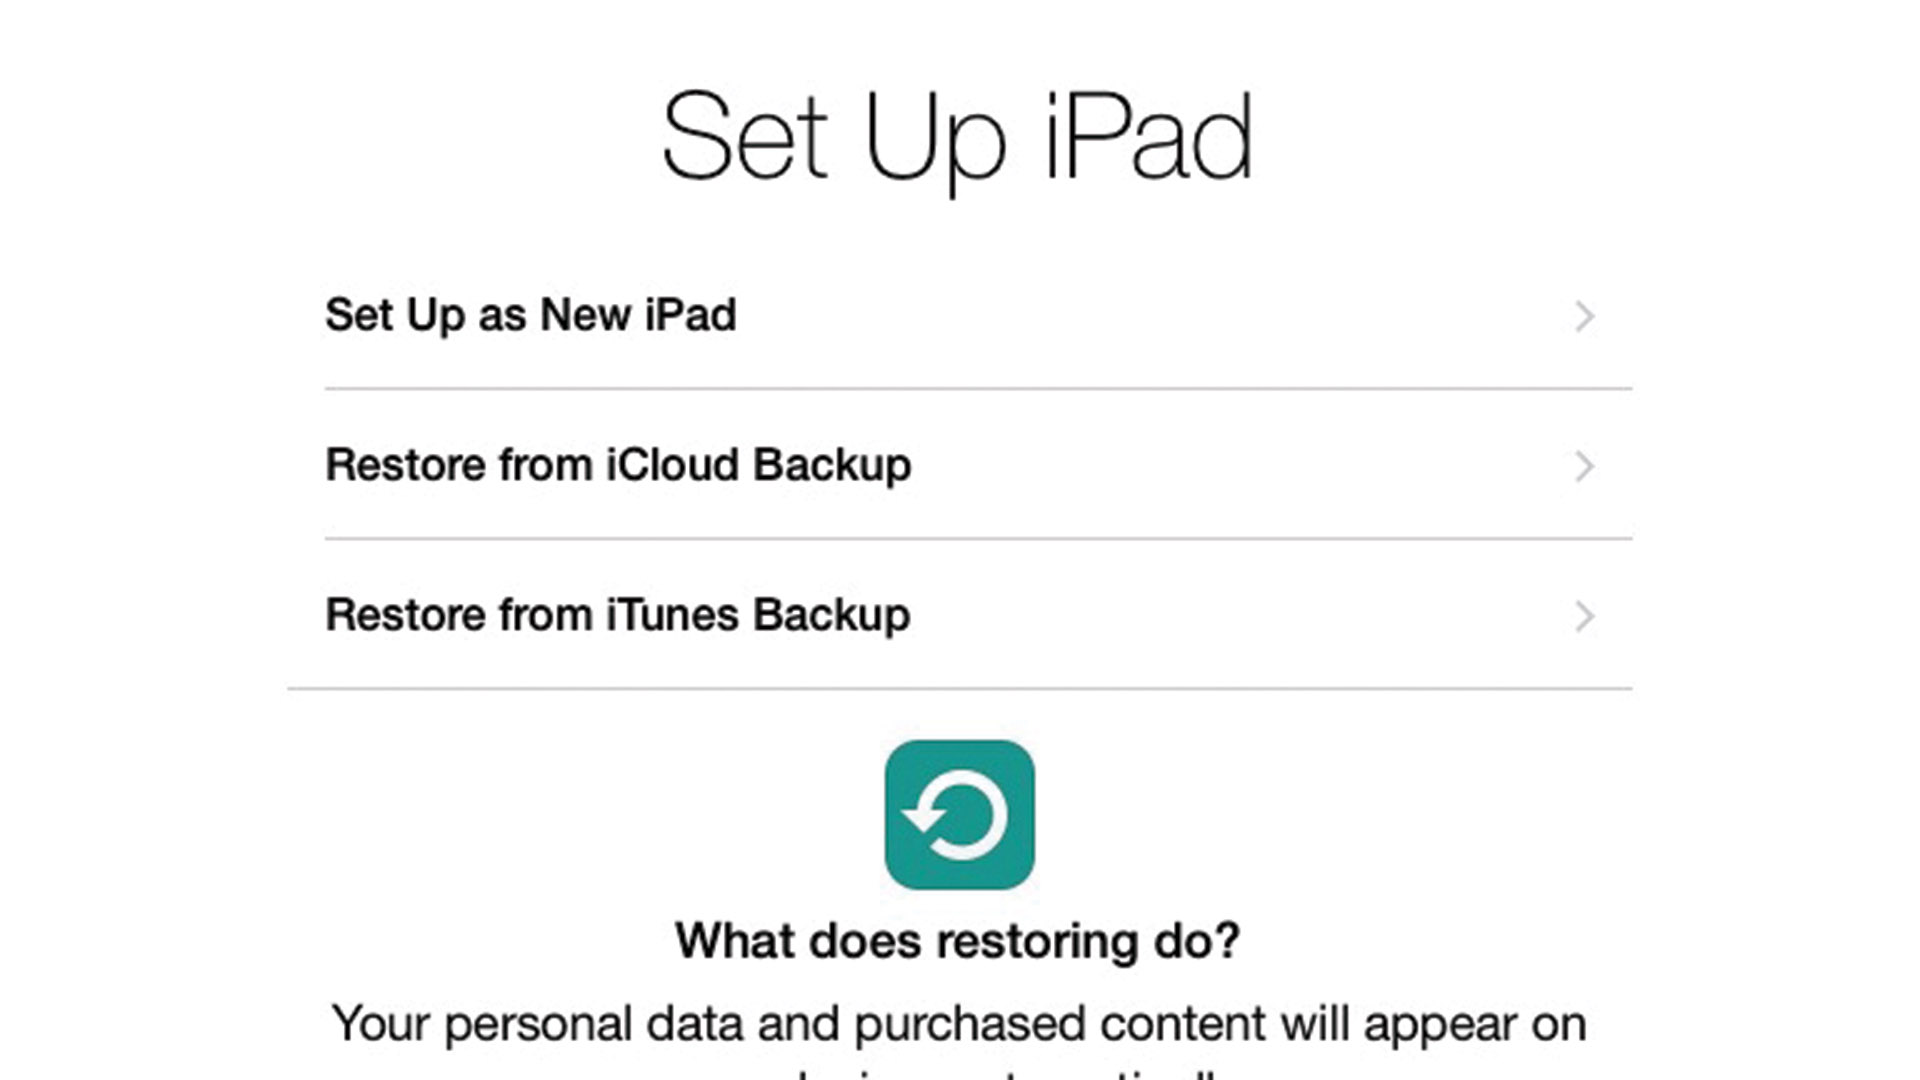
If you've got into the habit of backing up your iPhone or iPad to iCloud, you can safely reset your device and restore the data at a later date, which might resolve problems. However, you can also use your backup to transfer everything to a brand new device if you're upgrading. Tap through the set-up screens and when you get to Set Up iPad (or iPhone), simply tap 'Restore from iCloud Backup'.
Naturally your iOS device doesn't know who you are yet, so enter your Apple ID and password. These must be the same as the ones you used on the device from which the backup originates, or iOS won't be able to find your stored data. You're effectively setting up iCloud on a new device at this point (even if it's been used on it before) so you'll need to agree to the terms and conditions again.
iCloud can store multiple backups, allowing you to roll back devices to various states. The setup process will show you the most recent backup from each device, but if you want to roll back further, tap the link below the list to dig deeper into your history. When you've found the backup you want, tap it and wait for the data to download from Apple's servers and install on your device.
Finding and sharing
You could describe iCloud as the hub of your online life, and it's fair to say that your Mac and iOS devices would not be nearly as flexible or useful without it.
Find my…
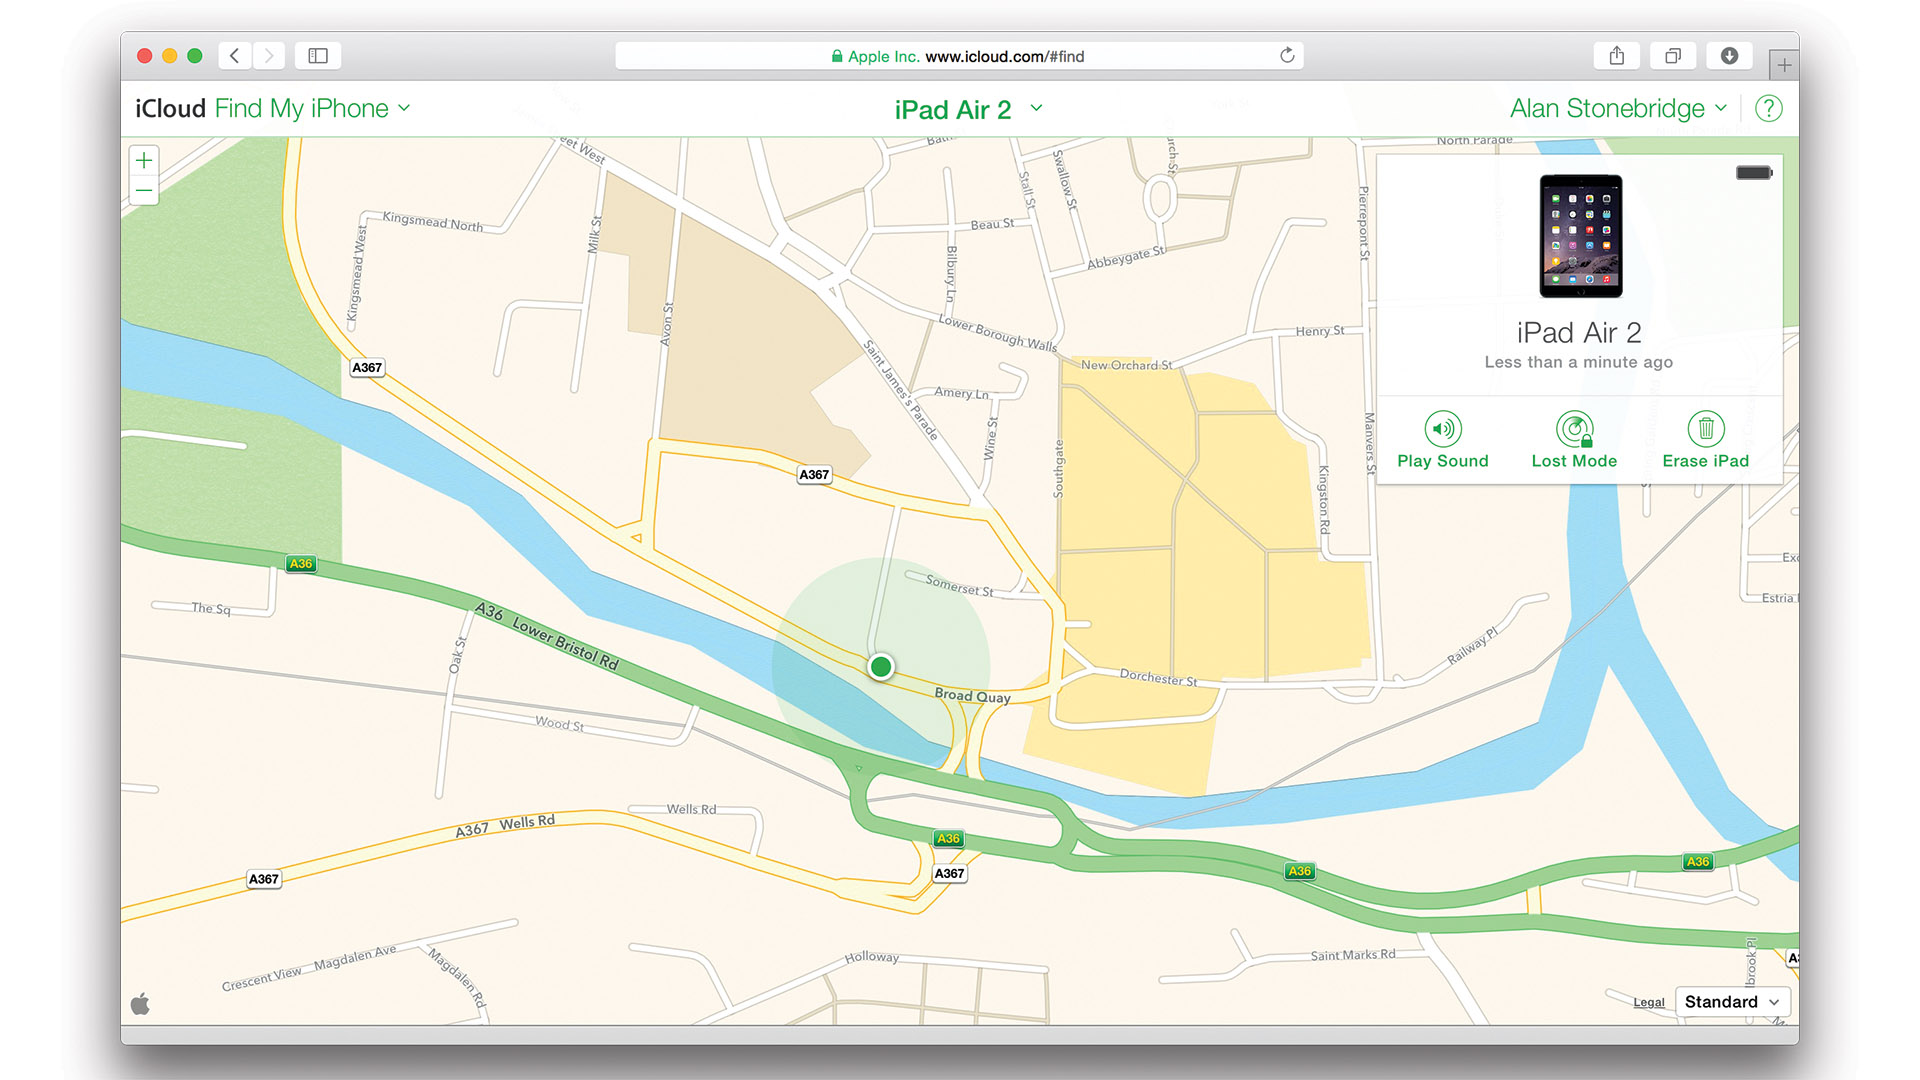
Tracking services like Find My Friends and Find My iPhone (the latter of which can also locate a Mac, iPad or iPod touch) would be a security risk if the data wasn't transferred securely. That's why it's processed by Apple's servers and only available to those whom you've granted access. Invitations and follow requests are sent from one device to another via iCloud, and must be authorised using an Apple ID to secure the system from end to end.
To set up lost device tracking on iOS, go to Settings > iCloud > Find My iPhone (or iPad) and ensure the switch is turned on. Optionally, also enable the Send Last Location feature, which will automatically upload the device's current position shortly before its battery runs out, which may help to track it if it powers down after being lost. To enable tracking on your Mac, open the iCloud pane in System Preferences and check the box beside Find My Mac.
Your tracked devices appear on a map in your iCloud account at icloud.com/find (accessible on a PC or a Mac), and through the Find My iPhone app for iOS.
Family Sharing
The ability to share your apps, iBooks and iTunes purchases with five other people in your family is a relatively recent addition to iCloud. (You might find that content providers have excluded certain items from this benefit, or failed to update usage rights for older items.) The Ask to Buy feature lets parents approve kids' attempts to buy content, which is paid for using the family organiser's bank card. Family Sharing also gives you a means to share photos with each other, and to coordinate using a shared calendar.
Once set up in iCloud's settings, family members can access each other's purchases alongside their own, in the store apps in iOS and in the iTunes Store on a computer.
If you've bought mature content, you can restrict access to it by setting up age restrictions in iTunes > Preferences > Parental (also do this in Settings > General > Restrictions on an iOS device). This merely stops the young downloading inappropriate content. You can hide items from the list using a Mac or iOS device, but this hides them for you too. You can unhide them (in Account > View Account).
Also, Family Sharing is the only way kids under 13 can legitimately have their own Apple ID – so long as it's set up by a parent or guardian.
Best of the rest
You can access email, calendars, the iWork apps and more from any PC or Mac at icloud.com, and enjoy your iTunes purchases on all your devices. The latter is particularly useful if all your devices aren't set to automatically download all your purchases – they're shown in your iTunes library and the Music and Videos apps on iOS, ready to download. With an iTunes Match or Apple Music subscription, even tracks from CDs and other music stores will be accessible on every device.
iCloud Photo Library
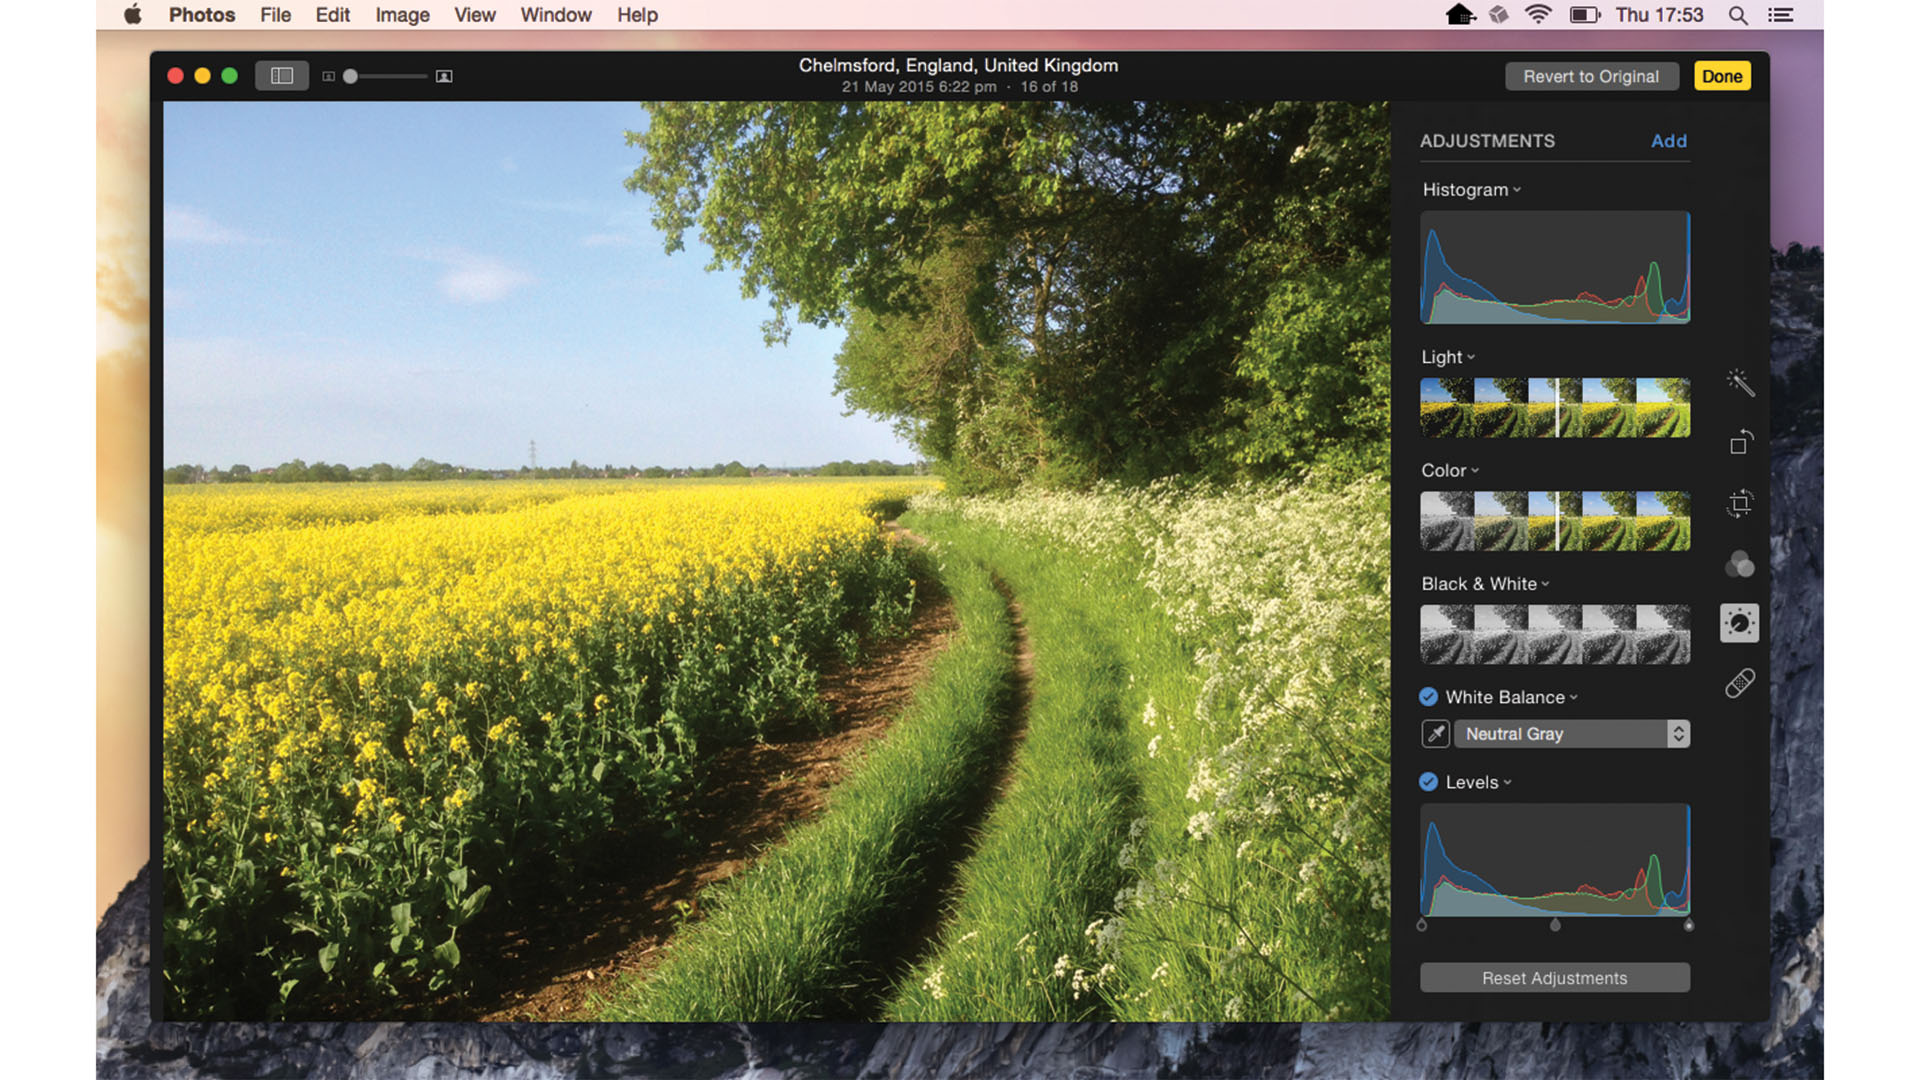
Photos, which started life on iOS and is now on OS X, is Apple's replacement for iPhoto and Aperture on the Mac. It automatically syncs your photo library to iCloud, so every shot is available on all your devices.
Synchronise your iOS device's photo library by going to Settings > iCloud > Photos. Make sure the switch beside iCloud Photo Library is turned on and choose whether you want to keep optimised versions on your iOS device, or uncompressed full resolution originals. Either way, the full quality originals are stored in iCloud.
To edit a photo, select it, then tap Edit. On iOS, as well as cropping, applying a filter and automatically enhancing your shot, you can tweak the colour, light and monochrome style. (OS X lets you do more, as you'll see in the tips on this page.) When you edit an image, Photos just tracks your changes and applies them on the fly. You can roll back to the original at any time by editing again and choosing Revert. Your changes are synced to iCloud and made visible – and revertible – on any of your devices.
By default, your Mac user account's System Photo Library, which is the only one synced to iCloud, is stored in your Pictures folder. If your startup disk is low on space, you can move the library to another drive and double-click it there to open it in Photos, then click 'Use as System Photo Library' in the app's General preferences.
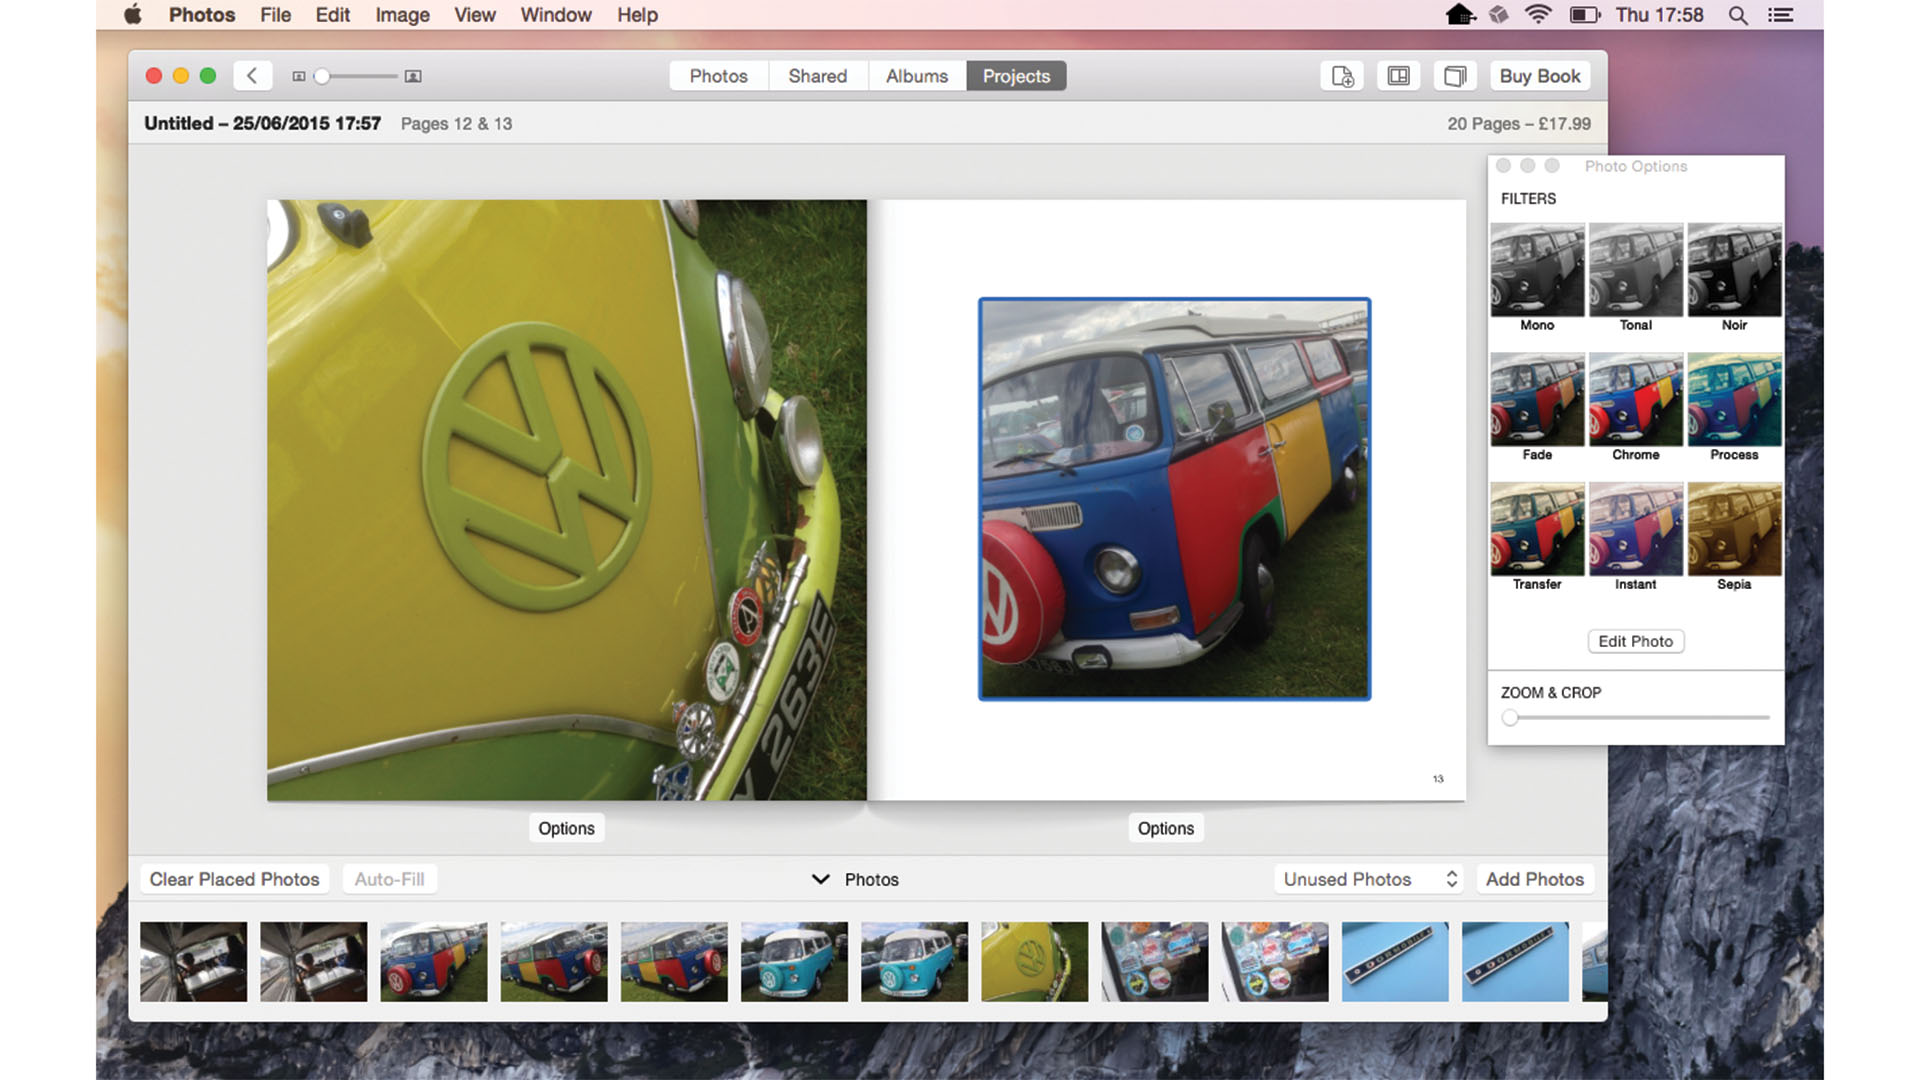
Edit on the page
When creating a photo book, you can apply filters on the page rather than tweaking the copies in your library before you place them. Drag them from the filmstrip onto a page. Double-click that page to enlarge it, then the image on the page to edit it, apply a filter and adjust its framing.
More flexible editing
Access Photos' full range of editing tools by selecting an image and clicking Edit on the toolbar, followed by Adjust in the sidebar. This launches with only three options: tweaks for light, colour, and black and white. Add others by picking them from the Add menu at the top-right. Notice the blue tick that appears beside any setting you've adjusted. You can click this to toggle the effect off or on to see how it affects your picture.
Take a break
Setting up Photos for the first time involves passing a lot of data back and forth between your devices and the iCloud servers. If your connection is straining, the process can be suspended on a Mac in Photos > Preferences > iCloud by clicking 'Pause for One Day'. It can be resumed sooner in the same place, perhaps to let it finish overnight.
Private libraries
You can set up multiple discrete libraries on your Mac, but only the System Photo Library is synced to iCloud and your iOS devices. Use this to your advantage to create a separate library of images you want to keep on your Mac by holding [Alt] while opening Photos. This displays a window from which you can choose the library that the app opens. Here you can create a new library, or import an iPhoto or Aperture library.
Find faces faster
Photos lets you index your images according to who's in them. Get started by clicking Albums followed by Faces. You'll be shown a strip of faces it has already found in your pictures (and likely some false positives, such as pets and inanimate objects). Apple's instructions are to double-click one and type that person's name. Doing this for every picture is tedious, but you can save time after you've named someone just once by dragging any suggestions of the same person from the strip onto their circle in the top part of the window. They'll be named automatically.
Set up an iCloud Keychain
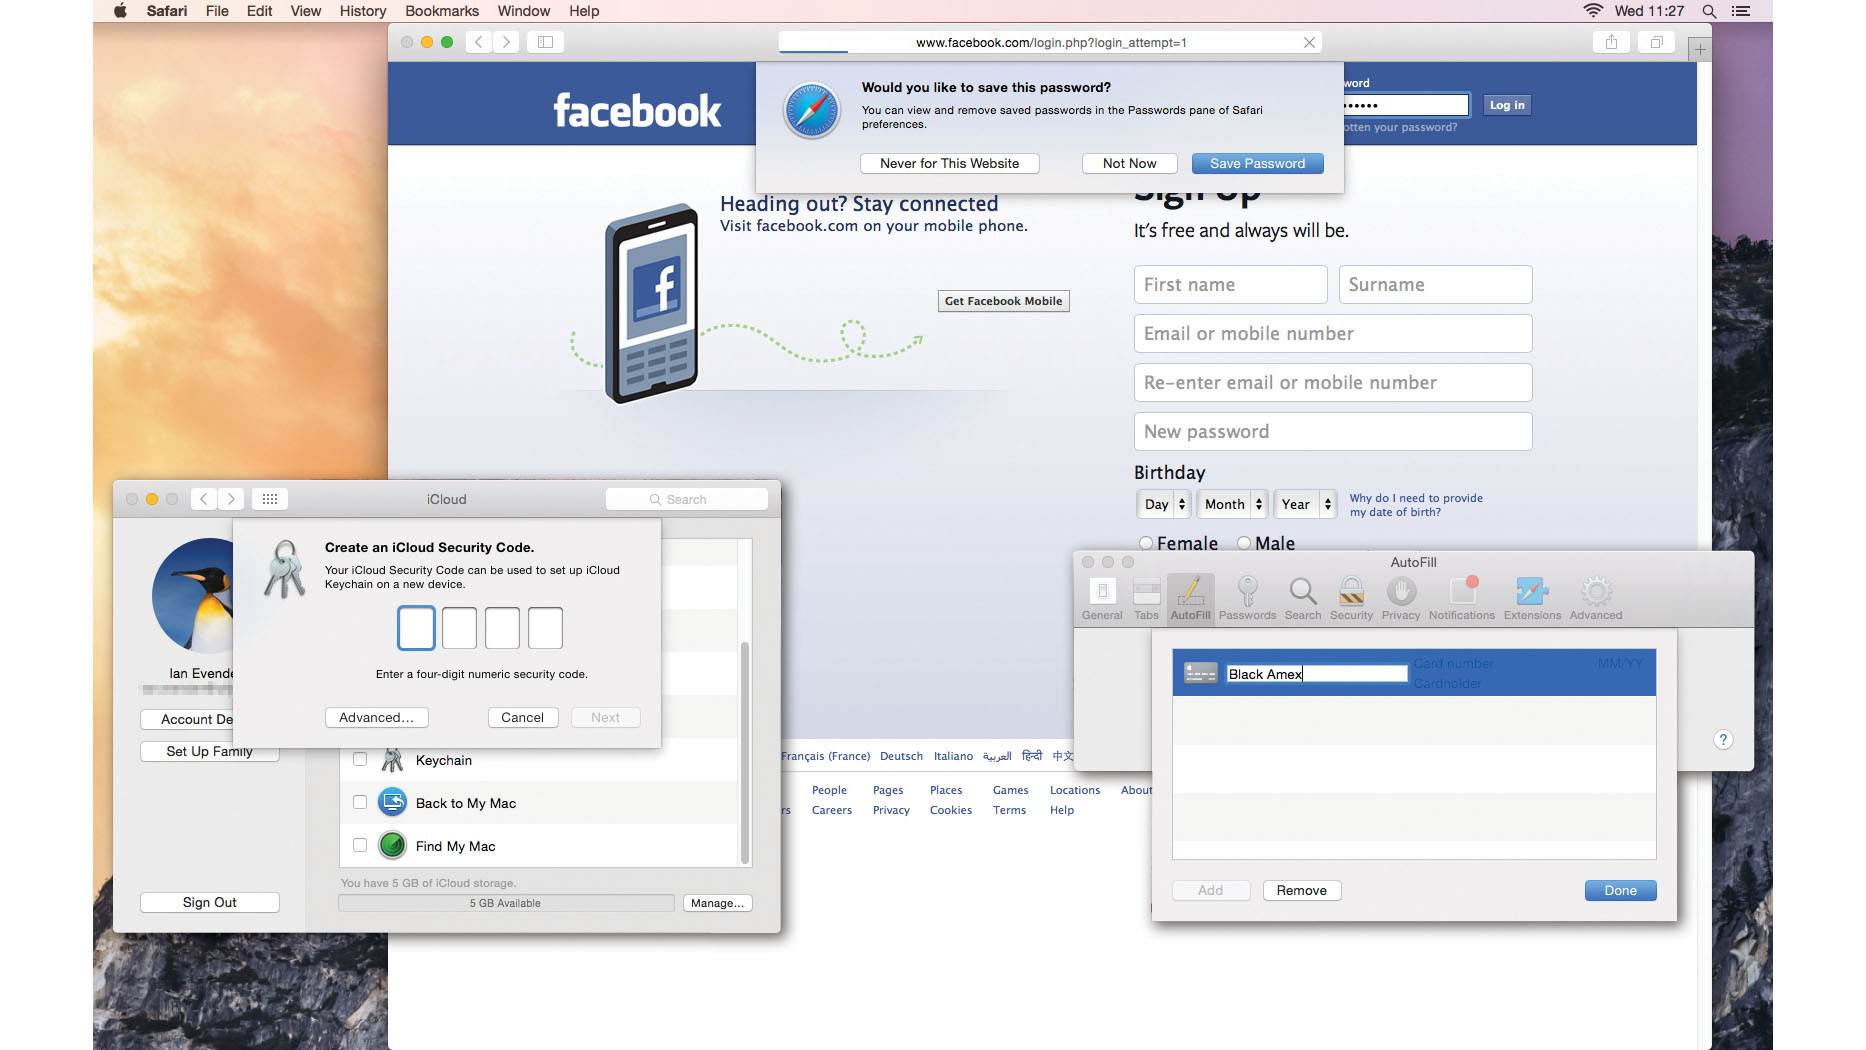
Remembering login details for a multitude of websites isn't easy. Passwords either end up being difficult to remember, or you make them so simple that they're easy for others to work out. But Safari and many other web browsers can save your credentials so you can set a stronger password and never have to memorise it.
You might want to log in to the same websites on an iPhone, iPad, iPod touch or another Mac. iCloud Keychain saves you the tedious task of having to enter the same login details on all of your devices. It can remember bank card details as well – but it won't store the security code from the signature strip. Apple says that your iCloud keychain is protected with high-level 256-bit AES encryption too.
With Keychain set up, the first time you log in to a website from one of your devices, it'll ask whether to record your details.
This isn't compulsory, and you might decline for sites that contain sensitive data. However, if you allow details to be stored, they're synced to iCloud Keychain. From there, they are sent to your other devices, saving you the hassle of having to type them. When you visit one of those sites in future, Safari automatically fills in the login form. All you have to do is tap a button to submit your details.
When you set up iCloud Keychain, you can create an iCloud Security Code, a four-digit code similar to an iOS device's passcode, or you can have a more complex code generated for you. The iCloud Security Code is used to authorise additional devices to use your iCloud Keychain.
iCloud Keychain on iOS
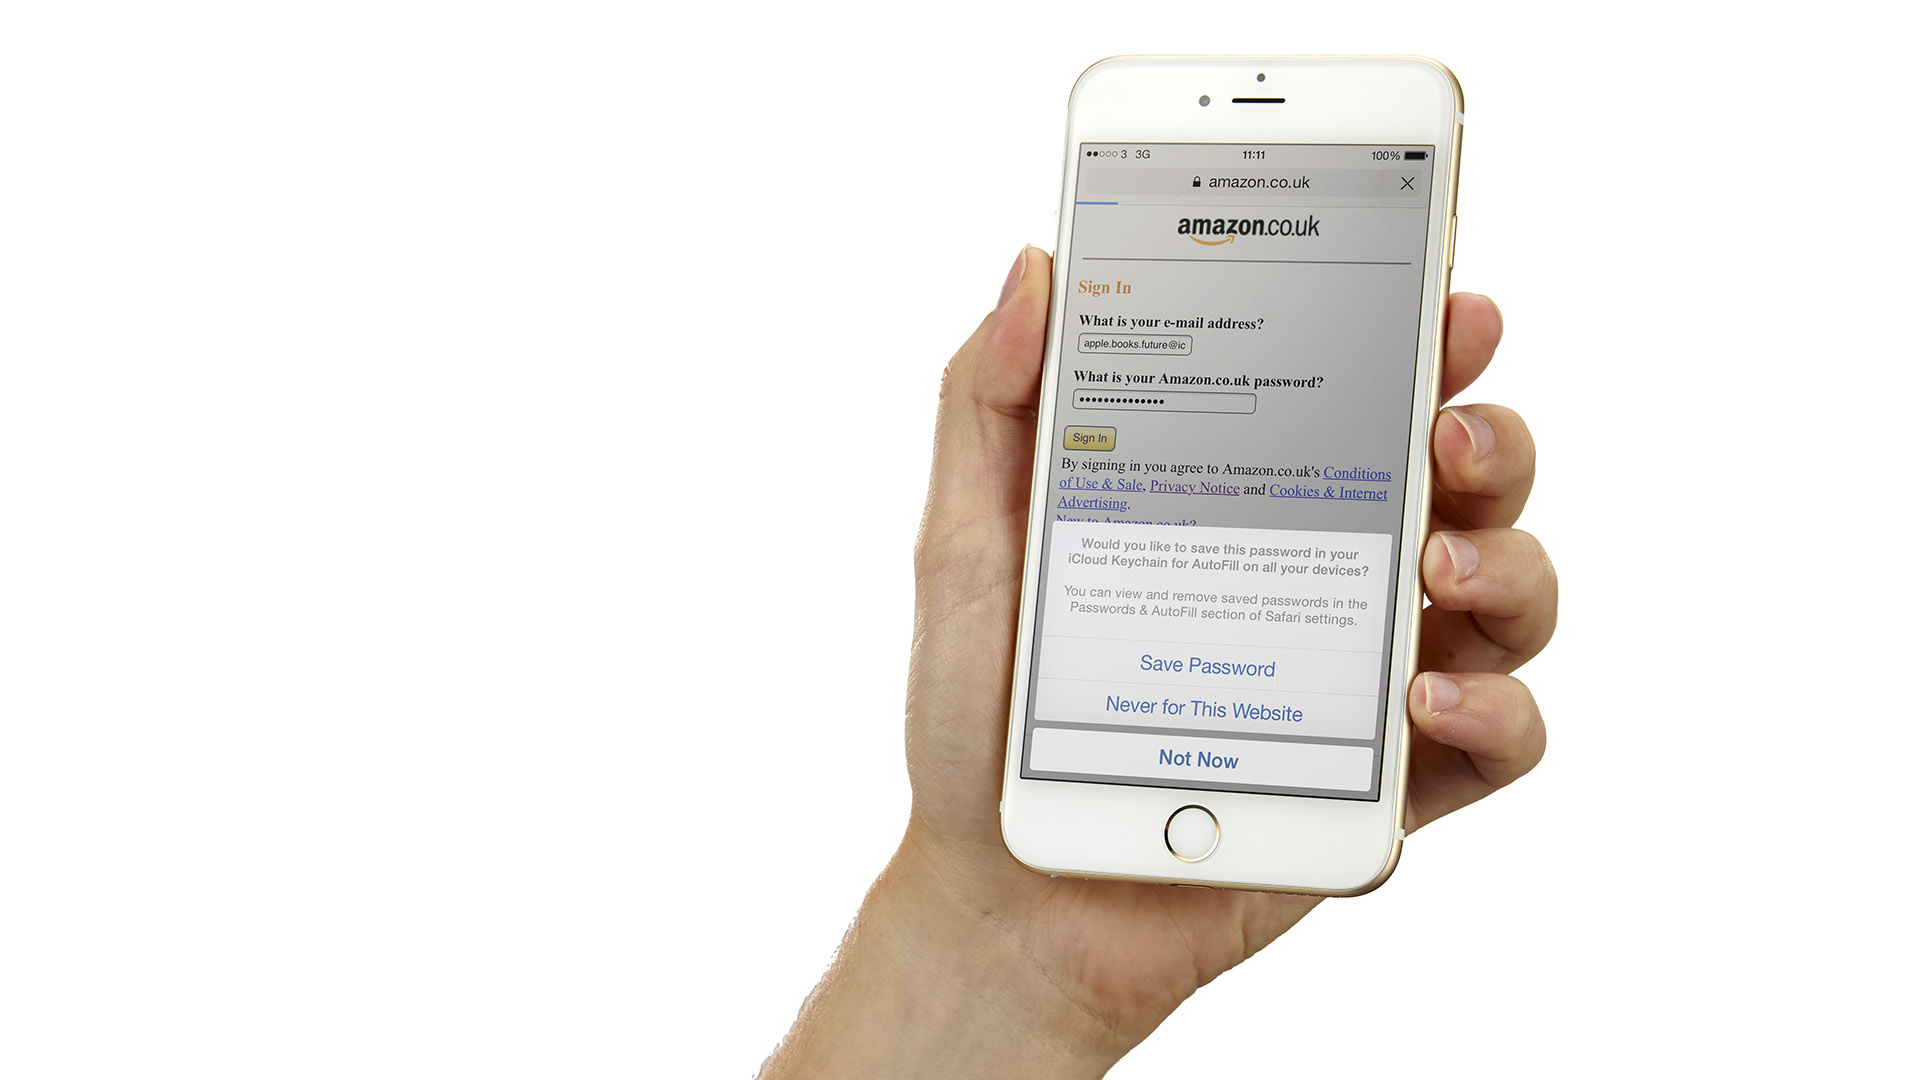
You should protect your iPhone, and hence your keychain, with a passcode. This code will be needed to access your iPhone, and to manage information in iCloud Keychain. Tap Settings > Touch ID & Passcode > Turn Passcode On. Enter a four-digit code, then repeat it to verify. Below that, Require Passcode sets a duration before your passcode is required after the iPhone locks (Settings > General > Auto-Lock) or you put it to sleep.
Keychain requires manual activation. Tap Settings > iCloud > Keychain and switch on iCloud Keychain. You'll be asked for your Apple ID. If you've already set up Keychain on another device linked to the same iCloud account, you'll need to approve your iPhone from there, or provide the security code you set during that process. If you opt to approve access to your keychain using another device, you'll receive a notification on it.
To save passwords ensure Settings > Safari > Passwords & AutoFill > Names and Passwords is on. In Safari, go to a web page that requires a user ID and password. Submit yours. You're given the option to save them, but you can opt not to. With iCloud Keychain enabled, the credentials are synced to your authorised devices and you won't have to type them. (When creating an account, 'Suggest password' appears above the keyboard.)
- Read more: iMac with Retina 5K display
Automate your passwords with iCloud Keychain
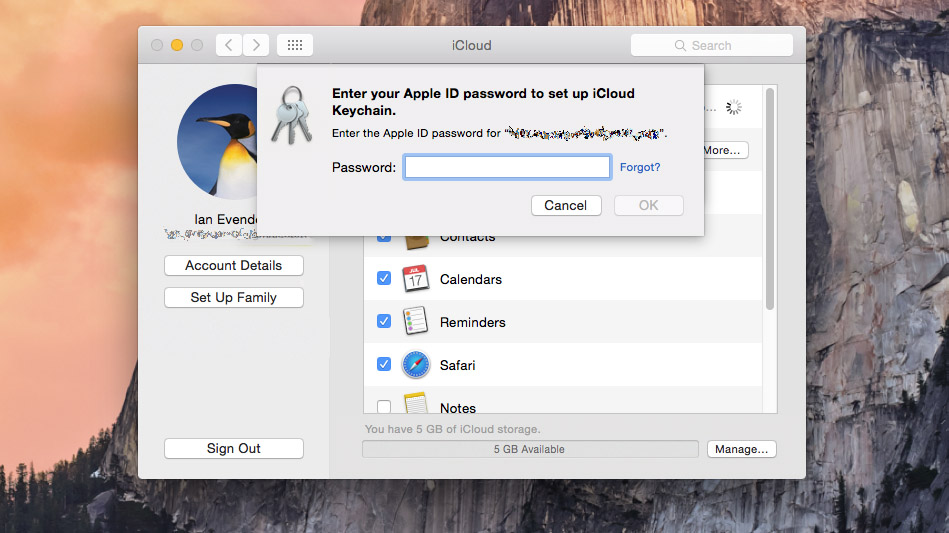
Open Apple menu > System Preferences and click the iCloud icon. We'll assume you're already signed into your account. Scroll down the list of features and turn on the Keychain option, enter the password for your Apple ID when asked for it, then click the OK button.
Enter a four-digit security code, or something stronger. If you forget it, Keychain can't be set up without resetting the online copy – an existing copy can be retained on your Mac to start over, though. Enter a code, click Next, then confirm it.
For something stronger, click Advanced to set a more complex code that can contain letters and symbols, or to have a 24-character code generated for you – you'll probably want to write that one down and keep it somewhere safe because it's hard to memorise.
Choosing to have no security code doesn't make your account less secure, but it's troublesome if you have only one device and it's lost or becomes inoperable. You won't be able to set up Keychain on a replacement device and will have to start over.
Enter a mobile number that can receive SMS messages, then click Done. Keychain is now ticked in iCloud's preferences. Messages are sent only when you try to enable Keychain on another device, where you'll be required to enter a verification code from the SMS.
In Safari's preferences, click AutoFill and tick 'User names and passwords'. When you log in to a website, Safari asks whether to save your credentials to iCloud Keychain. This isn't compulsory – you might want to exclude online banking sites, for example.
Master iCloud Drive
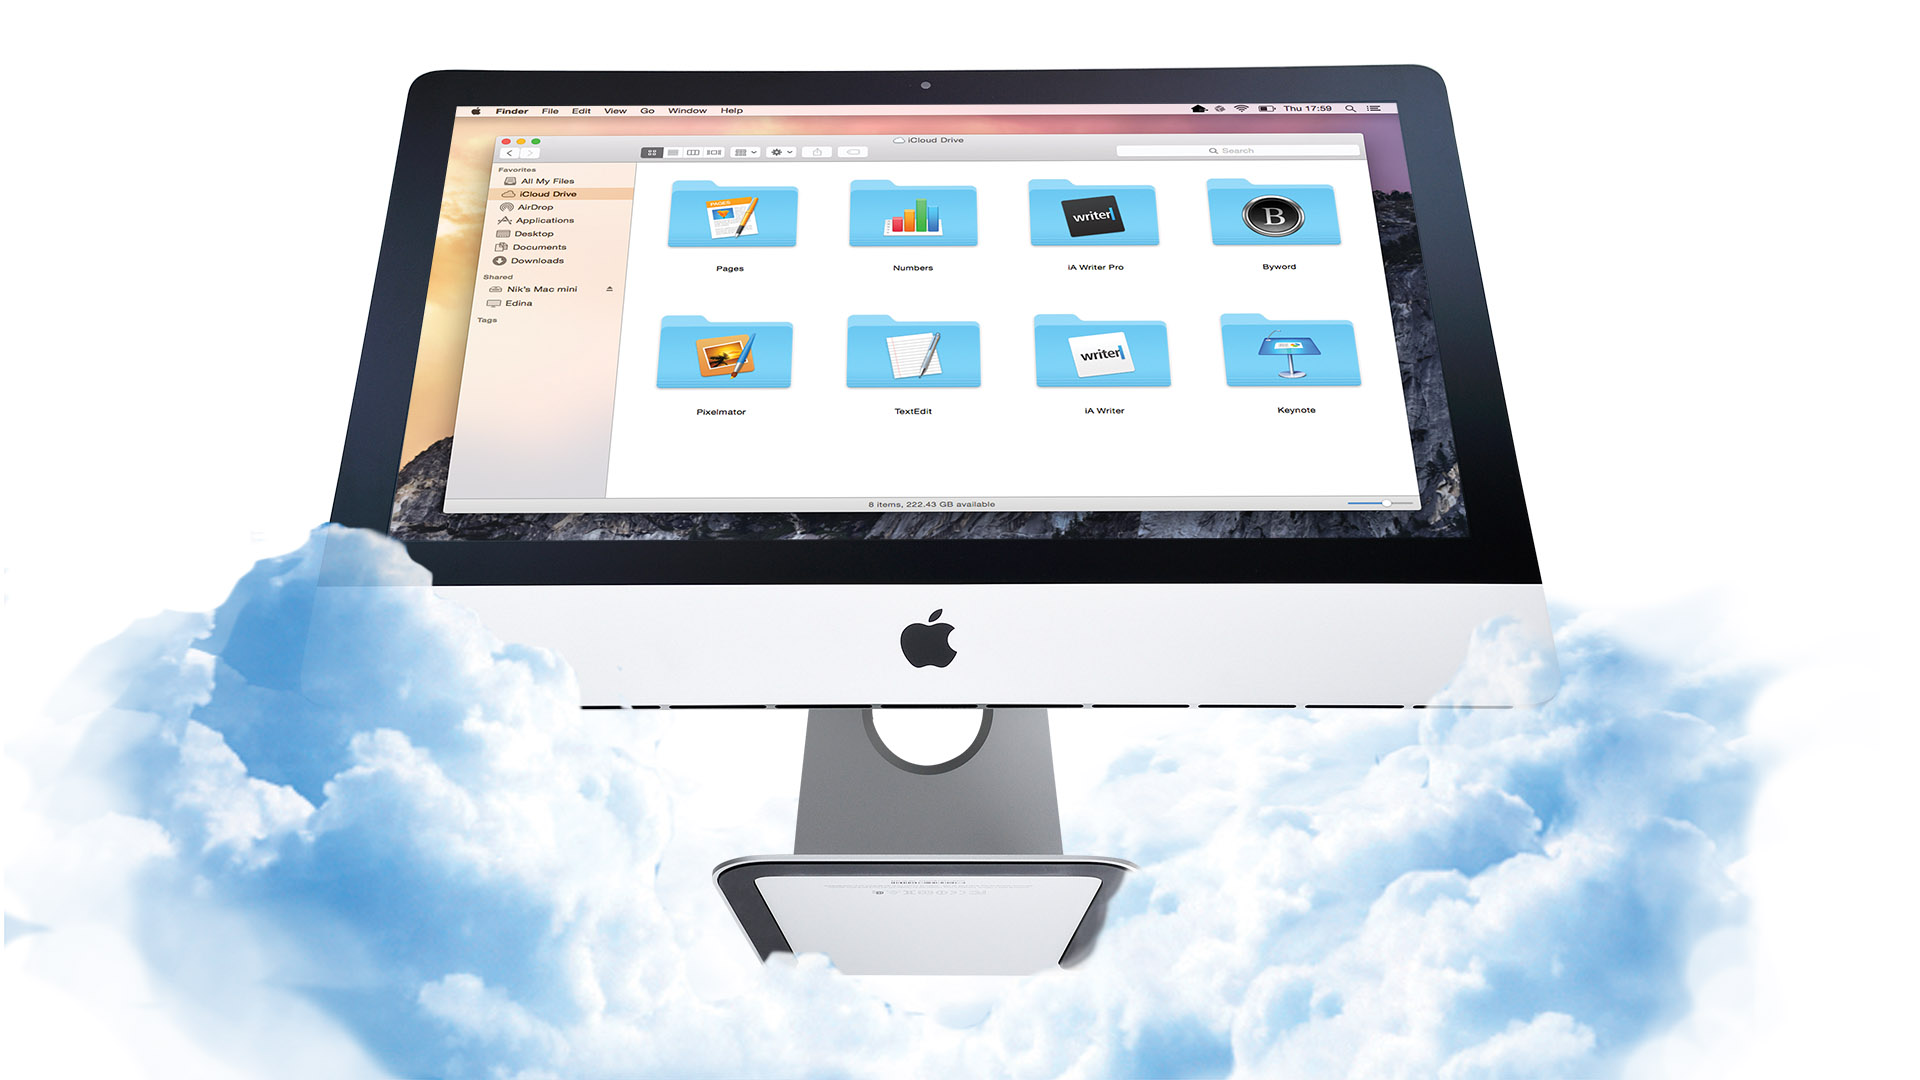
Apple's iDisk was part of MobileMe and provided 20GB of online storage, but it disappeared when the service was taken offline. It took until 2013 for a replacement to debut in the form of iCloud Drive, with its structured online storage. It's accessible from within iOS and OS X apps, and as a free-form online file repository through OS X's Finder, where you'll find iCloud Drive in the sidebar.
iCloud Drive works with iOS 8 or 9 and OS X Yosemite or later, plus Windows 7 or later. You can also access it through a browser at icloud.com/iclouddrive. Your iCloud Drive storage space is counted as part of your overall iCloud quota, so dropping large files here for the sake of backing them up will reduce the amount of space you have left for your photo library, email, iWork documents and so on.
iCloud Drive on OS X
At present, OS X is the most flexible system for working with iCloud Drive. By default, Drive is accessible from the sidebar. Click it and you can navigate the application-specific folders (App Libraries) created by some iOS and Mac apps.
Delete files by dropping them in the Trash, and upload them by dragging them onto Drive as you would with other storage. You can create new folders within Drive by pressing [Command]+n – including subfolders within an App Library, but you're not restricted to, say, saving Pages documents in its library; files from a variety of apps can be grouped however makes sense to you. Opening a file launches the relevant application on your Mac, just as it would for a document that's only stored locally.
iCloud Drive on iOS
In iOS 8, apps need to be written with iCloud Drive support in mind to be able to save to and open files from it. Depending on the app, you might only be able to see its App Library, though many recent apps provide access to a document picker that enables you to browse Drive much like you would in the Finder. iOS recognises which file types an app can open and offers a limited ability to open, say, a document from a third-party writing tool such as Byword in Pages.
iOS 9 is much more flexible when it comes to accessing Drive. Developers, who have already got their hands on pre-release versions of it, have found an option to show a dedicated iCloud Drive app on the Home screen. The app displays a similar view of iCloud Drive to the one shown in Finder on the Mac.
Free-form access to your files in this manner will make it easier to work on a single project across multiple applications. For example, you could start work in one image-editing app to gain access to its extensive editing tools, save the file to iCloud Drive, then use the iOS 9 iCloud Drive app to send it to another app that's packed with filter effects to apply a specific one before publishing the picture online.
iCloud Drive on the web
The web view of Drive is similar to that on iOS and OS X. You can create new folders and upload or download files on whatever computer you're using, and you can move items around in Drive by dragging and dropping them onto folders. To move them higher up in Drive, drag them onto a folder name in the hierarchy that's shown across the bottom of the window.
To change a file or folder name, click its icon and then the 'i' that appears at its top-right, and then type a new name. Delete things by selecting them (select several items by holding [Command], like in Finder) and clicking the trash can icon at the top of the page. You can also email files by clicking the envelope icon, but you can only send them from iCloud Mail, not a third-party service.
Pricing
You get 5GB of storage for free with an iCloud account, to share between all its services, including Mail, iCloud Drive and Photos. To upgrade this in iOS, go to Settings > iCloud > Storage, tap Buy More Storage (or Change Storage Plan if you already have). On your Mac, open System Preferences > iCloud, click 'Manage…', then Buy More Storage. Monthly prices are 79p for 20GB, £2.99 for 200GB, £6.99 for 500GB and £14.99 for 1TB.
Use Drive across OS X and iOS
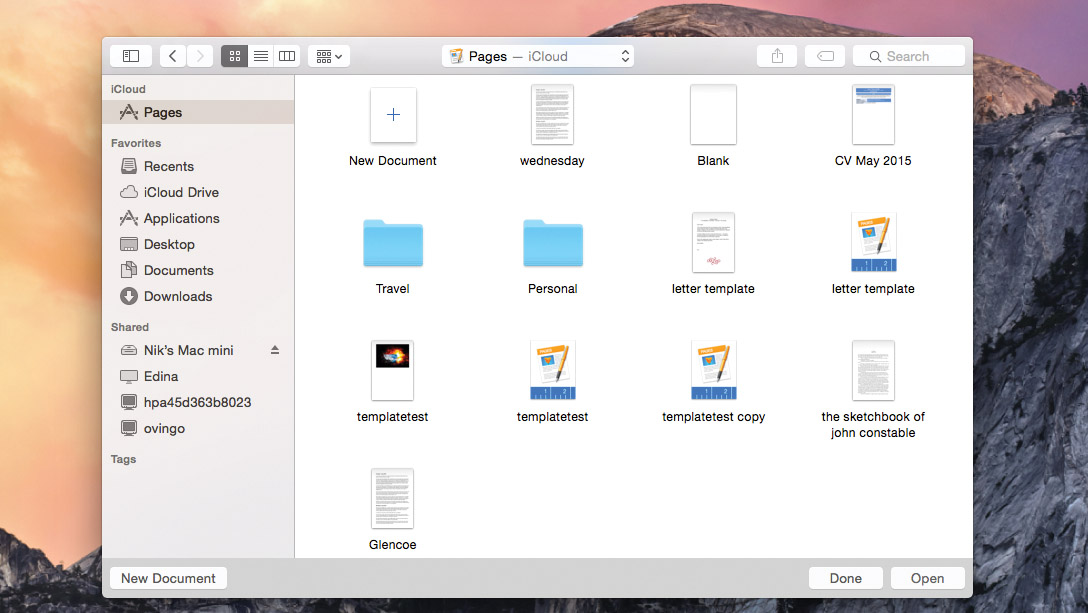
The beauty of storing your work online is that it's available on any piece of hardware through which you can access the internet – you only need to sign in to icloud.com using a compatible browser (http://apple.co/1K7jWdz) and have an app available that can open your files.
Start by making sure you've enabled iCloud Drive on all of your devices. On iOS, go to Settings > iCloud > iCloud Drive and ensure the switch is on. On a Mac, go to System Preferences > iCloud and check the box beside iCloud Drive. Click its Options… button to choose which apps can store documents and other data in Drive (you can still manually browse to and save files there).
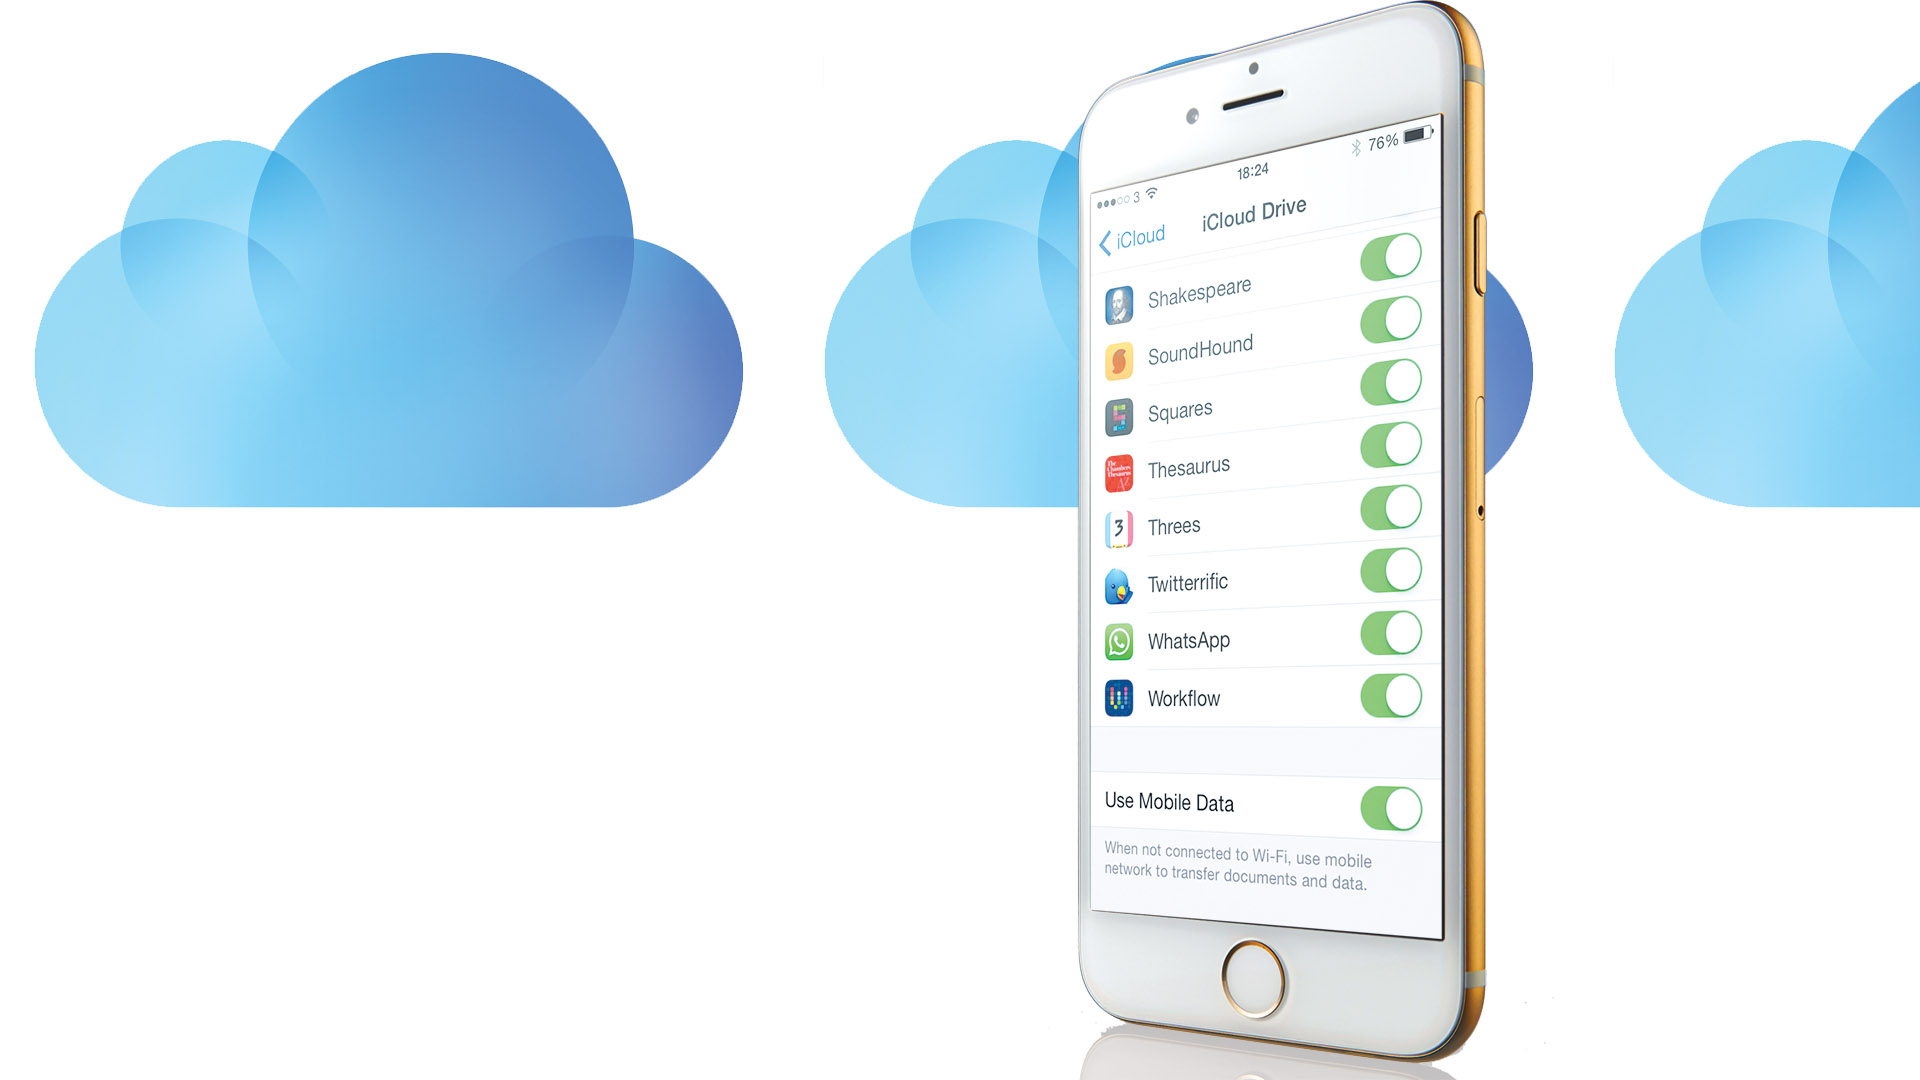
To control individual applications' access to iCloud Drive on iOS, go to Settings > iCloud > iCloud Drive and use the switch adjacent to an app's name to decide whether it saves to iCloud. If you switch it off, your work will be stored locally, and will remain inaccessible from each of your other devices. You'll have to share by email or AirDrop to edit things on a Mac or another iOS device.
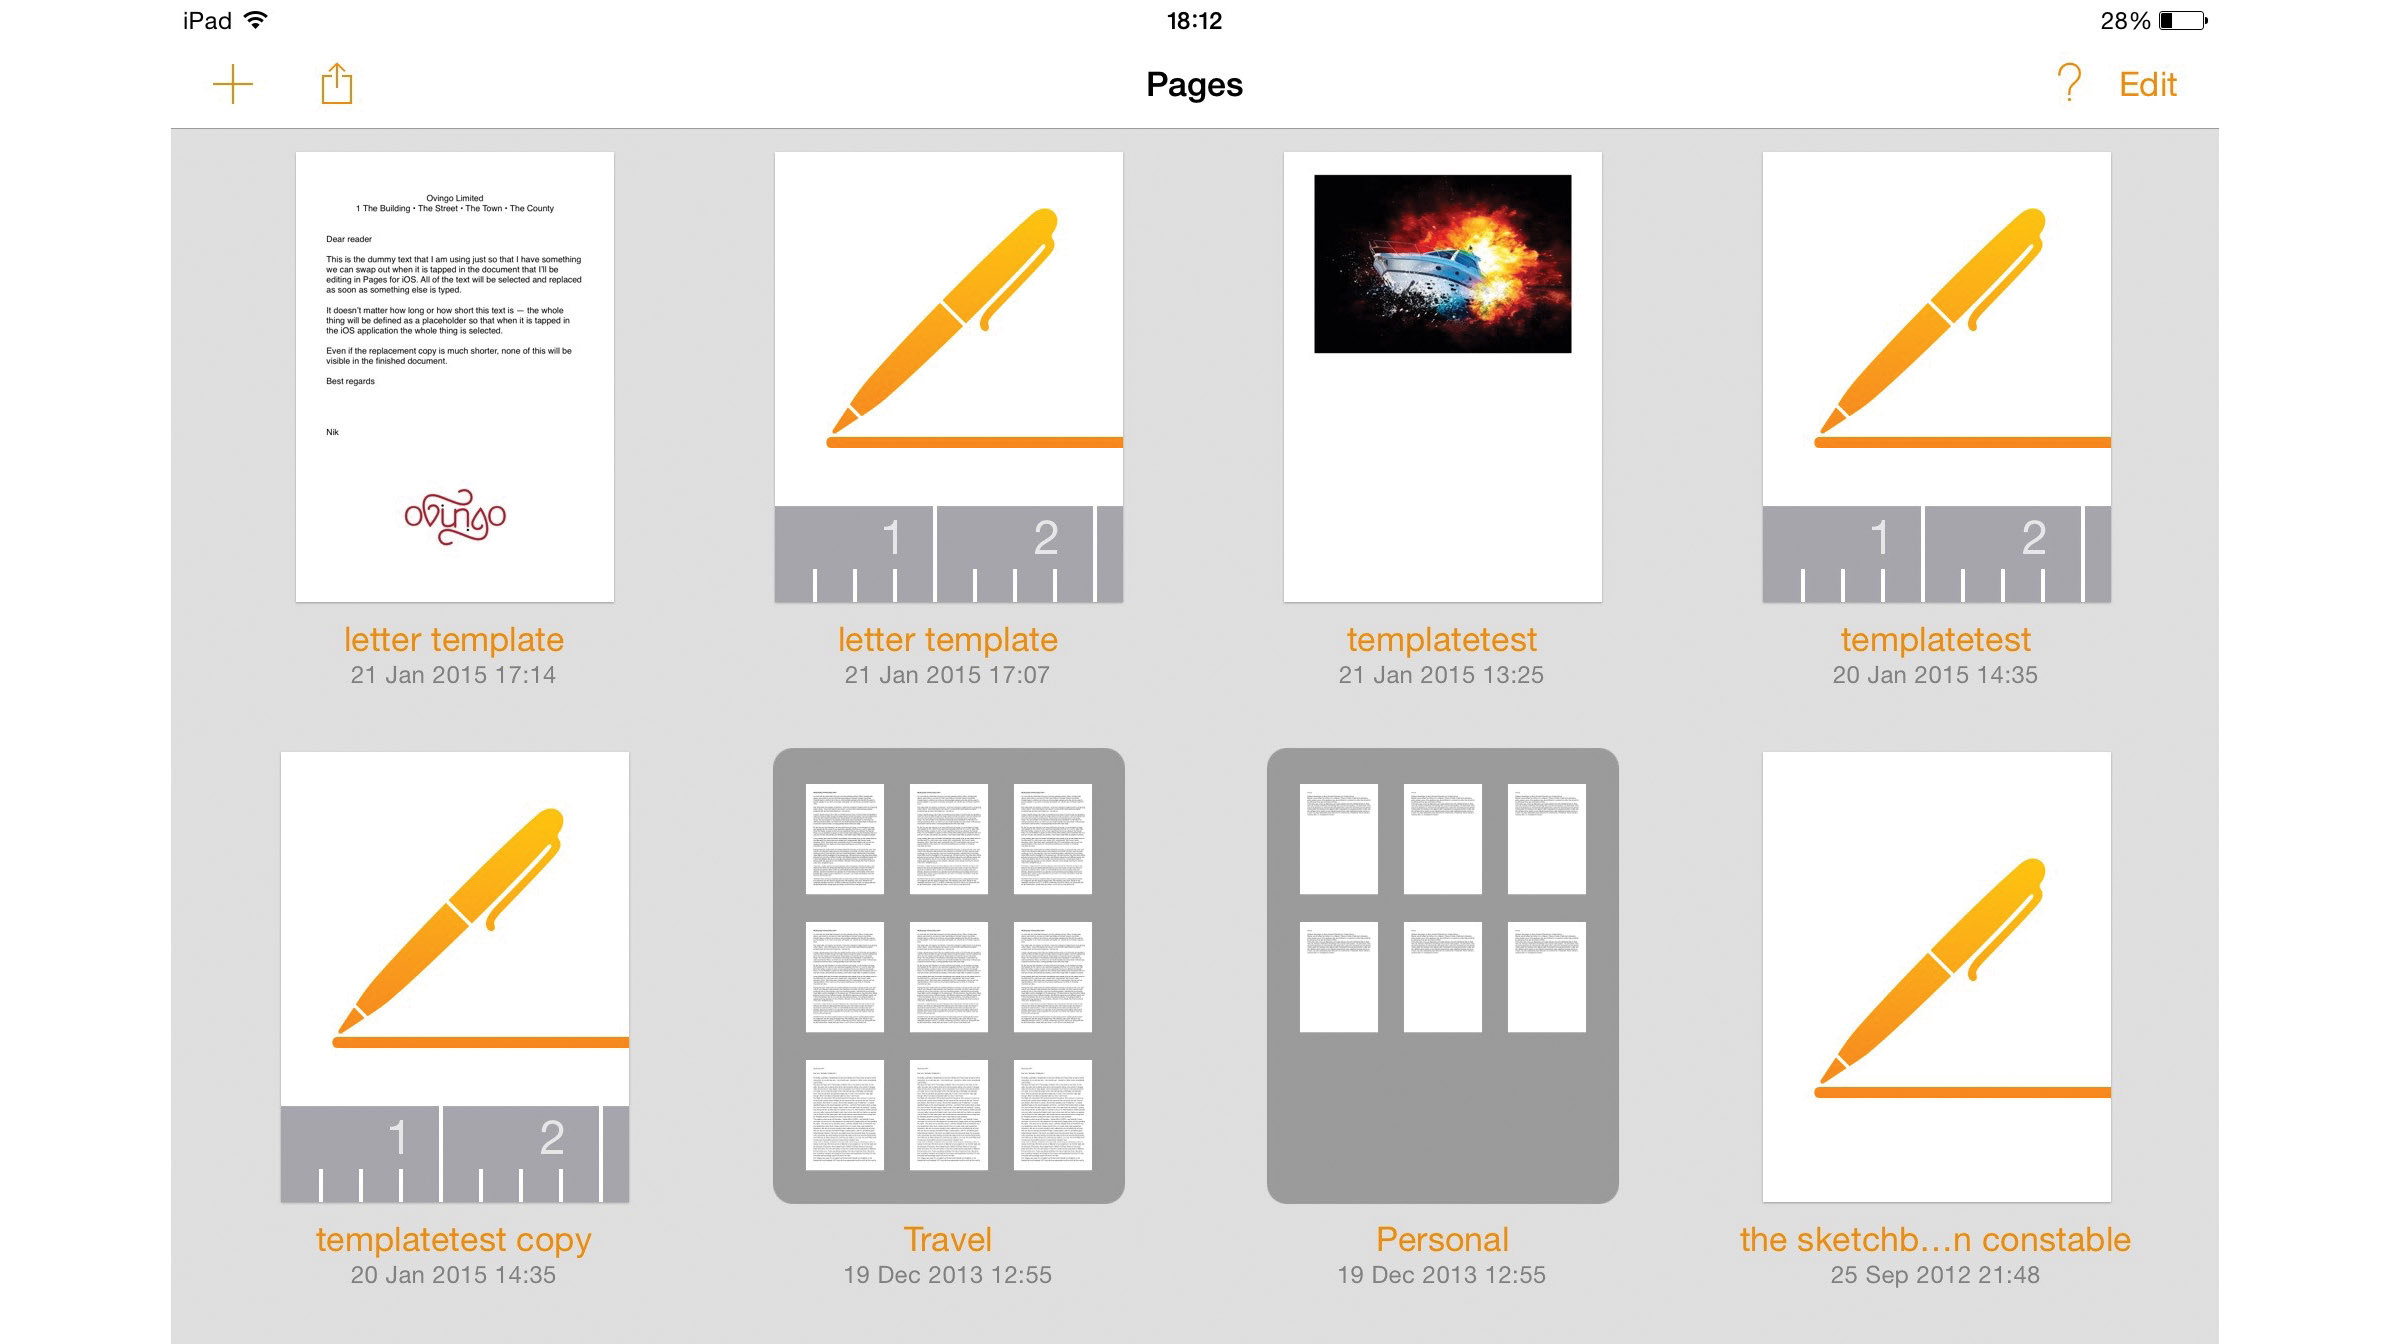
Many iOS apps default to showing the contents of their dedicated folder, or App Library, and some (yet fewer as time passes) can see no further on iCloud Drive. If you're on a Mac and want to continue working on an iPad, say, either save your file to iCloud Drive by clicking iCloud Drive in the sidebar and allowing the app to save to its own folder, or move your file from elsewhere to there.
Any iOS app that supports iCloud Drive is coded so that it knows exactly where to start looking for compatible documents. So long as it's set up to use online storage, your newly copied or saved file should immediately appear in its App Library or, if it uses iCloud Drive for synchronisation, as Ember does for screenshot libraries, update its contents to reflect changes made on your Mac.
Handoff lets you start work on one device and finish it on another. It requires certain hardware, Bluetooth to be on, and devices to be on the same Wi-Fi network. Devices must be signed into the same iCloud account. In iOS, enable it in Settings > General > Handoff & Suggested Apps. On a Mac, go to System Preferences > General and check the 'Allow Handoff…' box.
With Handoff enabled, your devices will recognise when an app that's installed on them is in use on one of your nearby devices. When using a Mac, an app's icon will appear to the left of OS X's Dock. Put the pointer over it to confirm the device and app your Mac will receive data from. Click it to open the same app on your Mac, right down to the document or place that was open on the other device.
Handoff works in both directions. Swipe up from the app icon that's shown in the bottom-left corner of the Lock screen or, if your iOS device is already unlocked, open the app switcher by double-clicking the Home button and swiping to the leftmost item. That item identifies both the device and the app from which data will be received and open on your iOS device when you tap it.
iCloud Drive tips and tricks
Access iCloud Drive from anywhere
In OS X, iCloud Drive resides within Finder's sidebar. If you don't see it, enable it in Finder's preferences in the Sidebar tab. When Finder is the active app, you can use a keyboard shortcut, [Command]+[Shift]+i, to jump straight to the top level of Drive.
OS X apps that are built to access Drive store their data in dedicated folders by default, shown at the top of the sidebar when saving a file for the first time. If you want to save in a different folder, check that any iOS app you'll use to open that file can freely browse Drive, not just its own folder.
Control the flow of data
If you're on a contract with a limited data allowance, you need to keep an eye on which of your apps use iCloud Drive. In Settings > iCloud > iCloud Drive you can stop individual apps using Drive altogether, but it's better to scroll to the bottom of the list and turn off Use Mobile Data to restrict all apps to only accessing iCloud Drive over Wi-Fi, which is usually unmetered, or at least more generously provisioned. This is particularly useful if you're roaming on a foreign network where higher data charges and lower caps will almost always apply. Remember, you can review how much mobile data apps have used by scrolling down in Settings > Mobile, and restrict them to Wi-Fi, though for all communication, not just Drive.
SOS – Save Our Space
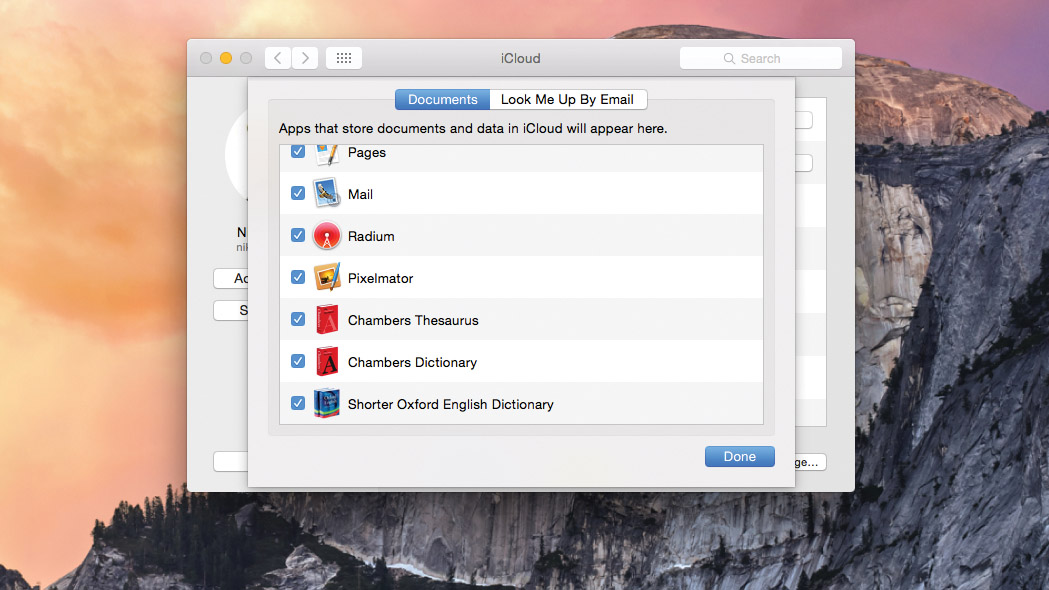
It's not only on an iOS device that you might want to restrict the range of applications that can access your iCloud Drive storage space – OS X offers the same options. You'll find them in the iCloud pane of System Preferences. Click Options beside iCloud Drive, and in the Documents tab you can uncheck apps to block their access. Note that this doesn't stop you manually browsing to and saving documents to iCloud Drive, but it stops apps saving other data to it behind the scenes.
This might seem like a strange thing to do on the Mac where you won't normally be connecting over a mobile network, but two primary considerations still apply here. First, in some rural areas the only practical option for getting online at a decent speed is satellite broadband which, as with roaming abroad, often comes with a lower data limit. Second, your iCloud Drive space is limited, so you might want to stop non-essential apps using it.
There is a third consideration, however, which is to use an iPhone as a personal hotspot. In this instance you almost certainly want to keep a handle on how much data you're using.
Move files around while they're open
Now that Apple has given us all access to the folders that make up our iCloud Drive storage – on OS X, at least – you can move work around freely in Finder. However, there's another way to do it while the file you want to move is open – perhaps because you have saved it in the wrong place. Open the File menu of an iCloud-compliant app and choose the Move to… option, then navigate to the folder where you want to store the document. (You can also do this by clicking the file's name in its title bar, where you can attach tags without going to Finder.) You can't manage files this way in iOS, but you'll often be able to send a file from the app that created it to another that can read it by tapping the Share icon and looking for 'Open in Another App'.
Use iCloud to send large files
Mail in OS X will only send attachments of less than 40MB, so if you spend a lot of time uploading large files onto sharing services like Dropbox and pasting links into your emails instead of the files themselves, then you'll want to use the Mail Drop feature (only found in Yosemite's version of Mail) to send attachments.
The first time you attach a large file to a message you'll get a warning that you've exceeded the maximum size. If the file is an image you can slim it down using the Image Size control in the composition window, but this degrades the image's quality.
So, rather than shrinking an image, ignore the warning and click Send. Mail will display options that include a Mail Drop button. Click that and so long as the attachment is 5GB or less it will be removed from the message and uploaded to iCloud – though you won't actually see it in Drive because it's not stored there and doesn't count against its storage limit. It will be available to download for 30 days. Although Mail Drop doesn't affect your storage quota, it is subject to a total 1TB limit in any 30-day period. Apple mentions some other limits here.

For 25 years T3 has been the place to go when you need a gadget. From the incredibly useful, to the flat out beautiful T3 has covered it all. We're here to make your life better by bringing you the latest news, reviewing the products you want to buy and hunting for the best deals. You can follow us on Twitter, Facebook and Instagram. We also have a monthly magazine which you can buy in newsagents or subscribe to online – print and digital versions available.
