How do I use a VPN on my phone?
We talk you through the basics of using a VPN on your smartphone, with some extra tips on vital features to look out for.

Get all the latest news, reviews, deals and buying guides on gorgeous tech, home and active products from the T3 experts
You are now subscribed
Your newsletter sign-up was successful
Having decided that you want to benefit from the protection provided by one of the best VPNs on your phone, you may be wondering exactly how you get and use such a service on your handset.
Well, wonder no longer, because in this article we’ll take you through everything you need to know about the process of grabbing a VPN app and installing it, and the basics of using the service thereafter.
- So...what is a VPN and how does it work?
- Discover what you can do with the best Android VPN
- The best out there? Read our ExpressVPN review
Choose and install your app
The first step in getting a VPN on your phone is to choose the provider you wish to go with. If you’re happy paying for a service, we recommend picking one of our highlighted best providers (where ExpressVPN leads the way) and using its mobile app. Or if you don’t want to pay for a provider, check out our best free VPN list, or source the best cheap VPN.
The reason you should stick to recommended providers with a good reputation is that certainly in the world of Android apps, there are dodgy developers out there who may be looking to make a profit off your data in some malicious way, or could even load their software up with malware (yes, the latter has been known to happen in the past).
So choose carefully, and once you’ve picked, find the relevant mobile app in the respective app store - Google Play for Android, or Apple’s App Store for the best iPhone VPN or best iPad VPN - then download and install it. This happens just the same as with any other mobile application.
The basics of using a VPN on your phone
Once the VPN app is installed, obviously you should then run it – and exactly how to proceed from here will differ depending on the software you’re using, naturally enough. But there are some common and key basic tasks that are worth knowing about with any VPN, whether it’s on Android or iOS, and the good news is that mobile apps are generally designed to be streamlined and easier to use than desktop software.
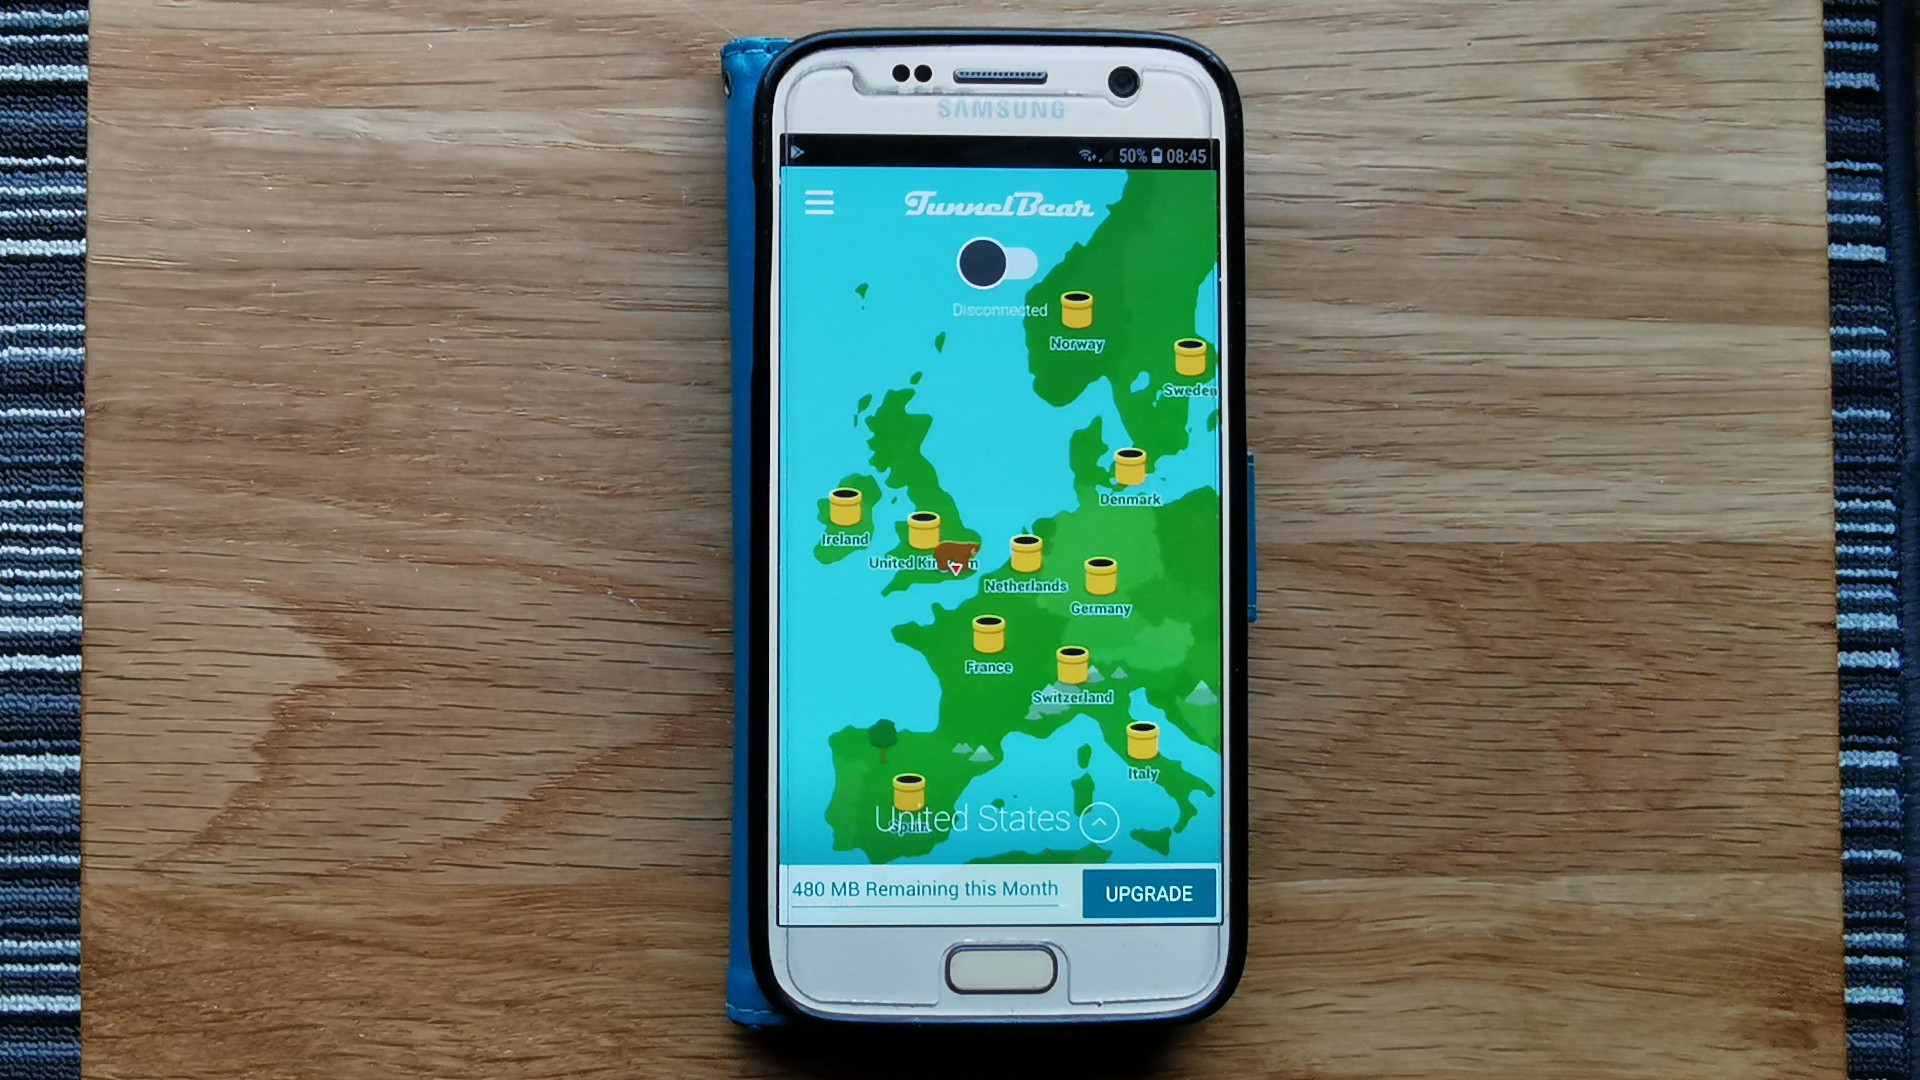
Usually, what you’ll be confronted with when you start a VPN app for the very first time will be the account creation screen – though you may have already created one on the VPN’s website, so you might just have to login. Once past that, you’ll typically see a switch to turn on the VPN, or turn it off, and some kind of server list or more usually a global map showing server locations.

These are the primary basic ways you’ll interact with most VPN apps, and obviously the most fundamental of interactions will be to turn the VPN on or off. When it’s off, you aren’t protected by the VPN, so your data won’t be encrypted, your IP won’t be hidden, and you won’t be private and anonymous online.
When the VPN is on, you’ll be protected in all these respects, being connected to your chosen VPN server, which can be anywhere across the world. The global map – or server list – is where you can choose that server.
Choosing a VPN server
So which server should you use? That depends on what you want to do. In many cases, you’ll want to connect to a server which is nearby to your geographical location, because you will get a faster and more responsive connection this way. The further away the VPN server, the more convoluted the route across the internet, meaning you’re more likely to get a sluggish connection – and if you’re connecting to servers on the other side of the world, speeds will probably drop like a stone.
Sometimes, the VPN service will provide some kind of indication of the speed or latency you can expect with its servers, presenting these servers in order of the best performance first – or perhaps simply recommending the optimal location for you.
However, even if no such guidance is provided, the general rule of thumb is the nearer the server, the better. Although it is still perfectly possible to get a fast connection from the US to, say, Europe, this will naturally depend on the provider’s network and, quite possibly, other variables.
Of course, the fastest server isn’t always the best, and in some cases you may wish to choose a server in a specific country to get around geo-blocking, for example. This is when, say, a US resident wants to stream the UK service BBC iPlayer: to do this, they must choose a server location in the UK, because this makes the content service (iPlayer) think the user is a resident of that country, and therefore they’re allowed to watch. Within those UK servers, though, if there are multiple options, you still want to choose the fastest one.
Going a little deeper
We’ve now covered the bare basics of running a VPN on your phone, but the app you’re using may offer some more advanced features. We’re not going to go into these in-depth here, but we will highlight a few elements that you should make sure are enabled. Or read more about why people use VPNs for more use cases.

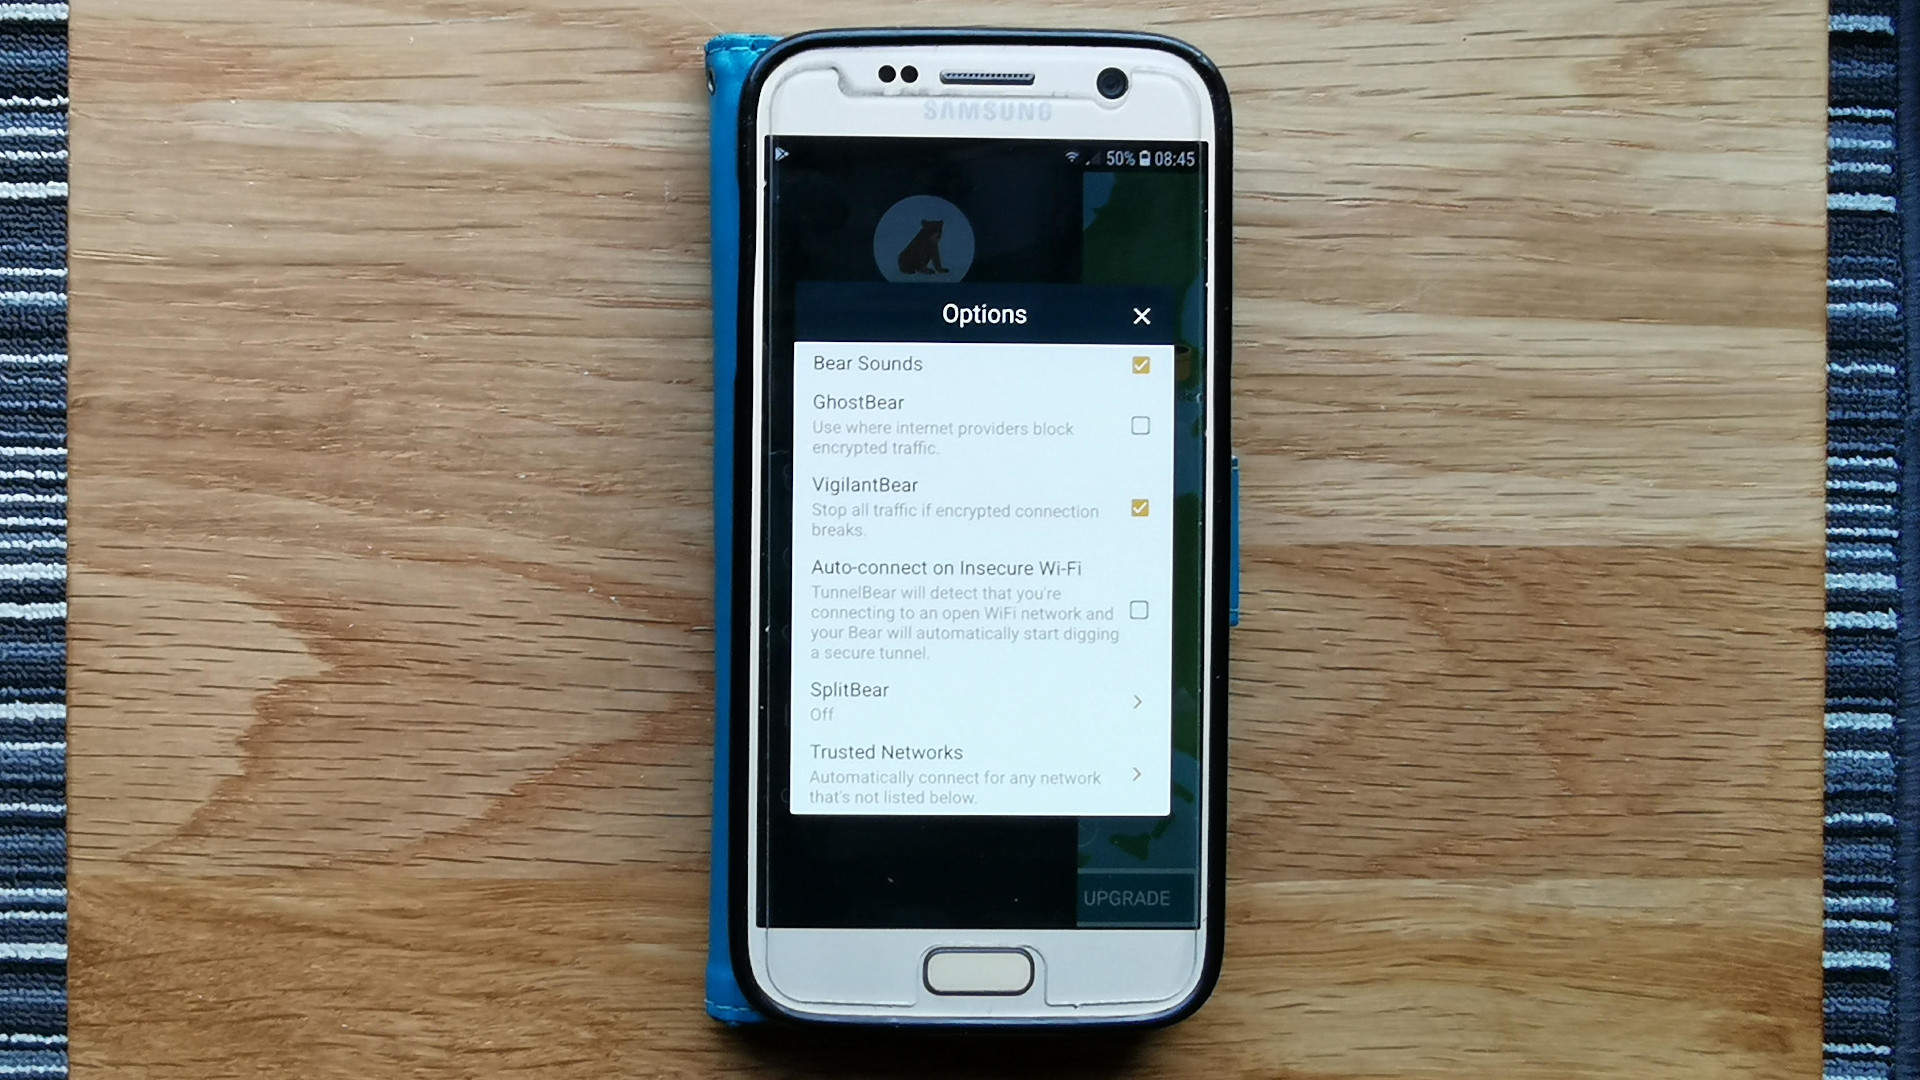
Most importantly, you should ensure that your VPN’s kill switch – if it has one (and hopefully it does for your operating system) – is turned on. Look under the app’s settings or options screen, and you should find something labeled kill switch; or at least a feature which promises to stop all your internet traffic if the VPN connection breaks somehow (TunnelBear calls its kill switch ‘VigilantBear’ for example). This is important, because it protects your real online identity should the VPN drop out like this - otherwise you may not longer be hiding your IP address.
Often a VPN will also have the option of enabling it to be automatically switched on if you connect to an unsecure Wi-Fi network, like for example the public Wi-Fi down at your local diner. It’s wise to use a VPN and its encryption to protect your data from potentially being compromised in such situations. These networks can’t be guaranteed to be safe, so make sure the VPN is set to come on automatically even if you aren’t using it (often this is labeled an ‘auto-connect’ feature or similar).
Should you leave your VPN on all the time? Well, there can be a bit of a performance overhead running a VPN, as your traffic is being routed via a VPN server and then to its destination rather than straight to the destination on the internet. So if you don’t need it, you may want it switched off.
As we’ve already mentioned, mobile apps tend to have fewer options and settings to play with under the hood compared to desktop software, but your VPN app will likely still have a small collection of advanced features to tinker with. So use the help available in the application, or the support section of the VPN provider’s website to research what they do, and perhaps get the further benefit of those capabilities.
Above all, enjoy the fact that your smartphone is getting VPN protection when you’re online, and hopefully top-notch protection at that.
- Check out all the best VPN services with T3's dedicated guide
Get all the latest news, reviews, deals and buying guides on gorgeous tech, home and active products from the T3 experts
Darren is a freelancer writing news and features for T3 across a broad range of computing topics including CPUs, GPUs, various other hardware, VPNs, antivirus and more. He has written about tech for the best part of three decades, and writes books in his spare time (his debut novel was published by Hachette UK in 2013).