How to explore the world in the new Google Earth
Sightseeing from your laptop

Google Earth has been with us for more than 15 years now - how time flies - but the virtual globe app recently got a modern refresh on the web and on Android. If you've not used the app for a while, or never had a look at what it's got to offer, we're here to show you round.
The new and updated Google Earth brings a cleaner interface, faster loading, and a wealth of guided tours with background info that enable you to really see the world without leaving home. We'll focus on the online version here, but check out the Android app too.
Google says the refreshed app is coming to iOS and browsers other than Chrome soon.
Getting started
Head to the Google Earth website in Chrome, click Launch Google Earth, and you're in. To begin with, you're just floating above the Earth, so use the icons in the lower right-hand corner, or your mouse's scroll wheel, or a double-click to zoom in.
The collapsing menu on the left is where the various bits of the Google Earth app are kept: if you open up the search box you can look for particular places in the world. Your queries can be quite vague: try searching for "the capital city of England", for example.
One of the new features Google has added to the app is an I'm Feeling Lucky option, inspired by the button that appears on its search engine. If you're stuck for inspiration about where to go, click the die icon on the left, and Google Earth transports you somewhere interesting with a nice pan-and-zoom effect.
You'll notice when you travel to a specific destination, pop-up cards appear giving you more information about it - click on any of these to reveal additional details (like opening times for museums). The small bookmark icon lets you save a place to return to later, which we'll talk about more below.
Get all the latest news, reviews, deals and buying guides on gorgeous tech, home and active products from the T3 experts
Moving around
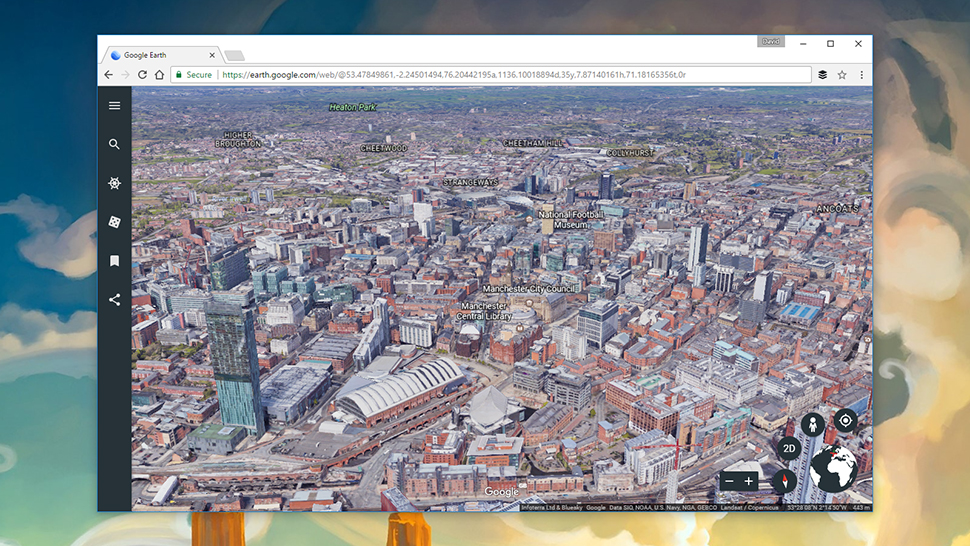
Being able to float around freely and smoothly is key to enjoying your Google Earth experience, so you'll want to master the app's controls as quickly as you can - most of it is common sense, and you'll soon pick it up yourself, but there are a few quirks and extra controls worth mentioning.
Clicking-and-dragging pans the map, while a two-finger swipe on the trackpad or a roll of the mouse scroll wheel takes care of zooming (there are also on-screen zoom controls, as we've mentioned).
Now, if you hold down the Shift key on the keyboard while you're doing your clicking-and-dragging, you can change the tilt of the landscape and bring the layout of the terrain into view; you've also got a button down in the lower right-hand corner of the display that lets you switch between 2D and 3D views.
You can still pan and zoom when the view is tilted, but it gives you a better look at some of the incredibly detailed 3D imagery Google's got its hands on. Meanwhile, hold down the Ctrl key and click-and-drag, and you can change the direction of your view.
Taking tours
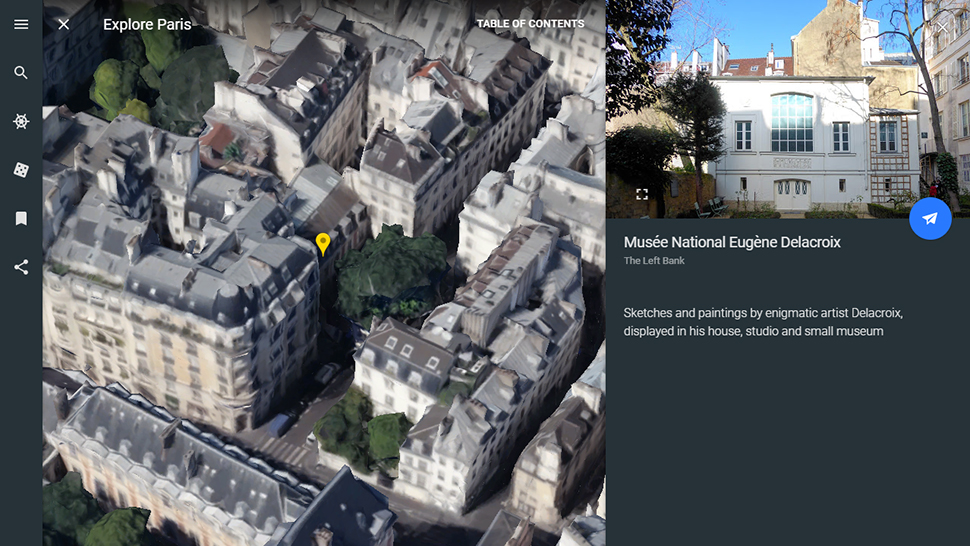
The introduction of the Voyager section is one of the biggest additions in the new Google Earth, and you can get at these curated guided tours via the ship steering wheel icon on the left. Watch the rolling slideshow for a few minutes and you'll see there are plenty of choices to help satisfy your wanderlust.
The Voyager tours are essentially linked spots on the Google Earth map that you can jump between using the on-screen controls. At each point you get a bit of background information about what you're seeing, and a photo for another perspective.
If a particular place has more than one tour, you can get back to the main menu from the Table of Contents link, but otherwise the tours are very simple to navigate around. All the usual zooming and panning controls apply while you're on your trip, just as if you were using Google Earth normally.
It's a great way to see a city or a particular area without having to manually click around the map - if you're heading somewhere on holiday, for instance, then you can get a look at the place before you get on the plane or in the car.
Saving places
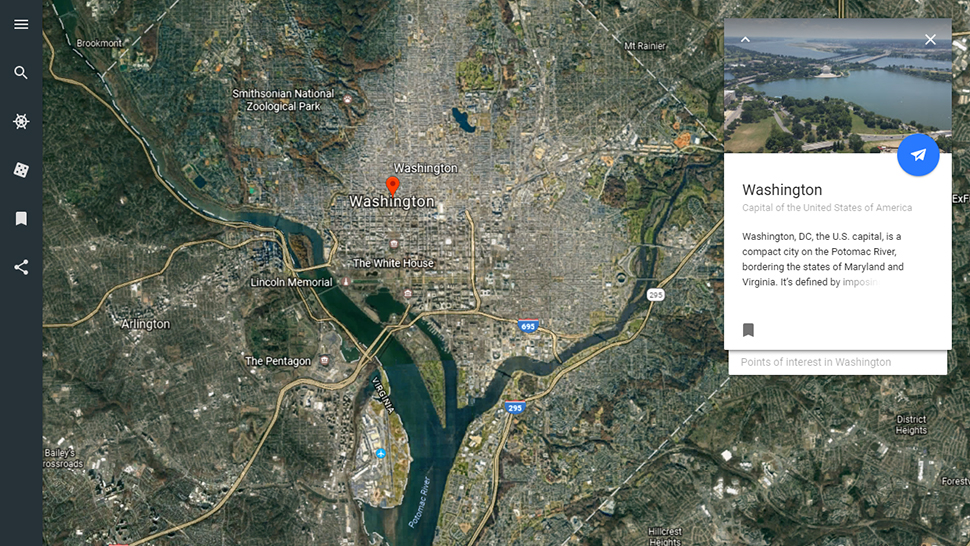
Google Earth also lets you save locations for future reference: when you've searched for or clicked on a specific place, an information card pops up, and you can click the bookmark icon to save it. In some cases you can see cards for other points of interest just underneath.
Your saved places are kept as a simple list that you can bring up by clicking the bookmark icon on the menu bar: double-click on any place you want to revisit to fly straight there. The icons to the right let you bring up the info cards and show or hide the place's marker on the map.
To change any of the entries in the list, click Edit; you can also export places as a KMZ file. At the moment the bookmarking options are rather sparse, so perhaps Google has plans to flesh out this part of the app in the future.
Finally, if you click the main menu button (top left) you can change the style of the map (basically how cluttered with labels it is) and access the Google Earth settings dialog: you'll find options for animation speed, units of measurement, zoom controls and more. Enjoy your exploring!
Dave has over 20 years' experience in the tech journalism industry, covering hardware and software across mobile, computing, smart home, home entertainment, wearables, gaming and the web – you can find his writing online, in print, and even in the occasional scientific paper, across major tech titles like T3, TechRadar, Gizmodo and Wired. Outside of work, he enjoys long walks in the countryside, skiing down mountains, watching football matches (as long as his team is winning) and keeping up with the latest movies.
