Shopping for the best laptop? Then you've come to the right place! There are lots of options to choose from and plenty of things to consider: are you best matched with Apple's macOS or Microsoft's Windows, or would a Google Chromebook better suit your needs?
Not to mention price, of course, which is why we've broken down our 10 best laptops guide to address a variety of budgets, and to meet a whole host of different needs, whether you want a MacBook, ultralight windows machine or even a gaming laptop with added grunt to play the latest games with the best graphics.
If you already know which brand you prefer, or if you have specific requirements, then you may find some of our specific guides more useful, such as our in-depth guide to the best Dell laptops, the best MacBooks, and the best Chromebooks. We also have guides to the best lightweight laptops, and best 2-in-1 laptops. But if you're after the best of each category, this is our best-in-show style lineup,
Best laptop 2024: The top 3
Why you can trust T3
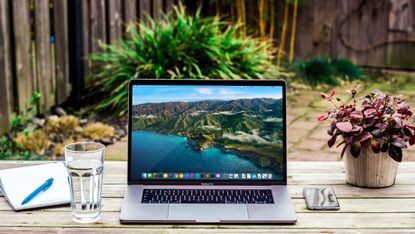
The best laptop for most people is the Apple MacBook Air (M2, 2022). Whether for work or play, Apple's M2-powered machine is a near-perfect blend of size, power and price.
The best premium laptop is the Dell XPS 13 Plus. Want a premium design and sumptuous screen? You'd be hard-pressed to better this Windows machine, which looks stunning and performs just as impressively.
The best budget laptop is the Acer Swift 3. If your budget doesn't stretch quite as far then Acer always delivers the goods when it comes to affordability, delivering reliability and longevity.


Think thin and light laptops have to lack power? Not anymore. Or that big performance equals smaller battery life? Nope. Or that getting all of these things in a single machine would be expensive? Wrong again. This is the best of all worlds.
It's all thanks to the M2 processor – the second-gen Apple-made silicon for Macs – which is effortlessly powerful. Combined with the speediest storage in the business, this laptop is fast. But it also runs cool enough that it doesn't need any fans at all, so it's silent.
As we said in our review: "It's super powerful, has excellent battery life, and aside from some heat due to no fan cooling and the inclusion of a notch on that new 13.6-inch screen, it's a laptop that's truly hard to fault." There's now also a 15.3-inch MacBook Air model, too, which might be an even better option if you're seeking a larger screen format. There is also the new MacBook Pro with the M3 Max chip, but that's really for power users only.
Sound like the go-to macOS laptop for you? Read more about why it's an ideal match for most people in our M2 2022 Apple MacBook Air review.
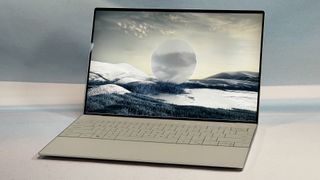

The Dell XPS 13 series has consistently wowed us here at T3, and while the '9315' version of that laptop is super, it's the newer, longer-lasting and all-around better XPS Plus that takes it opportunity to shine.
With great Intel processors and up to 32GB of RAM, this is a portable PC that's going to be able to handle everything that you throw at it. From late-night Netflix to early-morning report writing, you'll find the Dell XPS 13 Plus a highly capable laptop.
It's that 13.4-inch display with the super-thin bezels that really makes this laptop stand out though: you can go from Full HD through to 3.5K or greater-than-4K options, the choice is yours (as is the expense). Whichever you choose for your needs, though, you won't be disappointed by this stellar laptop.
Think the Dell sounds like your next laptop match? Read our full XPS 13 Plus review for all the info
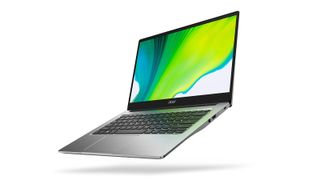

This 14-inch compact star really shines if you're looking for an affordable Windows machine that still delivers ample oomph (there are plenty of configurations available to choose from).
Its lightweight design isn't as premium as some other laptops out there, but that's the compromise for bagging a more affordable alternative.
Okay, so the battery life isn't fantastic, but it should still get you through the working day quite comfortably. And given the pedigree of previous Acer machines we've tested, we'd wager that the Swift 3 will last for years.
Read our full Acer Swift 3 review to see why it's the best of the budget laptops
Best laptops 2024: The best of the rest
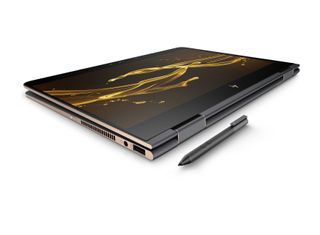

The HP Spectre x360 is a beautiful, flexible, premium 2-in-1.
The HP Spectre X360's big point of difference is the presence of its 2-in-1 style, meaning the hinge can rotate through a full circle for more versatile use-case scenarios.
In addition to that funky design, the keyboard is superb, the screen is bright and clear, and it’s a genuinely good-looking machine with great ergonomics and strong security to boot. The only real criticism we can think of is that the fans can get a bit noisy when you drive it hard.
But that noise is no surprise: although this isn’t a gaming laptop, it’s perfectly powerful for other kinds of work. All while being capable of 13 hours from a single charge. Impressive.
Want to know more? Read our full HP Spectre X360 review for the lowdown
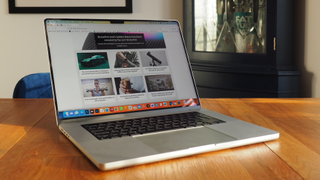

Apple updated its top-tier 14- and 16-inch MacBook Pro laptops with its M2 Pro and M2 Max processors. The result? Top-level performance yet hugely impressive battery life. If you want the very best laptop that Apple has to offer and the Air won't cut it then this is the powerhouse you want.
While this 2023 model doesn't change anything visually speaking compared to its predecessor, it's still a great laptop with superb battery life, plus small new additions such as HDMI 2.1 (for 4K/240Hz output) and Wi-Fi 6E speeds. Gone is the Touch Bar (it still lives on in the 13-inch 2022 Pro model though), and while the display still has a notch (just like the MacBook Air M2), we think it's hard not to fall in love with its bright Mini LED charms.
Oh, and that's before mentioning just how insanely capable M2 Pro or M2 Max is. The latter can feature up to 96GB unified memory, which is untouchable in this space. Perfect for content creators no doubt. It doesn't come cheap though, obviously.
Looking for super power and are on team Mac? Read our full MacBook Pro 2023 review to see why it's so spectacular
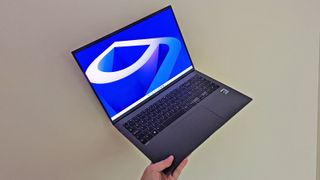

The LG Gram 16 is one of the best combinations of a large screen and a lightweight chassis – it's almost perfect if that's what you're looking for in a Windows laptop, especially if the MacBook Air M2 doesn't appeal to your operating system wants.
At close to the four-figure mark it's relatively good value for the specification on offer, too, especially with this much screen real-estate to really help sell this laptop. It's certainly going to be of interest to anyone in the market for a sleek, professional Windows 11 laptop, and it ticks a lot of boxes when it comes to performance, battery life and build quality.
Has this big-screen laptop sparked your interest? Read more about it in our full LG Gram 16 review.
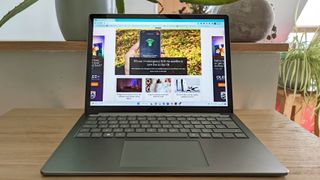

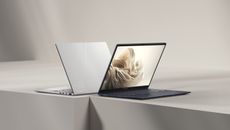
As the name suggests, the Surface Laptop 5 is the fifth incarnation of this particular laptop, so Microsoft has had plenty of opportunity to get it right – and we think it's a real success story.
From the quality of the screen to the battery life, the Surface Laptop 5 gets plenty right. It's very configurable in terms of power, too, with Intel CPUs available, together with a wide-ranging choice of RAM and storage options. That means you can bend it to fit your budget best as possible.
Perhaps above all else, though, it's the style of this laptop that really appeals. We think the finish is arguably better-looking than a MacBook Air, making this a contender for the Windows crown.
Read our full Microsoft Laptop 5 review to find out the fulls highs and lows about this Windows machine
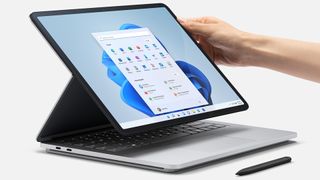

There are 2-in-1s and then there are Microsoft 2-in-1s. The long-established Surface series has evolved into the Laptop Studio, which is ideal for creators given the number of ways in which you can manipulate the screen for your advantage.
However, it's a rather pricey bit of kit, and you'll need to fork out extra in order to buy the stylus Surface Pen, too, further adding to the cost.
But we think it'll be worth every penny for creators, as this unique fold-over design is unlike anything else you'll find on the market. It's practical too.
Want to know more about the best laptop for creators? Read our full Microsoft Surface Laptop Studio review
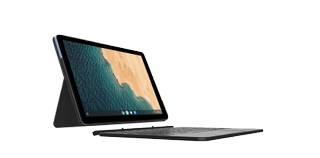

We called Lenovo's IdeaPad Duet 5 Chromebook "a vision of beauty" in our review, which is high praise indeed for a Chromebook. But this is no ordinary Chrome OS laptop, really, as its 2-in-1 construction and super OLED screen set it apart from the typically cheap and cheerful options elsewhere on the market.
Chrome OS won't suit all, though, as it's more based around Google apps and Android apps, but that's fine for lightweight working, so idea for students and those who need to go big on word processing, browsing and streaming. It'll do all this no problems and last an age whilst doing so too.
Is Chrome OS and a Chromebook the best laptop pick for you? Read our full Lenovo IdeaPad Duet 5 Chromebook review to find out more
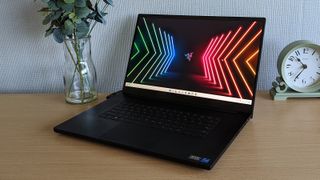

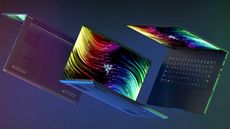
Well, well, where to begin with this beast? Because that's what Razer's 17-inch laptop is: an absolute powerhouse, with stacks of power to handle top-tier gaming and present it back to you on its massive 17.3-inch screen (resolution options range from Full HD to Ultra HD, it depends how rich you're feeling).
All that adds up to what we called "simply one of the best performing gaming laptops around" in our review. Such premium quality and scale doesn't come cheap though, so while it's very much in our top 10 best laptops, this Razer isn't going to be for the masses.
Read our full Razer Blade 17 review to see why this gaming laptop is such a superstar
How to choose the best laptop for you
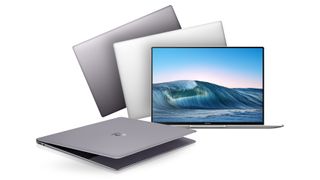
The laptop market continues to evolve, with new components and price pressure from low-end Chromebooks meaning you can now get more bang for your buck than ever before: it really is a great time to be choosing a laptop. If you're not familiar with the jargon you're coming across, we'd recommend first heading to our laptop terms and specs explainer first.
Picking the best laptop for 2024 for you is all about compromise. If you want something as powerful as possible, then it's going to be bigger and less easy to lug around on your travels. If you want something slim and ultra-light, then you simply can't pack in as many components.
Another important consideration is which operating system you're going to go with: you may already have a favourite, but Windows is best for gaming, MacOS is great for creatives, while Chrome OS is brilliant as a lightweight computing platform. Look at the strengths and weaknesses of each before committing.
Make sure you've weighed up exactly what you need to do with your laptop and the features that it needs to have before parting with any cash – otherwise you could be looking for an upgrade sooner rather than later.
Of course price is going to play a big part in your decision-making as well, and with that in mind we've included links to all the latest and greatest deals on the web for easy reference.
Types of laptops explained
General purpose laptops: These laptops come in a variety of types, from the best cheap laptops to serious, silicon-stuffed systems that deliver massive power and performance. These sorts of systems work well if you're just looking for a solid all-round system that is geared mostly toward work and productivity.
Gaming laptops: The best gaming laptops are ideal for serious gamers, as they come with dedicated graphics cards. These dedicated GPUs mean that you can play video games at higher resolutions and higher framerates, as well as enjoy advanced graphical effects like real time ray tracing. They tend have a higher entry price than general purpose laptops.
Ultraportable laptops: Ultrabooks and the best lightweight laptops are specialists at portability, and often come with thinner and lighter designs that general purpose or gaming laptops. These systems are a good choice for working professionals who need to carry their laptop around with them and travel frequently. Specs vary, but due to the lithe designs these laptops tend to retail for more than general purpose laptops.
Hybrid laptops: The best 2-in-1 laptops on the market offer two-fold functionality, capable of being used both as a laptop and a tablet. This obviously makes them very versatile and can also be a great way to save money, as you can buy one product instead of two. Some 2-in-1 laptops have fixed screens that can be rotated all the way round on 360-degree hinges, while others have screens that actually detach from their keyboard base.
Chromebooks: If you find yourself shopping on a budget for a new system then scoping out the best Chromebooks is a smart call. That's because these systems are cheap to buy and typically highly portable. Where they differ to other laptops is that they run Google's Chrome OS, which is designed primarily for use while connected to the internet. Chrome OS isn't as feature-packed as Windows or macOS, but it is streamlines and offers excellent access to all of Google's G-Suite apps such as Gmail, Gdocs and Google Calendar.
Student laptops: As you would expect, the best student laptops tend to ring in cheaper than other specialist laptops, and there is often crossover to Chromebooks due to this. Student laptops tend to offer small to medium-sized laptop screens and mid-tier specifications, although more premium recommendations can stretch into Apple MacBook Air territory. These laptops aren't the most powerful on the market, but they're designed to do the basics well and not cost too much, while also remaining portable.
