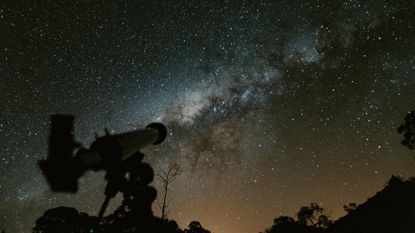
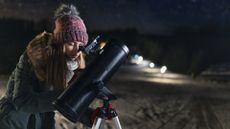
Figuring out how to set up a telescope is your first step to exploring the heavens and observing the night sky. The most common types of telescope for your average hobbyist are reflector, refractor and catadioptric telescopes (a combination of the two). If you’re yet to make a purchase head to our roundup of the best telescopes (or for complete newbies, the best telescope for beginners, alongside our advice on how to choose your first telescope), but for the purposes of this how-to guide, we'll assume you have a common computerised ‘go-to’ telescope.
Typically in the box you’ll get a telescope tube, a tripod, a couple of eyepieces, a tray for storing those eyepieces that attaches to the tripod, a finderscope/red-dot finder and a hand-controller. Opening that box or dusting off a telescope is the first step, but what comes next? Here’s how to set up a telescope and get it ready for some observing.
- Binoculars vs telescope: Which is better for stargazing?
- ... want the latter? Here are the best binoculars right now
How to assemble your telescope
First, find the manual or download it from the manufacturer’s website and give it a good read. Now take everything outside during daylight into a place where you can maximise your view of the night sky. Follow the instructions to build your telescope, making sure you tighten the screws on the tripod legs and around the telescope tube, and that you use the built-in spirit level to make sure the tripod is completely flat. You’ll probably have two eyepieces included with the telescope: a low-power eyepiece with a long focal length (25mm) and high-power eyepiece (8mm). Put the low-power eyepiece into the telescope’s focal plane.
Now attach the finderscope/red-dot finder on the side of your telescope, making sure they’re aligned. You can check this by pointing the finderscope/red-dot finder at a streetlight or other object and checking that you see the same thing through the telescope’s eyepiece.
As soon as it gets dark you can switch-on the hand-controller (which will need batteries) and – if requested – you should enter the date, time and your location. Some telescopes now have built-in GPS.
How to align a telescope
A ‘go-to’ telescope needs to know exactly where it is for its software to know what to point at. Most ‘go-to’ telescopes have a simple alt-azimuth (two-axis) mount whose software requires you to manually point it at two bright stars. The computer then does the rest.
This is where a lot of people get frustrated because they don’t know anything about the night sky. It’s an obvious clue that you’re not ready for a telescope yet and need to do some basic stargazing, but that doesn’t mean you have to quit. The software will usually give you a choice of stars to align to – typically Vega, Arcturus and Sirus – which should be relatively easy to find if you use a planetarium app on your phone like Stellarium Mobile, SkyView, or Night Sky. Get them in the crosshairs of your finderscope/red-dot finder, check they’re centred in the eyepiece, and confirm on the handset.
Some computerized telescopes now use software that means you don’t need to know anything about the night sky, but some knowledge makes it much easier. If your telescope has a high-end equatorial mount then you’ll have to align it to Polaris, the North Star.
Now you need to make sure you don’t kick or move your telescope, which will miss-align it instantly.
How to aim a telescope
If you have a ‘go-to’ telescope you can use the hand controller to select an object for it to point at. It will then ‘slew’ to it automatically. Use the focusing knob to get the object looking as clear as possible. If nothing appears in your eyepiece you need to align your telescope again. Another option is to use the left/right buttons on the hand-controller to manually point your telescope at an object. Point the finderscope/red dot finder at an object and get it in its crosshairs. Now look through the eyepiece and you should see that object. Now use the focusing knob.
What eyepiece to use and how to observe
Low-power eyepieces are for finding objects and high-power eyepieces are for taking a closer look. However, it’s how much light your telescope lets in that’s the most important factor in you seeing a clear image. For example, get the Orion Nebula (also called M42 and just below Orion’s Belt) in the crosshairs of your finderscope/red dot finder and look at it through the 25mm eyepiece. Now swap to 8mm. It may look dimmer and blurrier. This is often the trade-off with magnification. However, you can use the ‘averted vision’ technique to see more; look slightly to the side of the object and it will seem brighter. That’s because your peripheral vision is more sensitive to brightness.
Above all, be patient. The night sky is immense and hugely varied and you’ll need to pick-up lots of skills and, above all, be patient.
